Prawns with coconut milk and spices (Prawn Malai Curry)

October 2003

A close friend ‘D’ had a sudden craving for Prawns. Not just any prawns. It had to be Prawn Malai Curry. I didn’t really know how to make it. But the sheer opportunity of making something new excited me. I was more than happy to cook, if only I knew how.

In less than 24 hours (from what I recall), I got the recipe from his mother straight into my inbox. This is D’s grand mother’s recipe. This is an authentic Bengali recipe and one that I have made many times now! Thank you aunty!

The part I enjoy most is the involvement & enthusiasm everyone has in making this curry. Talk about team effort! Over the years, this has become a ritual and I look forward to it..:)

D get’s the prawns. The biggest and freshest available (though to this day my husband ‘R’ argues that the prawns he gets sometimes are the same size..:P) D and R don’t sleep the night before. They drive down to a particular seafood wholesale market at 3am where one can find the freshest catch of the day. It is a wholesale market where the fresh catch comes in before it is sent to other shops / restaurants in the city. Some of the biggest King prawns I have ever seen! One needs to buy in wholesale.. So, most of the time this dish is cooked – it is a BIG feast ! The only exception to this festivity is when it’s a last minute plan or a feast is somehow not possible (a rare possibility!)

Step 2 is the cleaning up.. And that is R’s forte. After the prawns come home, R spends a good amount of time cleaning it up thoroughly! You do realize that when I wake up… lazy… all of this has already happened ! D & R really go all the way to make it happen. I see the fresh and clean prawns… waiting so eagerly to be soaked in the most amazing coconut cream curry ever!

This is one of my most treasured recipes simply because it is one recipe that has no age or spice boundaries… It has been loved by my 2-year old son as much as it has been appreciated by Indians and by non-Indian friends alike.

To print this recipe, click here.

Ingredients:

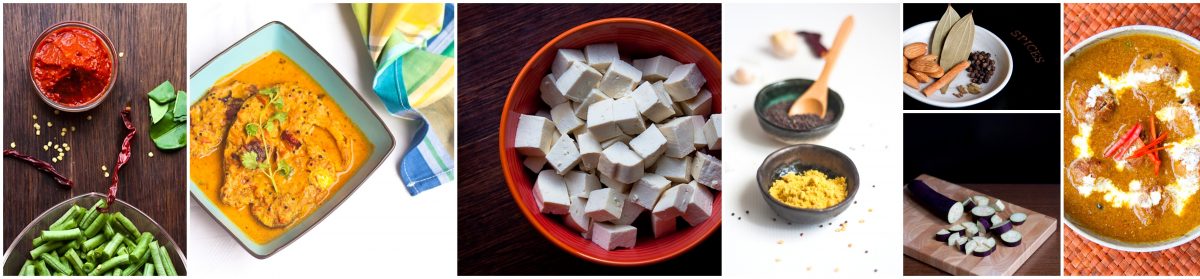
King Prawns: 500 gms – the bigger the better! (smaller prawns are also fine) – The prawns in this picture are from the local grocer.. which reminds me haven’t had a feast in a while!
Onion paste: 1 medium sized onion ground to a fine paste
Ginger paste: 1 tbsp
Garlic paste: 1/2 tsp (this is my personal preference and not part of the original recipe. you can ignore it if you like)
Coconut milk: 1/2 cup. I vary this depending on my guests’ spice tolerance level. If I want a more authentic and spicy taste, I stick to 1/2 cup. However, sometimes I add more coconut milk when I need to tone down the spice.
Turmeric Powder: 1/2 tsp
Chilli Powder: 1/4 tsp or more depending on your spice tolerance level
Cumin seeds: 1/2 tsp
Garam Masala Powder: 1/4 tsp
Cinamon stick: 1/2 inch
Dried Bay leaf: 2
Sugar: 1/4 tsp
Oil: Use a neutral oil (I use a blend of Canola and Sunflower oil)

How I did it:

  • Wash, de-vein, clean prawns. I like to remove the head and the vein but leave the tail behind. Put 1/4 tsp of turmeric powder and sprinkle a little bit of salt on the prawns. Mix this gently and keep it in the refrigerator until the Masala is ready.

  • Use a heavy bottomed pan to cook this curry. Add oil. Once hot, add the bay leaf, cinnamon stick, sugar and cumin seeds. Let the cumin seeds crackle for about 10-20 seconds. Add the onion paste. Fry this until it turns brownish and sticks together as lumps. Do this on low heat to avoid burning. This may take 10 to 15 mins.

  • To this fried onion paste, add the ginger paste, garlic paste, turmeric, chilli powder and salt. Fry this for 1-2 minutes until it is cooked and blends in with the masala.
  • Take out the pre-marinated Prawns and add it to the masala now. Stir this to ensure that the prawns are coated well with the spices and the prawns turn a nice pink/brownish color. (2 to 3 mins).

  • When the prawns turn pinkish, add the coconut milk. If you are using thick coconut milk like I did, you should add 1 cup of warm water along after adding the coconut milk. This curry is about your preference of coconut and spices. Remember that we have added sugar earlier, prawns are naturally sweet and coconut milk is also sweet. I strongly suggest you go slow on the coconut milk and taste it before adding more coconut milk. If the gravy is thick, add hot water into this to bring it to the right consistency. I alter the quantity of coconut milk and water to suit the palate of my guest.

  • Add some garam masala powder (a spice mix readily available in an indian grocery store) to this curry now. Let it cook on medium heat for another 7-8 mins until the coconut milk is cooked and comes together with the curry. Prawns cook really fast, so make sure you don’t overcook them.

Goes best with steamed white rice πŸ™‚

Advertisement

Walnut Brownies… and a new beginning.

As a child, I have been absolutely averse to anything sweet in my food. Yes, absolutely anything sweet with the only exception of sugar in my tea. People often wondered how I never craved for chocolate and I often wondered what was there to like it in the first place? My mom used to make Indian desserts which everyone in the family relished. I never understood how and why.

One day, magic happened πŸ™‚

During my pregnancy about 3 years ago, something changed. It changed my life forever – in a good way. I experienced a new taste, a new flavour so divine. Something, I had never experienced before. It was the same sweet flavours that I detested earlier. And here I was … loving it. Relishing every bite… with a mmmmmmm….. an out of the world experience! I finally discovered my sweet tooth. It was strange… a whole new experience awaited me. It was like discovering a part of me which I had written off long ago. Almost every lunch during those nine months, finished with a brownie and a smile like never before..:)

So, here is my favourite dessert of all – walnut brownies.

This is Nigella Lawson’s Walnut Brownie recipe from her book “The Domestic Goddess”.

I made half the size and therefore halved the ingredients and used a smaller baking dish.

For a printer-friendly recipe, click here.

Ingredients:

1 2/3 cups of soft unsalted butter
13 ounces bittersweet chocolate
6 large eggs
1 tbsp vanilla extract
1 2/3 cups sugar
1 1/2 cups all purpose flour
1 tsp salt
1 1/3 cups chopped walnuts ( I added a little more because I love walnuts!)
Original baking dish size recommended: pan measuring 13x9x2.5 inches. As I made 1/2 the size, I used a smaller baking dish.

How I did it:

  1. Preheat oven to 190Β°C. Line the sides and the base of the baking pan (preferably square) with aluminum foil.
  2. Melt butter + chocolate together. Use a heavy bottomed pan and extremely low heat to melt this mixture. I used a plate with the above mixture and let the steam melt this mix. Let it cool down slightly before you mix it.
  3. Measure flour into a separate bowl and add the salt in it. Keep aside.
  4. Beat eggs, vanilla and sugar together. Whether you are using an electric mixer or doing it by hand, remember to beat it in one direction only. If you are doing this by hand, it will take about 15 mins to get the right consistency. Do not over beat until the mixture becomes fluffy. The idea is to beat everything well and combine it together. After beating it well, you will notice that the color of the mixture will change.
  5. Once you are satisfied that the above mixture is well beaten, add the slightly cooled chocolate & butter mixture into the mixing bowl where you’ve already beaten the egg, vanilla and sugar. Combine it together.
  6. After mixing the above, add the walnut and the flour. Add the flour slowly bit by bit, mixing it together. It helps to use a sieve for this purpose as it controls the amount of flour going in and gives you enough time to combine the ingredients together and avoid forming any lumps.Β  The purpose is to bind it together into a smooth mixture – not over-beat it.
  7. Transfer the above mixture into the baking dish prepared.
  8. Bake for 25 mins. When it’s ready, the top should be dry and the inside dense & gooey.
  9. Once done, remove from the oven immediately; let it cool naturally. Don’t leave it inside the oven once it is done. I have done that once and my brownies were a little dry from inside… Remember it cooks even during the cooling process.
  10. Enjoy! πŸ™‚

Basil Chicken Spaghetti

Hello World!

I have always wanted to enter the world of blogging ever since I knew about it! I have made several attempts in the past… but, unsuccessful. This time, I am determined to start this whole new journey…

Here’s to a new beginning!

Although I was born in India and went to school there, I have had the fantastic opportunity to spend 5 years in Bangkok and live life as a local there. I believe there is no better way to know a place than to be and to do as the locals do. I spent some of the best years of my life there. When I arrived in Bangkok from Delhi, I was only 17. Bangkok was so different. I had a major culture shock. I had left all my friends back in India to start a new life. The first 6 months were depressing. I remember complaining to my friends about how much I hated the place and wanted to take the first flight back, if only it was possible!

There were many hurdles, language being the biggest. I had to learn how to order my food, how to give directions, how to take a bus to college and back, and a lot more. The smell of street food would drive me mad! I remember a particular street food vendor near our house selling deep fried chicken feet!! You read it right! Deep Fried Chicken Feet! It was the worst smell I could have ever imagined! There were many such street food vendors and I remember squeezing my nose past those stalls & running away as quickly as possible – or better still – take a Motorbike taxi home for 5 Baht from the Main Road to the house πŸ™‚

It took a couple of months for me and I don’t exactly remember how or when… my love affair with Thai Food started. The same smells made me hungry! If you have been to Thailand, you would know that fish sauce with chopped chillies is a common sight. It is usually kept on the table just like salt and pepper. That fish sauce with chopped chillies just makes me drool now!

Therefore, it is no surprise that Thai Cuisine holds a special place in my heart. I love the spice and the herbs which combine together to get those unique flavors. I love cooking Thai food just as much as I love eating it! No, wait! I love eating it more than I love cooking it! errr… No! That’s not correct. Bottom line: I simply love Thai Food. So, my first post is dedicated to the cuisine that will always remain my first love.

Click here for a printer-friendly version of this recipe.

Ingredients:

Spaghetti – 150 gms (enough for 3 people).
Minced Chicken: 100 gms
Button Mushrooms sliced – 1/2 cup
1/2 Capsicum – cut into long pieces
4 Long beans cut into small pcs (about an inch long)
Basil leaves – a generous bunch!
Garlic: 1-2 tbsp pounded (If you can get hold of Thai garlic, use that. Thai garlic is smaller and has very thin skin. The smell is absolutely out of this world and it adds that authentic flavor to the dish!)
Chopped fresh red and green chillies – 1 tbsp (I love my food spicy… so if you don’t like it spicy, reduce the number of chillies)
Cooking oil: 1 -2 tbsp
Fish sauce
Oyster sauce
A wok

Thai garlic

How I did it:

  • Boil Spaghetti al dente as per instructions on the pack.
  • Cool down under running cold water to stop the cooking process. Add a little oil to the spaghetti and keep aside.
  • Take a small pan and cook the mushrooms with salt. This may take a few minutes. Keep aside.

  • Add 1 tbsp of fish sauce to the minced chicken.
  • Add oil to the wok. Turn up the heat. Wait for the oil to get a little smoky.
  • Once it gets smoky, add garlic. Continue to stir or the garlic will burn. If it is too hot, reduce the heat.
  • Add the minced chicken seasoned with the fish sauce to the wok now. The heat should be high/medium at all times unless you feel that the food is burning. You will need to continue to stir the chicken very frequently to ensure it is cooked but not burnt.

  • Add the chopped chillies and keep stirring. With the back of the ladle, mash the chillies to make the spice go all the way into the chicken – if you like it really spicy! πŸ™‚
  • This next step is optional. If you can get your hands on a packet of “mama” noodles (the Thai Tom Yum flavor noodles absolutely to die for!), this recipe can be spiked up by using the spice powder (masala) from the “Mama” noodles packet.
  • Now add the long beans. Stir fry for 2 mins on high heat.
  • Next add the capsicum. Remember to keep the heat on high once the vegetables are added to ensure they are stir fried and crunchy!

  • Add the spaghetti. Next add 2 to 3 tbsp oyster sauce. Stir continuously. Check for salt and spice and adjust accordingly. The balance (oyster sauce and fish sauce) is important and the amount will vary depending on your preference. Oyster sauce adds to the color of the dish and fish sauce adds that pungent & salty taste which I absolutely love!

  • Now add a generous bunch of fresh basil leaves. Stir well and serve immediately. Remember, this should be eaten absolutely hot ! Nothing like a glass of chilled beer with spicy basil chicken spaghetti πŸ˜‰

Cheers! Enjoy;)

P.S: After my first few months in Bangkok, and when I could not resist the smell of that deep fried chicken feet any longer, I just had to try it! The result: a little disappointment, it wasn’t for me πŸ˜‰