I wasn’t really in the mood to cook anything elaborate today .. well that’s me many days! I used to beat myself over it in the past. But over the years, I’ve come to realize that it can be a blessing in disguise. It makes me more efficient and creative in the process.
I checked my fridge and these beets were lying neglected in a corner. They demanded my attention and I was happy to give it to them, but … umm.. just not indulge them too much 😉
So that’s the birth story of this marvelous recipe 😉
Inspired by the Carrot Koshimbir, I learnt a couple of years ago from @indianfoodrocks, here’s what I did. Now this probably isn’t authentic and it wasn’t my attempt to make one either. But this is what I made and this is exactly what I’d like to share with you. I hope you enjoy it as much as my family and I did.
Serves 3-4 (as a side)
Ingredients:
Beetroot : 2, large. Washed, Peeled and grated using the big holes of your box grater. Lime: juice of 1 (adjust according to taste) Salt: to taste Ground black pepper: a pinch or two
For the tempering:
Coconut oil: 1 tbsp (you can replace it with any neutral oil if you like) Mustard seeds: 1 tsp Split,Skinless urad dal: 1 tbsp Green chillies: 2 (My kids were eating it, so i kept the green chillies whole. You can chop it up if you like it spicy) Dry red chillies: 2, torn in half Curry leaves: 10 White sesame seeds: 1 tbsp Sliced almonds: 2 tbsp (can be replaced with peanuts) Salt (a pinch)
Method:
In a microwaveable bowl/plate, add the grated beetroot and 3 tbsp of water. Cover it with a microwavable lid, leaving a little space for the steam to escape. Microwave for 2 mins. Stir. Then additional 1 min. I want them very slightly cooked, while still retaining their crunch.
Remove from the microwave and squeeze the juice of 1 lime. Add some salt to taste and ground black pepper. Mix well. And let it sit for 20 mins. Transfer it to the serving plate.
Make sure you have all the ingredients next to you before you start the tadka process. You’ll have to work very quickly now.
After 20 mins, heat coconut oil in a tadka pan. You’ll have to work very quickly now as these ingredients burn fast. Add the mustard seeds. Once it starts to splutter, reduce heat and add the cumin seeds, urad dal, sliced almonds and dry red chillies.
Stir for a couple of seconds and add the green chillies, curry leaves and the sesame seeds. Keep stirring. A few seconds more and you’ll notice the almonds start to get darker in color. Turn off the gas at this stage. Sprinkle a pinch of salt in the tadka now, mix everything and add it over the grated and microwaved beetroot. That’s all it takes and you have an amazing Beetroot Koshimbir / salad / side ready in no time!
I was super excited to try Sona NYC ever since Priyanka Chopra made the announcement a couple of weeks ago! To know that Chef Harish Nayak would be running it, was an added bonus! I remember reading one of his books many years ago.
We got a reservation for 5:15PM on a Friday evening. It was a chilly evening, so outdoor dining wasn’t an option. They did seem to have some tables outdoors though. We reached about 15 mins late (Thanks to the Holland Tunnel traffic!). Temperatures were taken and we were reminded that the tables are reserved for 1.5 hours. We were greeted by our server who was a pleasant gentleman with a cheerful disposition!
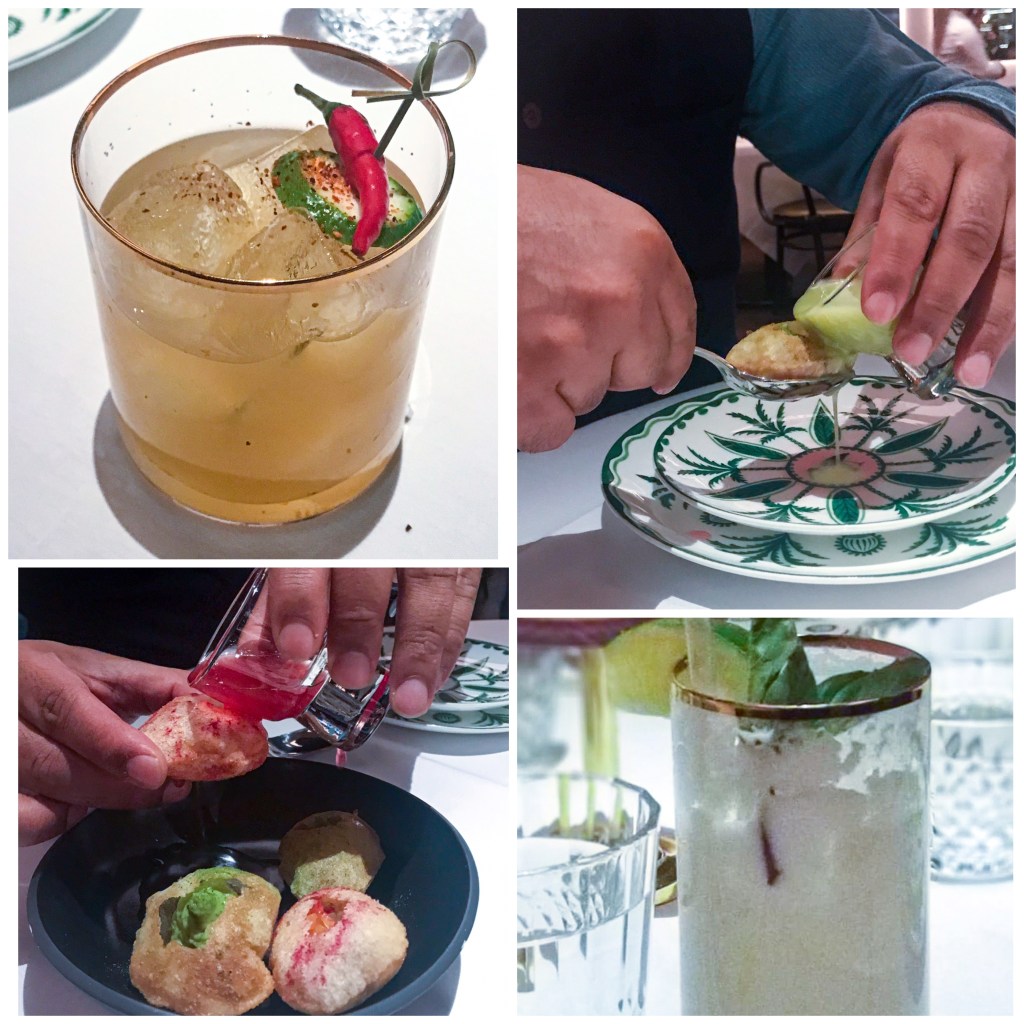
Knowing we had lost 15 mins already, we got straight to business 😉 We got started on a Spicy Chilli Margarita for me and a West Bengal Buck for him. The Spicy Chilli Margarita was exactly what it was supposed to be – it looked and tasted amazing! The West Bengal Buck though was a delightful surprise! I absolutely loved it. The hint of coconut & basil was so well balanced and quite refreshing!
We started off with the Golgappa shots – the tequila and the vodka, both. I loved the attention to detail – that sprinkle of colour coding to identify the tequila avocado from the vodka beets was quite impressive. The two had very distinct flavor profiles but if I had to pick favorites, and purely based on creativity and flavor, I’d pick the tequila avocado! The only suggestion I have is to add one more golgappa for the amount of the liquid in the shot glass. Essentially, it would have been nice to serve 2 golgappas with that 1 shot.
For apps, we got:
ROCK SHRIMP KOLIWADA Popcorn Style Fritters, Mango Pickle Aioli
The boys ate the Tangra Stuffed Chicken wings and they loved the stuffing, esp. the pairing with the Meyor Lemon dip. This one gets a 5/5!
IMO the star dish was the Calcutta Mutton Cutlet! I have stopped eating meat but the Mutton cutlet was presented so beautifully with that thin crisped sliced onion on top that I couldn’t resist a taste. If you’ve ever had a good galwati kebab, you know what to expect. This dish was pure perfection – melt in your mouth with just the right amount of spices and the black pepper jam with the cutlet made the dish truly phenomenal!
The Rock Shrimp Koliwada was deep fried to a crispy perfection! It paired so well with our drinks. I liked that it was a sizable portion, so one could literally snack on them like popcorns! It lives up to it’s description.
The Pink Snapper Ceviche was a 100% on flavor. This dish makes you nostalgic and every bite is like a vacation in itself. It’s like the Modern Indian -a world explorer grounded in her roots. My only pet peeve was the texture of the fish – it could have been more melt in the mouth. I’d still recommend it for its flavors!
So far so good. The apps were not heavy – a sign of great cooking techniques and quality ingredients! We were ready for more!
Our mains were:
FLOYD’S GOAN FISH CURRY Coconut Clam Broth, Kokum, Red Rice
BLACK PEPPER SHORT RIB Bone Marrow Korma, Hen of the Woods Chili Fry, Appam
CRISPY GARLIC CRAB RICE Masala Rice, Jumbo Lump Crab
I was in a fix – to order the Banana leaf wrapped green pepper grilled halibut or the Goan Fish Curry. I went for Chef Floyd’s Goan Fish curry. I was so happy to see that they served it with traditional Kerala Matta rice. I love creativity with traditional elements to it. I wanted to love this dish but, it didn’t entirely live up to my expectations. The fish was more firm than I would have liked it to be and the curry itself had some of the rawness from the spices. I could have done with a little bit more curry than what was served.
My 11 year old had the Black Pepper short rib korma and he enjoyed it very much with one appam. I didn’t taste it but he was very happy with his choice and finished his plate clean.
The crispy garlic crab rice was another star dish! The flavor and texture of the rice reminded me of a good Lucknowi biryani which is usually very unassuming and simple but so full of flavor. The crispy garlic bites made it even more enjoyable for a garlic lover like me.
I regret not having clicked a photo of this delectable dessert.
We were conscious of having overshot our time there (though they were polite enough to not remind us at all), so we rushed through the dessert. And I am so happy we tried it! It was delightful!
It was like an invitation to the rest of the world to come have a taste of the rich Indian desserts and break stereotypes of them being overly sugar laden. Luring them with the familiar (the carrot cake) and taking them through the rich flavors of the carrot halwa while delicately balancing it with the frozen yogurt.
Overall, SONA was a delicious experience. I’d rate it a 4/5. I take off the point because I think they have every making of a 5/5 experience, but it’s not there yet. I wish them all the best and would love for them to thrive!
We are definitely going back again (on another special occasion) to try out some of the other dishes on the menu including the Green pepper, banana leaf grilled halibut and the grilled octopus. have a feeling that the biryanis are going to be amazing too! 🙂
My recommendations:
Tequila avocado & Beet vodka golgappa shots
West Bengal Buck & Spicy Chilli Margarita (For drinks)
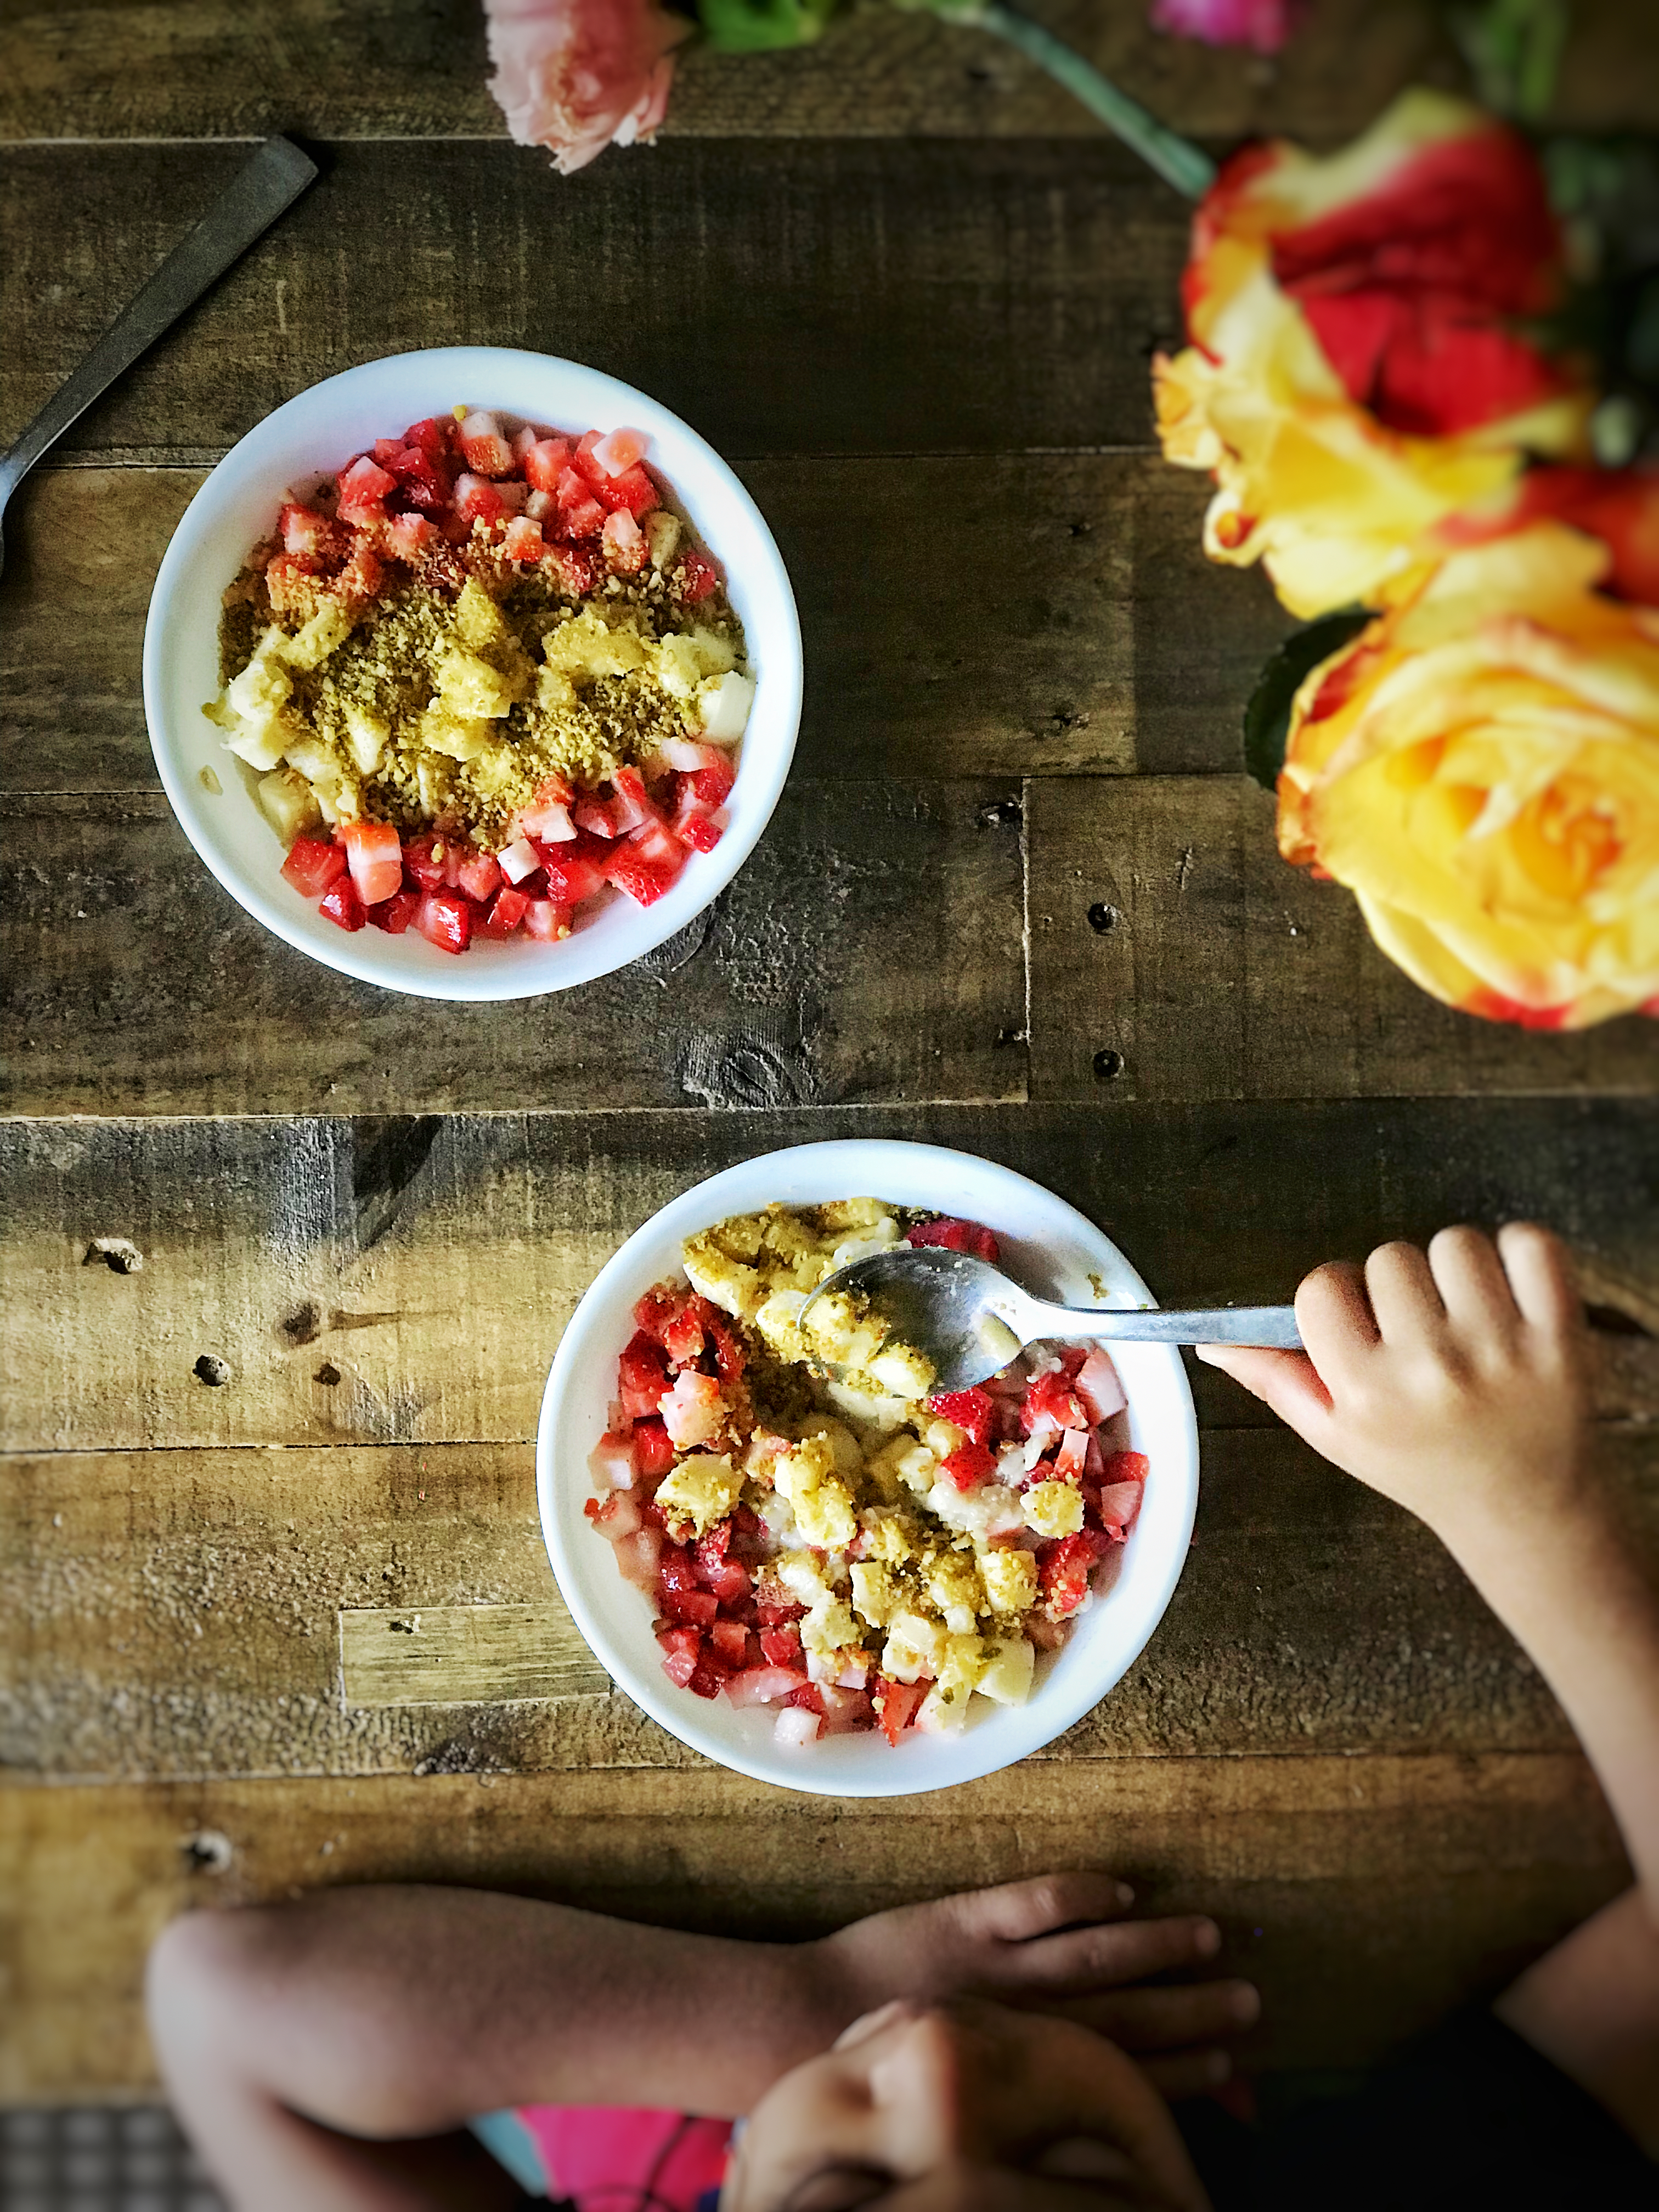
I love eating a variety of foods in my meals. And more than that, I like to feed my children a variety of foods too. So, even though I make oats twice a week, I try to make variations of it.
With the standardized tests going on last week, I was pleasantly surprised to know that the schools educated kids about the importance of eating healthy and hearty breakfasts. It reinforced the value of eating well because this is something I always talk about at home with my kids. When this information comes from the teachers as well, it just works much better!
Let’s get to the recipe, if I should even call it that. It’s super easy and takes about 10 mins to put together.
Serves: 2
Preparation time: 5 mins
Cook time: 5-7 mins
Ingredients: Old fashioned Oats (or Rolled Oats): 1 cup (If using quick oats, the cooking time will be shorter. Water: 2 cups (or more, as desired) Ground cinnamon: 1/8 tsp a pinch of salt Chia seeds: 2 tsp (optional) Maple Syrup (Gur or Jaggery or Honey as sweetener: 1 tbsp or more as per taste Strawberries: 6-7, small diced Bananas:1 or 1 1/2, small diced Walnuts + Pistachios (or any other nuts of your choice): roughly chopped in a chopper, 2 tbsp per bowl – I usually make a small batch of it which I use for a week or two.
Method: 1. Add the oats, water, chia seeds, cinnamon and salt in a heavy bottom stainless steel pot. mix well and turn on the heat. To save time, you can let the oats soak in water for 10 mins to an hour or two, and then add the remaining ingredients and start cooking. If you are soaking the oats, you may need to add extra water. 2. With the heat on medium, let the oats come to a boil. Keep a close eye as they burn or stick to the bottom very quickly if not given proper care! 3. Now, lower the flame and stir often not letting the oats stick at the bottom. Cook to the consistency you like and feel free to adjust the water accordingly. When it’s almost done, add the maple syrup. I try not to add too much sweetener but let the fruit add it’s natural sweetness. So, if this is not sweet enough for you, you could add more maple syrup/honey OR, more bananas! 4. Take two serving bowls. Top them with the finely diced strawberries and bananas and the nuts mixture above.
Notes: 1. The nuts can be added whole. I coarsely grind it because my little one doesn’t like it otherwise. 2. If you have babies or toddlers eating, you can dry roast the oats for a couple of mins. Let it cool and then coarsely grind it and store in a bottle. Makes the cooking even more quicker. 3. For babies under 1, skip the honey. Consult your doctor before giving any food to babies/toddlers. I am not a doctor by any means, so please consult your doctor before feeding introducing new food to your babies. 4. This is what works for my children. And if it works for you, i’ll be happy to help!
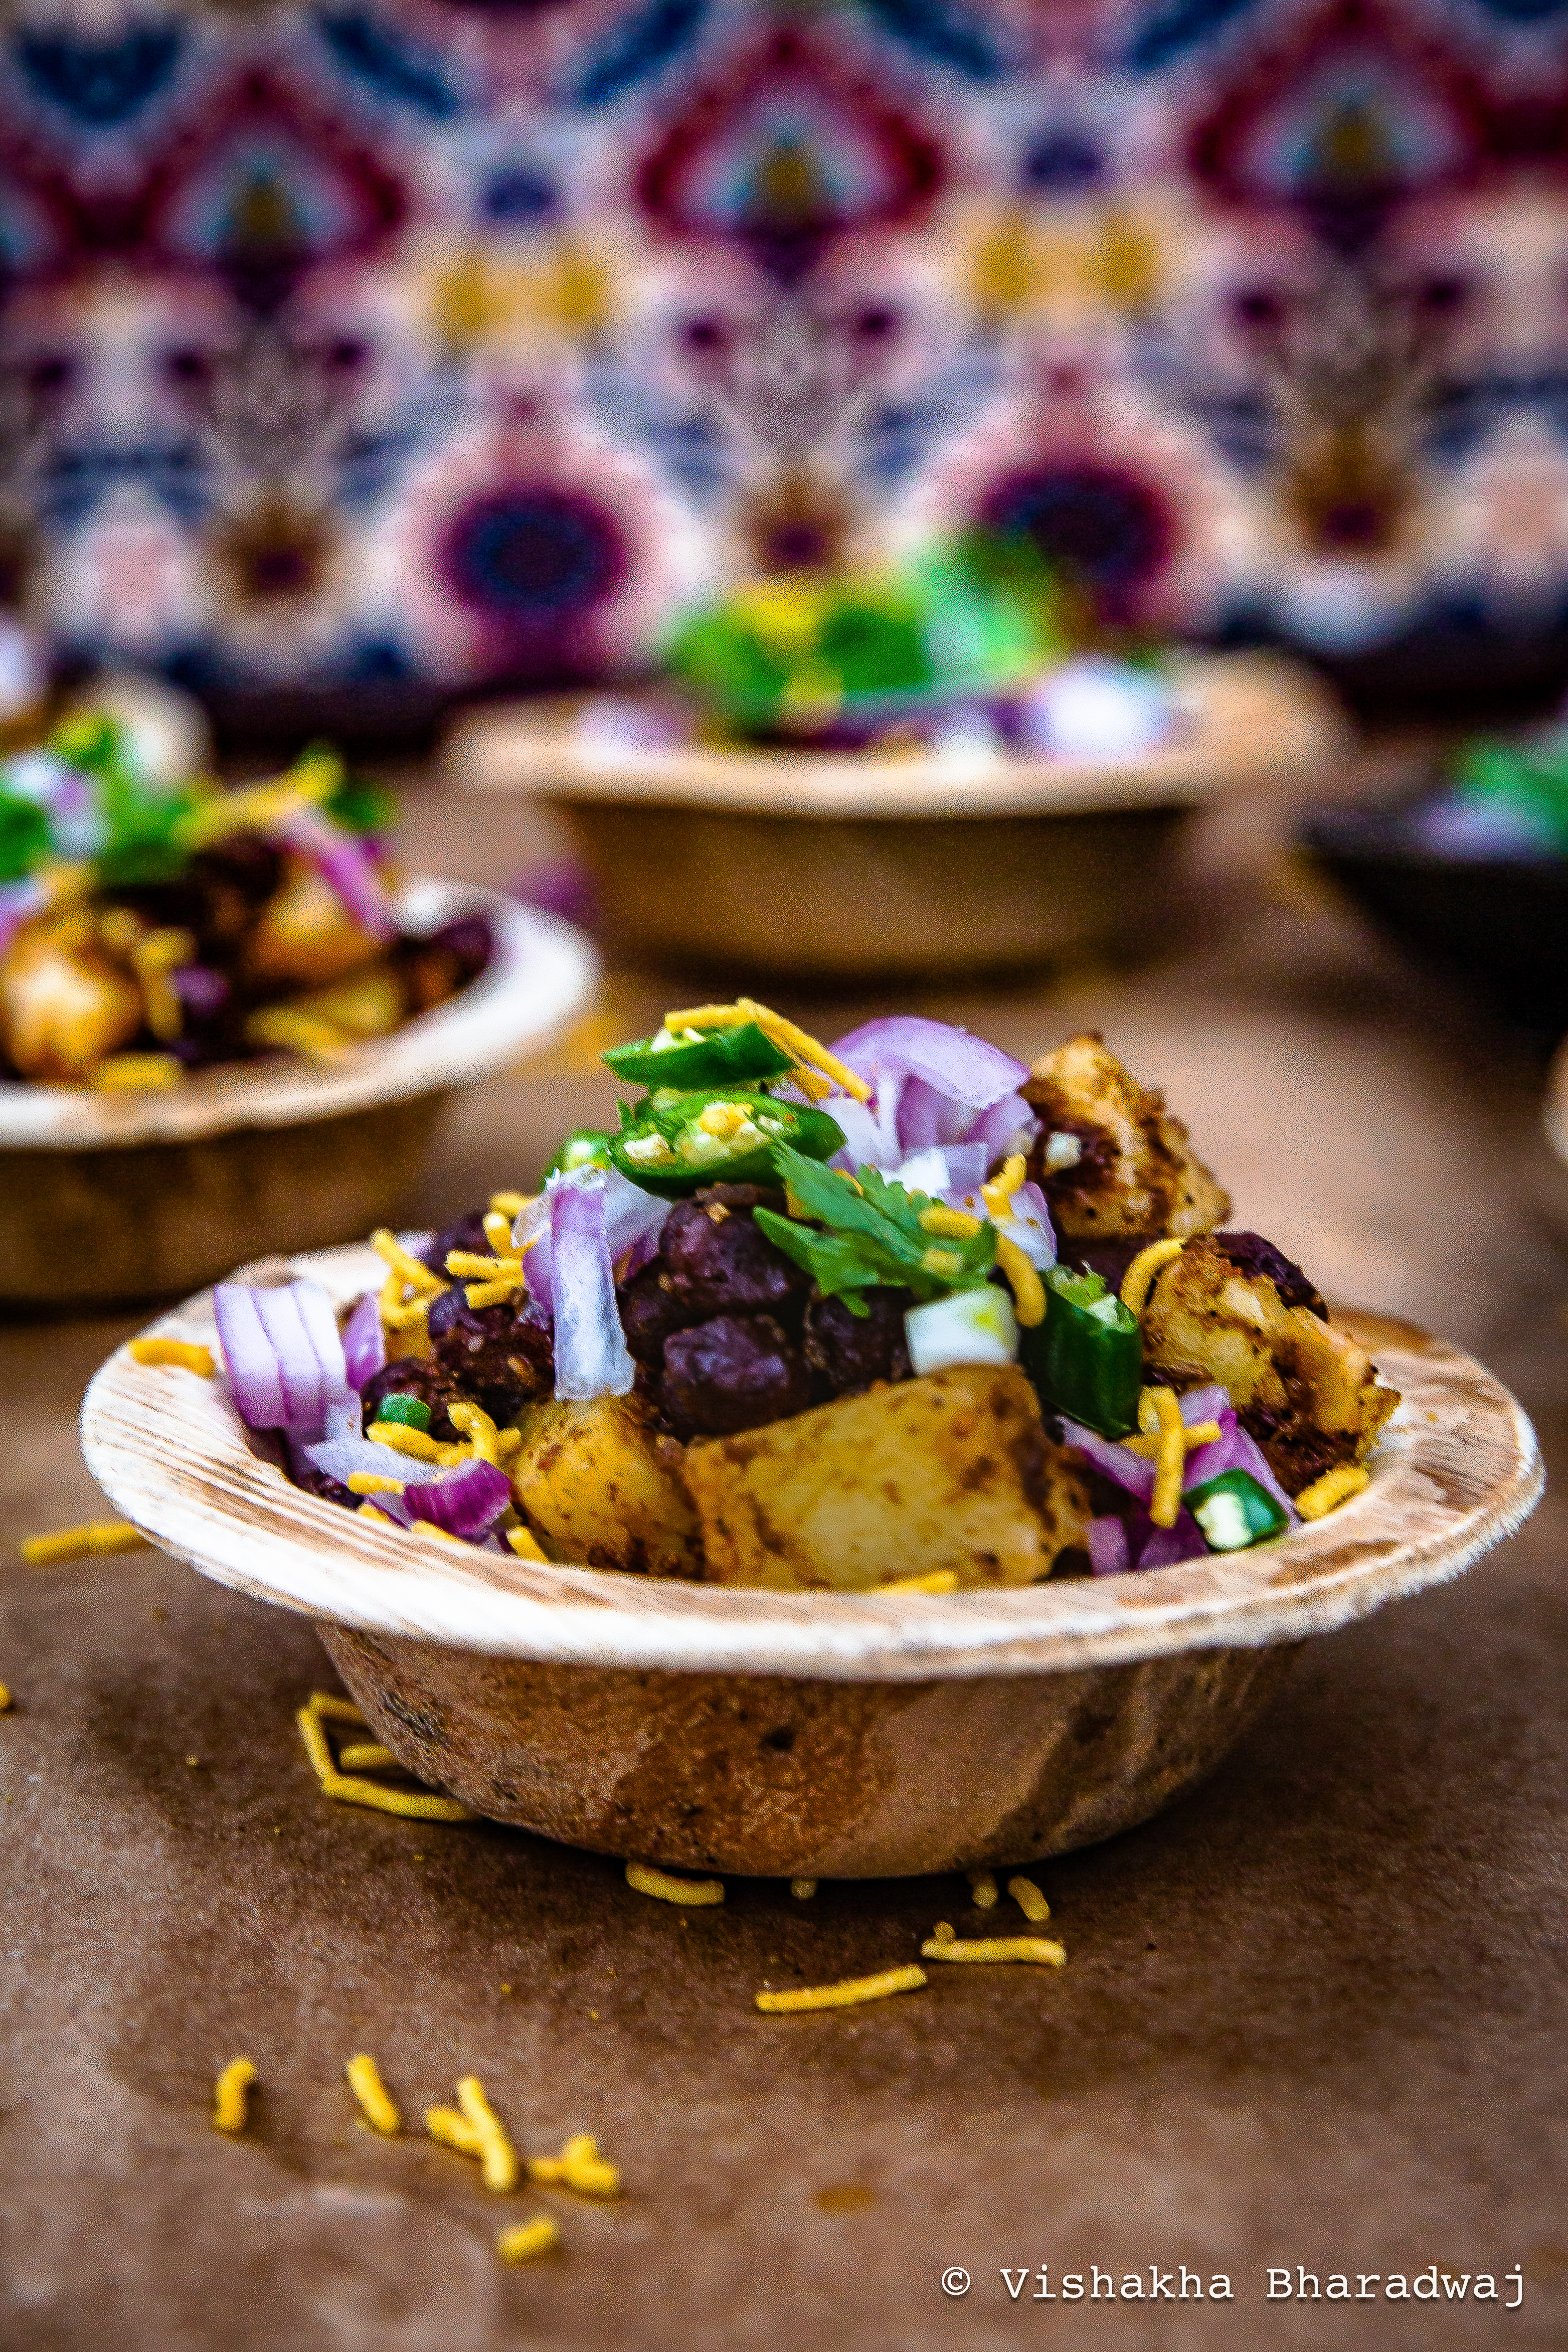
Kaala Chana Chaat (A warm, mildly sweet, tangy, spicy, herby street food of black chickpeas and potatoes)
Today, I shall take you on a nostalgic trip to my country of birth, India.
Where birds sing on roof tops, children joyfully play a game
of hop scotch, a street vendor calls out from a distant corner, there is life
all around and conversations abundant.
As I prepare myself for my trip to Asia in summer, I cannot
help but imagine how things are back in my country of birth. I am also super
excited about all the food that I am going to savour.
On this chilly spring evening, this warm chaat and a cup of tea is all I need in my life! The mild tang and sweetness of the dried pomegranates, some heat from the chili powder and fresh green chili peppers, freshly chopped onions, cilantro and the mildly pungent asafetida, the crunch from the sev, instantly takes me back to wander in the streets of India. My sweet neighbourhood. My childhood.
We love our street food and sometimes we try to recreate it at home!
Here’s one that R made one of the weekend afternoons when I was on my downtime! I came drawn to the kitchen with the aroma of all the warm spices he was using.
This is his creation but the only contribution I made was to suggest adding the Anardana powder because I really liked how my friend Dee had used Anardana in one of her Mom’s recipes of Dried Chhole and I’d loved it! So, thank you Dee!:)
For the longest time, R & I just couldn’t be together in the kitchen at the same time. I’ve had fights over how the onions were cut or which variety of okra R picked up from the grocery store! After moving here, he cooks over the weekend and I get fed!
Now, we give each other ideas when we try to create or recreate something. I must add that he has a very well developed and a sensitive palate, and that is a huge help in terms of feedback when trying out new recipes or food! He gives me critical and honest feedback so every recipe that comes to the blog has passed his test, for sure!
This is a great starter for a party, an afternoon snack or a street food themed party, as one can do most of the prep earlier. It’s perfect to serve in the slightly cooler months. However, you can cook this ahead and keep it in the fridge to serve it as a cold for summer.
Recipe for this warm Kaala Chana Chaat (A warm, mildly sweet & tangy, and spicy, herby salad with black chickpeas and potatoes)
Makes: 6-8 servings
Ingredients:
Mustard Oil: 2 tsp Asafetida (Hing): ¼ tsp Ground Dried Pomegranate Powder (Anardana Powder): 2 tsp Cumin Powder: 2 tsp Red Chilli Powder: ½ tsp Salt: To Taste Ground Pepper: ½ tsp (or to taste) Boiled Black chickpeas (Boiled Kaala Chana): 2 cups Diced Boiled Potatoes: 1 cup Chaat Masala: 1 tsp Mustard Oil: 2 tsp to add on top
Garnish (Totally customized):
Onions: Chopped, fine (a tbsp per serving or as per your liking) Green chilli peppers, finely chopped (as you prefer) Cilantro – a handful, roughly chopped Lime – a squeeze, or more if you like Crispy Sev (Chickpea flour) – a tsp or as much as you like
Method:
Heat 2 tsp of mustard oil.
While the oil is still getting warm, add Asafetida powder, Ground Anardana, Cumin powder, chilli powder, salt and pepper.
Stir well, in the oil but ensure they don’t burn (adjust the heat as necessary).
Add 2 cups of boiled Kala Chana making sure to add very little of the boiling liquid.
Mix well.
Continue cooking on medium heat until the spices are uniformly coated and stick to the Black Chickpeas & there’s no liquid left.
Add the diced, boiled potatoes (1 cup)
Mix well until it is well coated in all the spices.
Now add 1 tsp of chaat masala.
Stir for another min, add 1/2 tbsp of mustard oil and turn off heat.
Serve warm, loading it with garnish as you like!
To Serve:
Scoop a portion of the cooked Chickpeas and Potatoes in a bowl.
Add a tbsp or two of the chopped onions, green chillies (as per taste) and some freshly chopped cilantro. Squeeze a bit of lime. Enjoy!
Today we are getting personal. Like, sharing our treasured family staple chicken curry recipe, personal! I mean, if this is not personal, I don’t know what is? 😉
All you need to do is use your imagination and visualize that I have invited you to my home and you’ve come for a meal and you relished the most nurturing, delicious loving chicken curry that you will ever have (apart from the one your mom cooks, ofcourse!) Except, you are the one doing all the hard work you know – the cooking and cleaning up afterwards! haha
Oops! you just got a tiny glimpse of my evil side 🙂
Whether you intend to pack this for travel (think, summer vacations and Indian railways, if you have grown up in India) or you plan serve it to guests, this chicken curry is such a crowd pleaser! Now I cannot mention Indian railways and not get a little nostalgic here.
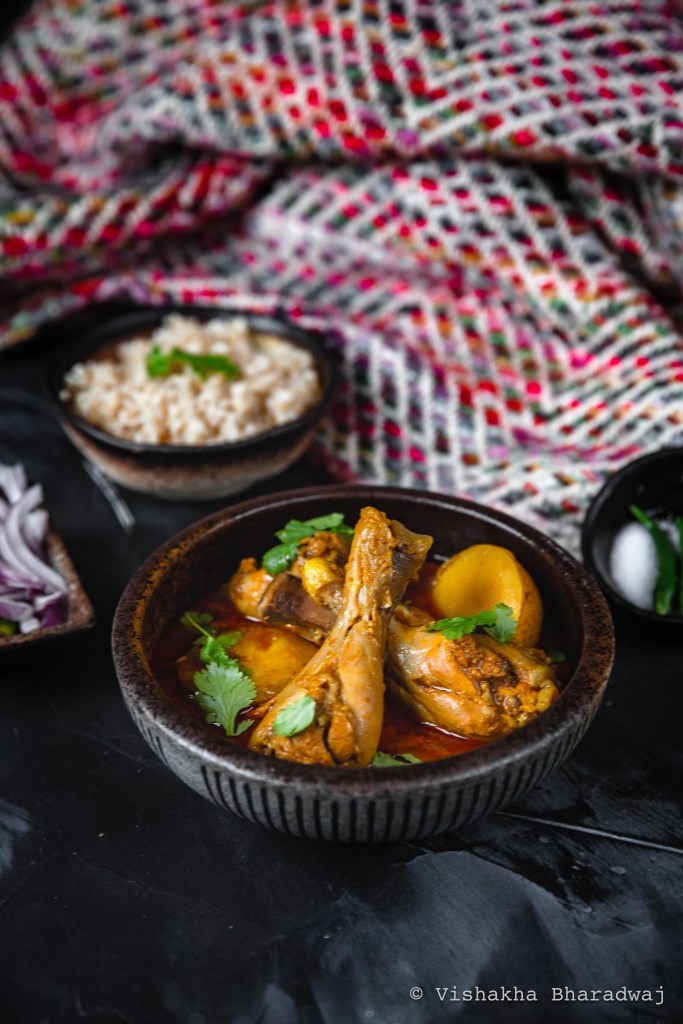
Carefully packed Masala Chicken (the dry-ish version of this recipe) with some lacchha parathas, sliced onions and fresh green chilli peppers on the side. Let’s just pause at this thought and cling to it for a few moments, shall we?
As a child, I would look longingly at other passengers having their meals in stainless steel trays served on-board the Indian Railways and wonder why life was so unfair and why I couldn’t eat that stuff!
Years later, I tried one of those meals. (I had to try it at least once!) and all I can say is that I am glad my parents didn’t let me eat it 😉
As a side note, I have added this to the list of good parenting skills you realize about your own parents only after you become a parent yourself:).
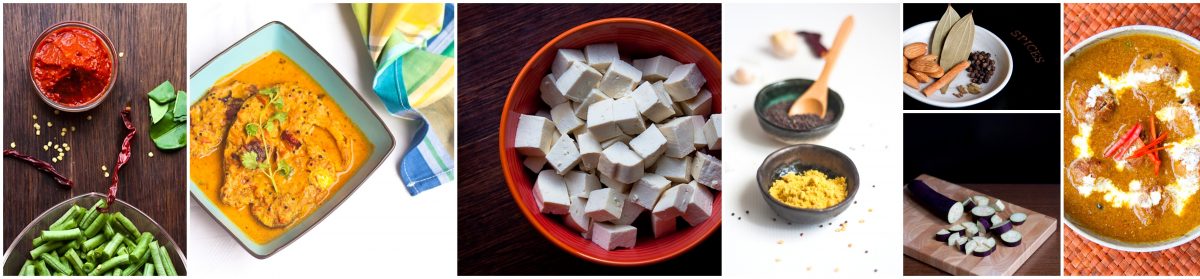
Our Family’s Favourite Chicken Curry recipe
This chicken curry can be made two ways. The recipe stays exactly the same, the only difference being, how much curry you want. If you want curry, like how I did this time, follow my recipe. If you want to have a dry version, you’ll have to cook everything in a heavy bottom pan and add water sparingly. Just enough to not let it stick to the bottom. You’ll let the chicken cook completely this way.
A fair warning: Now I know some of us do not like the idea of bones in chicken but, I would level set your expectations. The bones add to the flavour and you will just not get the same taste without bones. If you do, however, decide to make it boneless, I would recommend using chicken stock in place of water. Also, you will need to reduce the cooking time substantially (like 3-4 minutes).
Also, if you skimp on the chilli powder or not use it at all, please note that the colour will be yellow (from the turmeric) and not red at all (like in my picture). It is pretty obvious because there are no tomatoes or anything that can add a red colour to this dish other than the chilli powder.
Making this simple by dividing into 3 steps:
Step 1. Marination Step 2: Prepare Masala & Cook the Chicken Curry Step 3: Resting
Step 1: Marination
Ingredients for Marination:
Chicken drumstick and thigh with bones, skin removed – 1 kg; medium sized pieces, washed and patted dry. If using frozen pieces, you should thaw the chicken overnight in the fridge or in the microwave Turmeric powder: 1 tsp Ginger paste: 1 tbsp Garlic paste: 1 tbsp Ground Coriander: 1 tsp Ground Cumin: 2 tsp Kashmiri Chili powder (Or Cayenne Pepper: 1 tsp or as per your spice tolerance Thick Yoghurt (or Greek yoghurt) : 1/4 cup Salt : to taste Mustard oil 1 tbsp
Mix all of the ingredients in a large mixing
bowl., Marinate overnight in the refrigerator or for 3-4 hours at the
minimum.
Step 2: Preparing the curry:
Ingredients for the curry:
Mustard Oil: 1 ½ Tbsp Black Cardamom: 1 Cloves: 5 Bay leaves: 2 Cinnamon stick: 1 inch stick Green Cardamom: 3 pcs, lightly pounded Onion: thinly sliced, 2 cups, loosely packed (About 2 medium sized) Salt: to taste Sugar Onion: thinly sliced, 2 cups, loosely packed (About 2 medium sized) Salt: to taste Sugar: 1 tsp (optional) Medium sized potatoes – 3, cut into halves Garlic paste: 1 tbsp Ginger paste: 1 tbsp Deghi Chilli Powder: ½ tsp (add kashmiri chilli powder if you do not like the heat but still want the colour) Indian or Thai Green chilli peppers : 3-4 Cilantro (Coriander leaves): a handful, to garnish
Method:
Turn on the Instant pot [IP] to sauté mode. Once “Hot”, add 1 1/2 tbsp mustard oil
Next, add the black cardamom, cloves, Bay leaves, cinnnamon stick, lightly pounded green cardamoms. Stir for a few seconds.
Add the thinly sliced onions, a tsp of salt and a tsp of sugar. Fry until it turns golden brown. If it starts sticking to the base, use water to splash and ensure nothing sticks to the bottom of the pot, scraping with the spatula (Takes about 8-10 mins)
In the IP, Add 1 tbsp garlic paste + 1 tbsp ginger paste. Mix until raw smell goes away (about 2 mins)
Add 1/2 tsp Deghi Chili powder (to bring a little heat and colour. You could skip this if you do not want the heat)
Add the marinated chicken and continue cooking for another 8-10 mins on high heat sauté setting, uncovered, stirring occasionally. Make sure nothing sticks at the bottom and always. I always have a glass of water to the rescue. Sprinkle just a little bit of water to prevent it from burning. If the heat seems too high, adjust the heat to medium.
Add the potatoes. Continue to cook for another 2 mins
Next add 1 ½ cups of water (more or less as you prefer)
Cancel saute mode. Turn on manual mode for 8 mins and NPR (Natural Pressure Release).
Step 3: Resting
When the curry is done, Add a few whole green chillies and simply let it sit for an hour before serving.
Just before serving, garnish with freshly chopped cilantro.
A few weeks ago, I had a couple of these sweet beauties (sweet potatoes) lazing around. It was a Friday and the kids were in school, which meant, I could give my full attention to creating something with all of my senses fully present. There was no yelling, no interruptions and I had time to myself. If you have little kids at home, you know exactly what I am talking about! And if you don’t, then just take my word for it!
Going back to my story about the beautiful sweet potatoes… I opened my fridge for inspiration. I often do that before I start cooking. I stare at the produce and most days that is how I get inspired!
It’s like a party with a special guest list .. you know, the ones which say ‘By invitation only’ ! I opened the chiller and stared some more. Pancetta! There was a light bulb moment! And.. the idea of inviting Pancetta to this party got me super excited!
Now I also needed something earthy to match the meatiness of
the pancetta while serving as a bridge between the sweet potatoes and the meat.
I began a quiet search for this next guest. And there it was. The fresh rosemary
stalks beautifully intertwined together with the confidence one has when they
are the party starter!
I started prepping the ingredients, super excited but I got
a certain uneasiness that I was missing out an important guest on the list. I
needed something a little refreshing and zesty to lift it all up and make it
fun! Just then, the mandarins said ‘hello, is it me you are looking for?’! (Sorry,
I just couldn’t help it!)
The preparation was done and now we needed some music because what’s a good party without great music and dancing?!
This is an excellent party starter .. perfect for an appetizer or just by itself as a snack when you are in the mood for something delicious! Also, you can always make it vegetarian by removing the Pancetta, using ghee (or Oil for a vegan version) and topping it with some fried cashew nuts!
So, without further ado, let’s get the PARTY started!
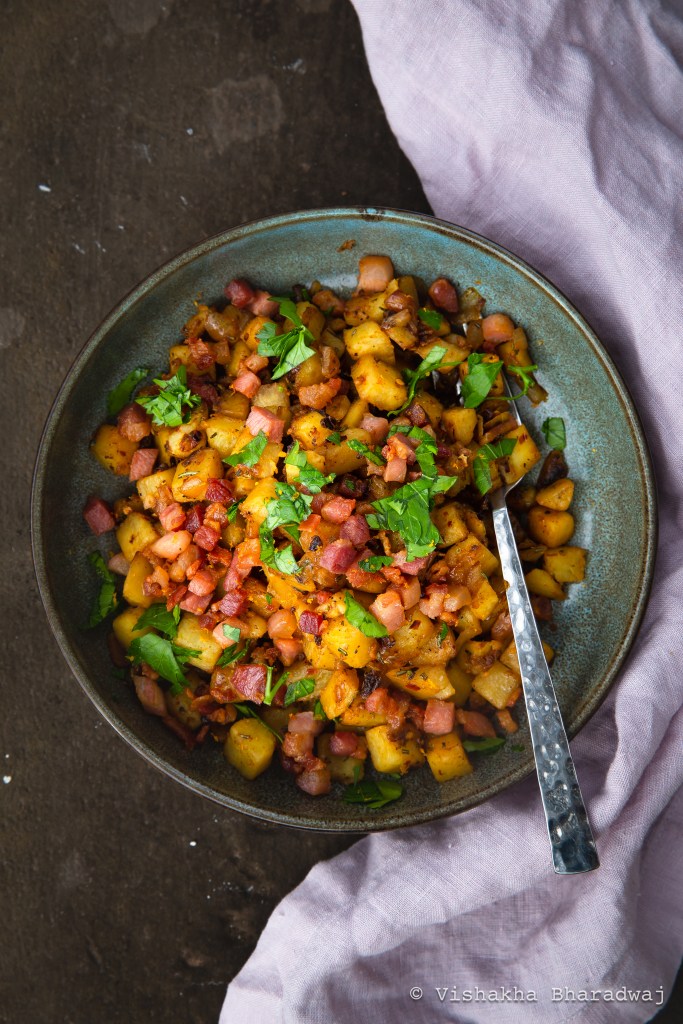
Sweet Potato with Pancetta & Rosemary with hints of mandarin!
Total time: 30 mins Preparation time: 10 mins Cook time: 20 mins
Ingredients:
Pancetta : 1 store bought packet or 4 oz or 113 gms (I used 1 4 oz packet of Boar’s Head brand diced uncured Pancetta) Garlic: 2 cloves of garlic – sliced or if you prefer, you can chop it finely Onion: ½ cup of finely chopped onions (I used yellow onions) Ghee or any oil of your choice: 1 tsp Salt Pepper: to taste Rosemary: 2 stalks, washed, stems removed, leaves finely chopped Dry Chilli flakes or freshly chopped Thai red chilli peppers – 1. Just a hint of spice is needed Sweet Potatoes: 2 cups of medium diced sweet potatoes (As a ballpark, I used around 2) Mandarin: Juice of ½ a mandarin + Zest of 1 mandarin Fresh parsley: a small handful, Finely chopped, as garnish
Preparation:
Finely slice the garlic, if you are lazy like me
and you love garlic. Otherwise, mince it finely.
Finely chop the onions to yield ½ cup of onions.
I used yellow onions. You could try with red onions, shallots. They would all
go well.
Wash the rosemary stalks. Pat them dry. Now
remove the leaves from the stem and finely chop them.
Peel the sweet potatoes. And cut them into medium
dice.
Take the zest of a mandarin. Cut it into half
and juice ½ the mandarin. I challenge you to not juice the other half directly
in your mouth and get some of that zesty orange juice stuff all over your face.
Method:
Making of Sweet Potato w Rosemary
Heat a flat, heavy-bottom pan. I would recommend using something which has a broad surface area that can be used for cooking.
Add the pancetta and mix it around until it renders fat and turns nice, brown and crispy.
Now remove it from the pan. If the oil left behind is enough, you don’t need to add any more oil. If not, you could add a tsp of oil or ghee. I used ghee because I love ghee.
Add the garlic and stir it around until it releases aroma. Do not brown it.
Next add the onions/shallots or whatever you are using. If you are using fresh Thai chilli peppers, finely chop them and add them together with the onions. Season with salt & pepper and sweat it. Go for a translucent colour without browning.
Next, add the rosemary leaves and the diced Sweet potatoes. Season again with salt and pepper. Cook this covered for the next few mins on medium-low heat to get them cooked through but remember stirring them every few.
Once the sweet potatoes are cooked, add the zest and keep heat to medium and just let the edges turn a little brown. Now deglaze the pan by adding the juice of ½ a mandarin. It will sizzle and who doesn’t love a good sizzling sound! Combine the flavours and remove them into your serving dish. Now top it with the Pancetta and a little bit of fresh parsley and you are good to go!
Notes:
If you choose to make a vegan version of this, do not include the pancetta. Use coconut oil or any oil of your choice and instead you could add some dry roasted, crushed peanuts as a topping to replace the Pancetta.
The inspiration for this recipe comes from the big fat Indian feasts that happen in the Eastern state of India, Bihar.
For most special
occasions in our family home in Bihar, we outsource the cooking to a local
caterer who has an army of cooks working for him. They come prepared, set up
their temporary cooking stations in our big open backyard, slowly the gigantic
pots and pans start coming out followed by jute sacks filled with fresh produce
like onions, potatoes, pointed gourd (Parval) and other ingredients for the big
feast.
If you are as
crazy about food as I am, you’ll quickly realize that it is such a treat to
watch! These seasoned cooks operate with ease, often engaging in a friendly
banter, the topics covered range anything from the current price of locally
sourced onions to the fate of the country post elections and sometimes world
peace!
Their
efficiency and skill is beyond doubt, exceptional! The one thing that I am
always in awe of is how they estimate spices & salt when handling such large
quantities of ingredients. There is no madness like you would normally witness
in a commercial kitchen, even though the menu is usually quite extensive. The
preparation and cooking is flawless and the food just seems to magically come
together, on time! Of course, what we don’t see are the years of practice, planning
and time management skills that have gone in to what seems like an effortless
pursuit.
I took inspiration from the pointed gourd curry which I have had on many such occasions. The use of Kashmiri and Deghi chilli powder (easily available on amazon or your Indian stores) imparts a nice red colour as well as heat to the curry. I like to add a little yogurt in this curry which helps balance the heat from the chilli. The addition of yogurt to this dish may not be traditionally done, but I like the hint of tang and creaminess that it lends to the curry. Also please note that, traditionally, the potatoes and pointed gourds are deep fried. I am always on the look out for adapting traditional recipes to a more balanced form so that I can maintain their nutritional value, taste and ease of cooking. That totally does not mean that I never deep fry stuff or you shouldn’t either. Everything in Moderation – that’s my food mantra!
Recipe for Pointed Gourd and Potatoes Curry (Aaloo Parval sabzi)
Serves: 6-8
Time taken: 1 hour and 5 mins
Preparation time: 20 mins
Cooking time: 45 mins
Ingredients and Preparation:
Potatoes – 2 medium sized Golden potatoes (Bought from Asian store). Boiled firm, Cooled, Peeled and cut in large cubes (Keep cubes are similar in size to the pointed gourd).
Pointed Gourd (Parval / Potol) – 16-20 small pcs of tender, fresh pointed gourd. I do not discard the seeds if the pointed gourd is tender. Trim the ends, scrape it unevenly with a pairing knife and cut into halves.If the pointed gourd you get is bigger in size, cut them into 4. This will also reduce your cooking time in the final step.
Mustard Oil – 2 Tbsp (You can always use your regular cooking oil if you don’t have mustard oil)
Bay leaf – 1-2
Onions – 1 medium
sized (I used Red onions from the Asian store, you can use yellow onions as
well). Makes ¾ cup of this onion paste.
Salt – to taste
Sugar – 1 tsp
Turmeric powder – 1 tsp
Garlic – 5 cloves
Ginger – 1” thick pc
Thai or Indian green chilli – 1
Make a paste of ginger, garlic and Chilli(reduce the garlic if
you do not like too much garlic in your food)
Coriander powder – 2 tsp
Cumin powder – 1 tsp
Kashmiri chilli powder – 1/2 tsp
Deghi Chilli powder – 1/2 tsp (skip the Deghi Chilli powder
if you want to reduce the heat)
Tomato – 1 ½ roma tomatoes. I didn’t have those so I
used 3 relatively big size cherry tomatoes (as in photo). Make it into a puree without adding water. It should yield around ½ cup
of paste.
Yoghurt (thick): 1 Tbsp (skip for vegan version)
Garam Masala Powder – ½ tsp
Method:
STEP 1: The base of the curry: the Masala
Heat a heavy bottom pan (wok/kadhai). Once hot, add 1 tbsp of mustard oil. Let the oil reach smoking point, then reduce heat and begin cooking.
Add the bay leaf. Stir for a few seconds
Next goes the onion paste, a pinch of salt, sugar and turmeric. Cook this mixture on medium-low heat.
Once the onions start to lose its moisture it will become brownish. Continue to fry until it looks dry and comes together.
Next, add the ginger+garlic+chilli paste. Fry on medium-low heat until all the raw smell of the masalas are gone and the masala looks dry-ish. Add more oil, if you need to. Or sprinkle a little water to prevent burning.
Once the masala is ready, add the cumin powder, coriander powder and the Kashmiri as well as Deghi chilli powders (if using). Mix for another 2 mins
Now add the tomato paste. Stir to combine and fry until oil separates and the raw smell of the tomatoes is gone!
Reduce heat to the lowest setting. Add a Tbsp of water. Mix to cool off the pan, then add the yogurt. Give this a good mix until it is well combined. Cooling off the masala and the pan is important and will make sure your yogurt doesn’t curdle. Once the yogurt is well combined, you can turn the heat to medium and keep stirring until the oil separates from the masala
STEP
2: Preparing the vegetables, can be done along with STEP 1
Meanwhile, since our masala (above) will take a good 15+ mins to come together, I make use of that time by preparing my vegetables.
Heat another heavy bottom pan to lightly sear the vegetables.
On medium heat, add 1/2 tbsp of oil, a pinch each of turmeric and salt. Stir it around occasionally until you start seeing a nice browning effect on parts of the skin. This should take a 4-5 mins. In a traditional feast, this is deep fried
Once the pointed gourd is done, take them off the pan and keep aside. Repeat the process above with the cubed boiled potatoes but since our potatoes are already boiled, it should be done very quickly. Keep aside.
STEP
3: Combining it all
On medium heat, add the prepared Pointed Gourd (from Step 1) to the prepared Masala in Step 1. Let this cook for a good 7-8 mins.
Now add the Potatoes (from Step 2) and stir for another minute.
Add 2 cups of hot water. Let it come to boil, then cover on low-medium heat for about 15-20 mins. Stir every 5 mins and cook this curry until the pointed gourd is cooked through. It should be soft and not crunchy. The curry can be of medium thickness but also note that if you keep it in the fridge, the curry thicken as it rests.
When the curry has reached it’s desired consistency, finish it with a generous pinch of Garam Masala Powder and Ghee. Stir to combine. Remove from heat.
Notes:
An optional finishing touch is to add a final tadka of dry red chillies and some more chilli powder in ghee. I do that sometimes to finish the dish and for some added colour and heat.Relish this spicy curry as a main course for a weekend meal or a weeknight meal with Roti / Rice along with your favourite Dal (lentils).
For best results, prepare this curry ahead and let it sit for a couple of hours before serving.
This keeps well in the fridge and in fact it tastes even better the next day!
In Bihar, we relish the left over curry the next day, as a side with Chooda (Flattened rice flakes), Dahi (Yogurt), a tiny pinch of salt and green chilli on the side. This is a very popular breakfast in Bihar!
When I was in my late teens, I used to hangout a lot with a good friend. Late afternoons were spent at her home, just chatting and giggling about great nothings. And when her Mom (Aunty) would come back home from work, she would often head straight to the kitchen to prepare a meal for us. I would stand by the door of the kitchen, making sure not to come in her way, yet be close enough to have my eyes following her as she operated in that sacred space.
I have always been very fascinated by the art of cooking and as a natural extension of it, watching people cook. I can stand for hours mesmerized by how people cook their food, no matter which part of the world I am in. Every cook (whether at home or a professional chef) has a unique way in which they function. It is a childlike fascination I have to watch them do what they lovingly put together. This goes way beyond the recipe. . . It is meditative. . . It is like a glimpse into another’s soul.
Aunty was like the composer and conductor of her orchestra, knowing every nuance and operating with effortless precision. Like a Master, putting the various little bits together harmoniously to produce a symphony each and every time she was in that space. She moved around with confidence as she collected the ingredients, washed, chopped, stirred, cleaned and chatted, while I watched, blissfully, as we shared a bit of our lives, little knowing that we were making memories of a lifetime.
The memory of how Aunty used to cook in her kitchen is so vivid and has stayed with me all these years. Amongst the many glorious things she cooked for me, aaloo gobhi was one of the highlights. I do not remember her recipe exactly, and I could ask her for it, but I would rather watch her cook before my eyes and relive that memory when I meet her.
Is there a higher form of praise than cooking something and being told that it reminds them of their Mom’s food? In my world, NOT. That is the best compliment. And one that truly melts my heart. . So, the decision to spread the good food becomes instantaneous! I cooked this aaloo gobhi recently for a dear friend. She immediately said that it tasted (& looked) like her Mom’s food! I just knew I had to share the recipe here!
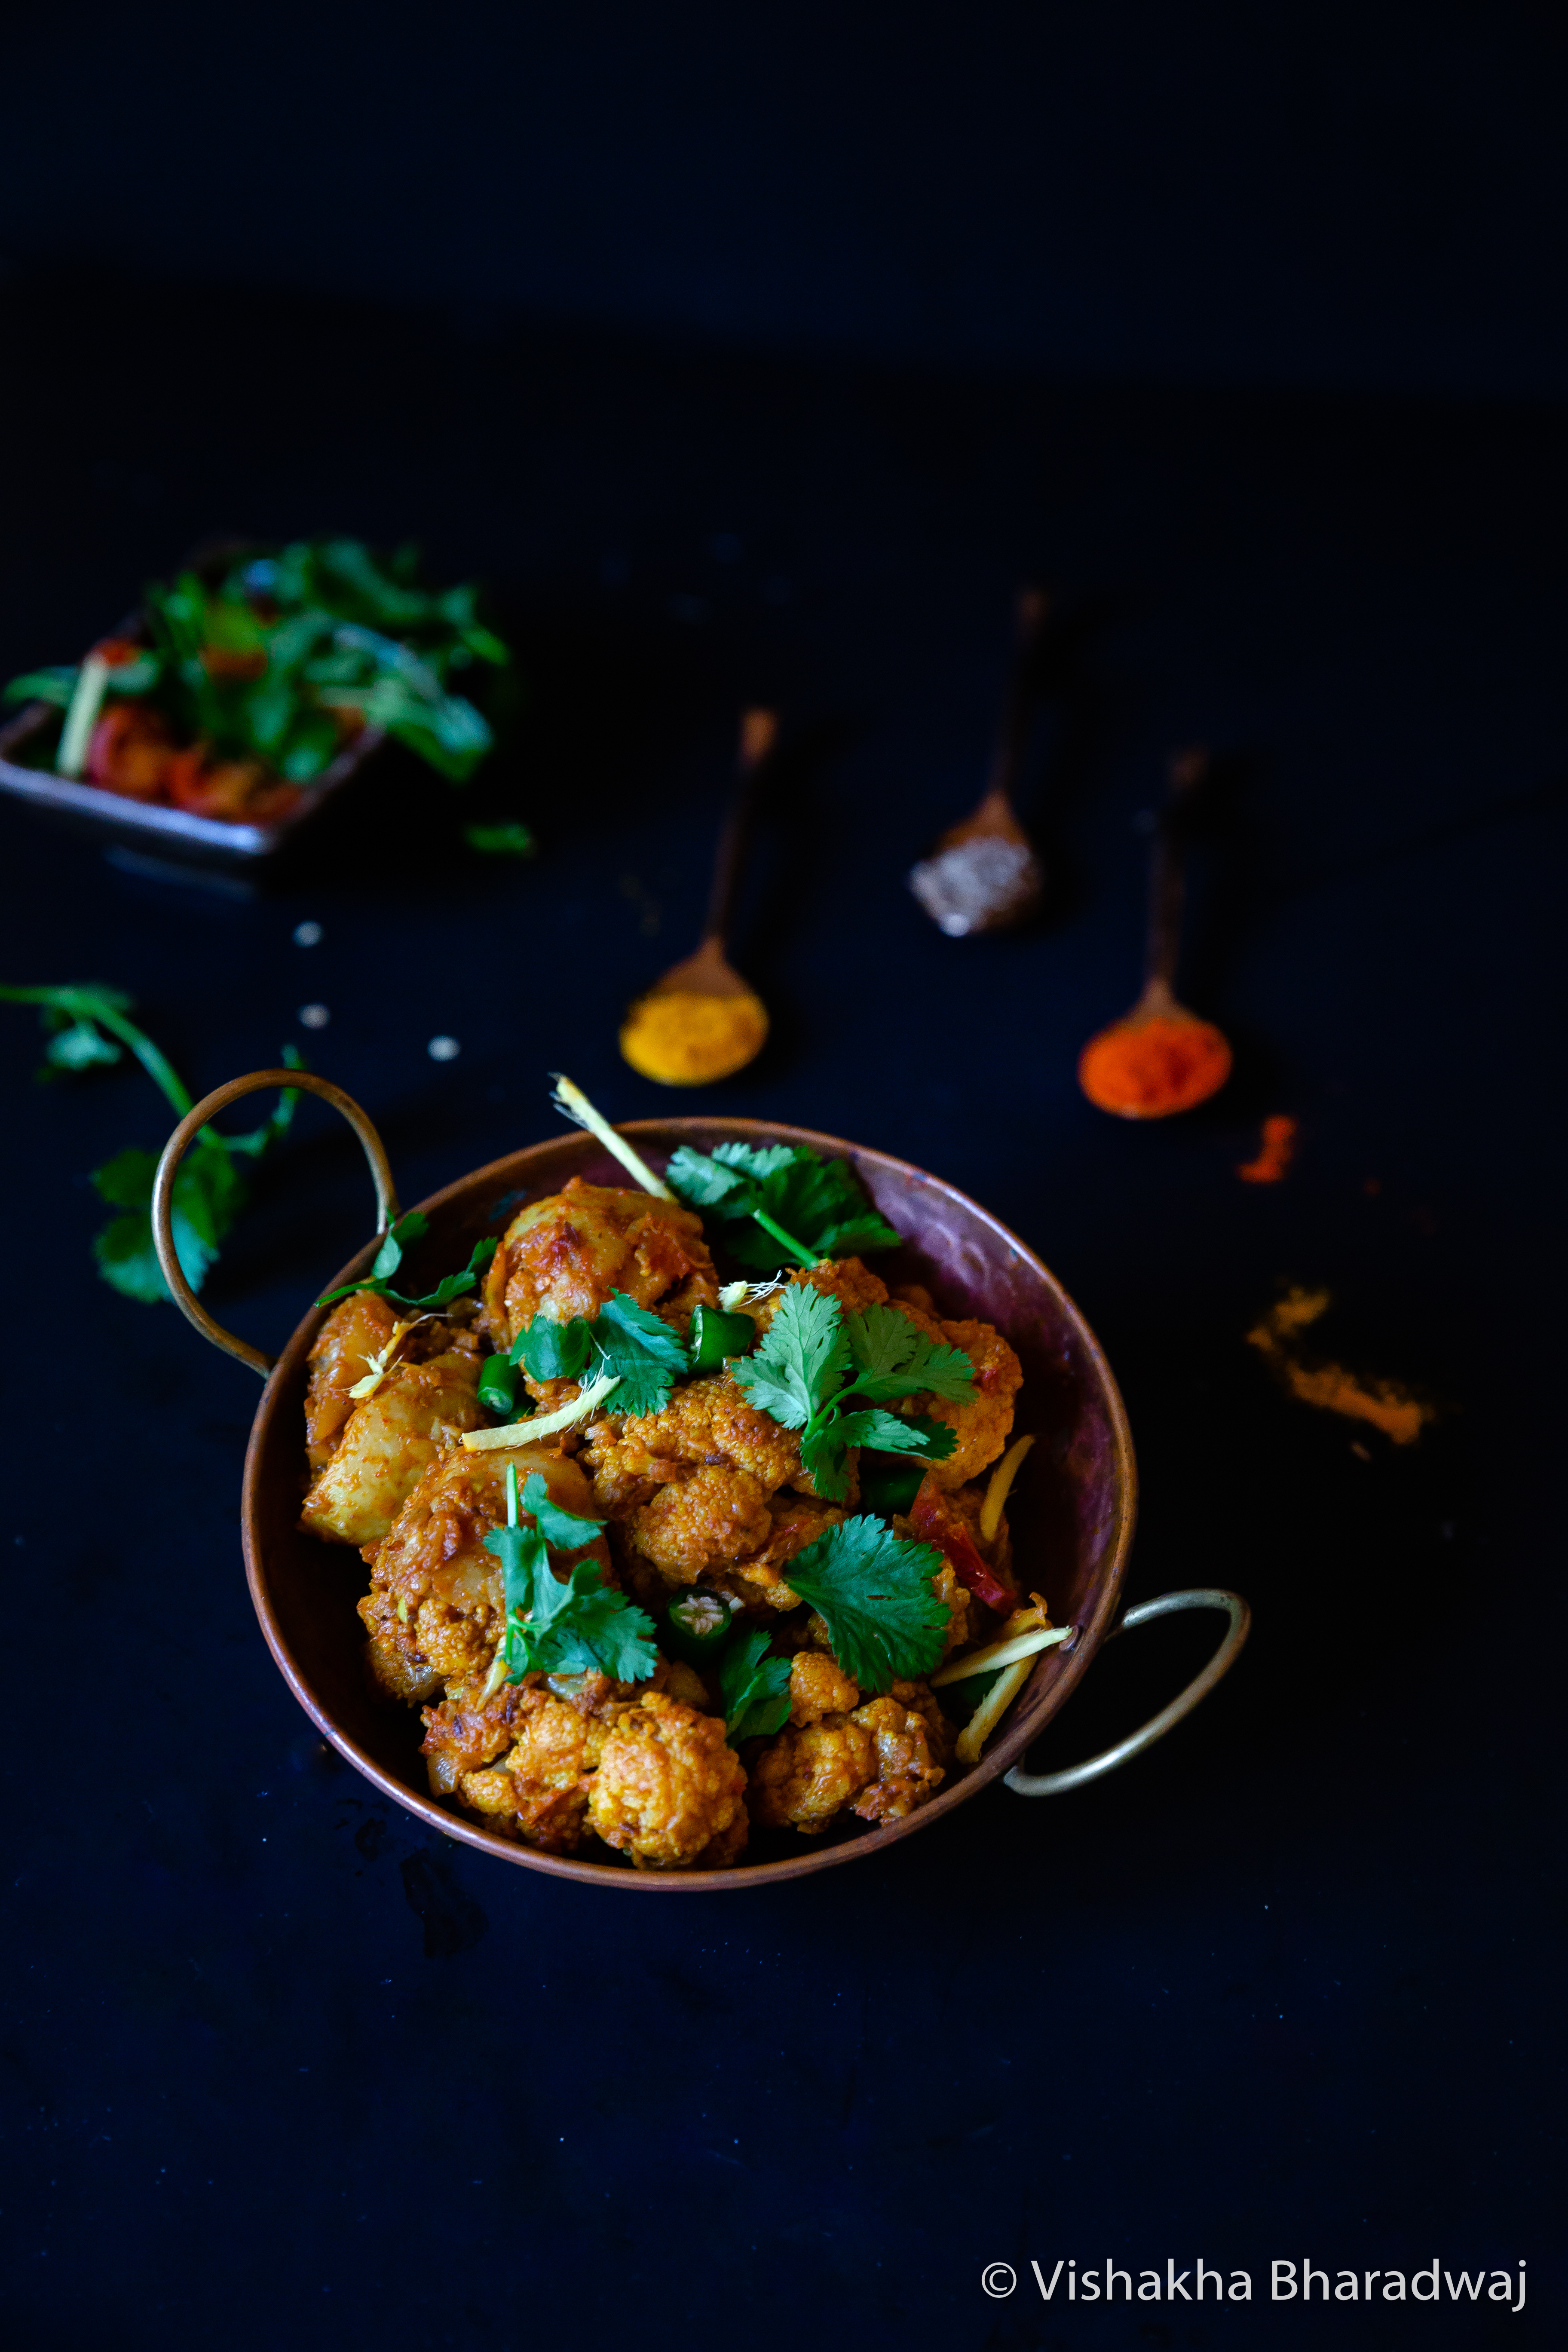
Aaloo Gobhi [Cauliflower and Potatoes in a onion and tomato masala]:
Serves: 4-6
I divide the preparation of this dish in two steps. Step one is to Roast and prepare the cauliflower. Step 2 is to Prepare the masala and get the flavours mixed together.
Roasting the Cauliflower:
Many people do not roast the cauliflower and that’s completely fine. However, I find that every time I have roasted the cauliflower this way, it has helped to preserve the texture of the cauliflower and while I absolutely love a slightly mushy cauliflower curry, the one with the texture preserved has its own deserving place.
Ingredients:
Cauliflower : 1 big head of a cauliflower
Turmeric Powder 1/2 tsp
Kashmiri Chilli Powder: 1/2 tsp
Salt: to taste
Mustard Oil 1 Tbsp (Or equal amount of any other oil)
Method:
Remove the green leaves/stem of the cauliflower. Take out the florets and cut them if needed into half. The idea is to make sure the florets are even sized (as far as possible), not too small, or they’ll end up being a mash and not too big or the cauliflower will not absorb any flavors of the masala.
Wash the florets. Pat them to remove any extra moisture using a paper towel or a clean kitchen cloth.
In a big dry mixing bowl, add the cauliflower and the rest of the ingredients. Mix it uniformly.
Line a Flat Baking sheet with parchment paper or aluminum foil. Place the cauliflower on it making sure they are in a single layer. Discard any liquid / water that is left at the bottom of the mixing bowl.
Set the oven to Broil setting or the highest setting available on your oven. Put the cauliflower to bake for about 18-20 mins. After around 10-12 mins, move the florets around. But monitor closely to make sure they do not burn. The timing may vary depending on what kind of oven you have and the size of the cauliflower as well as the moisture it has.
The idea is to make it dry-ish and slightly browned.
Alternatively, you can fry the cauliflower in a heavy bottom pan in batches. However, I try to avoid that method as it takes more oil and more time. I put this to Broil and work on my Masala.
While the cauliflower is roasting in the oven, let us get started with the Masala.
Preparing the Masala:
Ingredients:
Cumin Powder: 1/2 Tbsp
Coriander Powder: 1 Tbsp
Turmeric Powder: 1/4 tsp
Kashmiri Chilli Powder: 1 tsp
Deghi Chilli Powder: 1/2 tsp (optional)
Water: 3-4 Tbsp
Mustard Oil: 1 Tbsp (Or any other oil)
Dried Bay leaf: 1
Cumin Seeds: 1 tsp
Garlic: 1/2 Tbsp, minced
Onions: 1 Cup, finely chopped (I used a chopper to chop it fine. Can be done by a knife too, it just saves me time).
Ginger: 1 Tbsp, Finely chopped
Salt: to taste
Small-Medium sized Potatoes: 6 pcs (reduce it if you don’t like potatoes too much!). Boiled firm, Peeled, and Halved. (Quartered, if the potatoes are big. The idea is to have it similar in size to the Cauliflower florets)
Tomatoes – Use well ripe, Roma tomatoes or the bigger, round cherry tomatoes which are slightly sweetish. Chopped into big dice – 1 Cup
Fresh Cilantro (or fresh coriander leaves), roughly chopped: 1/2 cup
Garam Masala Powder: 1/2 tsp (optional)
Kasoori Methi leaves (Dried Fenugreek leaves, Roasted for a couple of mins until the aroma comes, then crushed in your palm by hand) (optional)
Fresh cream: 1 tbsp (optional)
Kasoori Methi leaves (Dried Fenugreek leaves: 1 tsp, Roasted for a 1-2 of mins until the aroma comes, then crushed in your palm by hand) (optional)
Green chillies, a couple, chopped, as a garnish (optional)
Method:
In a small bowl, add the cumin powder, coriander powder, turmeric powder and Kashmiri + Deghi chilli powders. Add enough water to cover the ground spices and stir it well to make a thick paste of it. Set aside.
In a Heavy bottomed pan or Kadhai (Wok), Heat Mustard Oil. Let it reach smoking point, then lower the flame. I like the traditional flavor mustard oil adds to this dish. You can easily substitute any non flavored oil like avocado oil or grapeseed oil. If using any other oil, you do not need to heat it to smoking point.
Once the oil is hot, add the Dried Bay leaf and cumin seeds and reduce heat. Cumin starts burning very quickly so, I reduce the heat to prevent that. Stir quickly for around 20-30 seconds making sure the cumin doesn’t burn.
Next add the minced garlic. And increase the heat to medium-low. Stir it around continuously making sure the garlic doesn’t burn. Once the garlic starts turning brown, add the finely chopped onions, ginger and 1/2 tsp of salt. Mix it until the onion turns translucent and slightly brown at the edges.
At this point, add the dry masala paste which we prepared in step 1. Continue to stir and mix for another 2-3 mins until the rawness of the spices is gone.
Add the boiled, peeled & halved Potatoes. Mix it well coating the spices. Once the spices are coated, add the tomatoes as well as the roasted cauliflower. Cook this uncovered fora couple of mins on medium heat.
Cover the pan, put the heat now on medium and let it cook for around 10 mins, stirring every 3-4 mins. Once the tomatoes have integrated fully in the masala and cauliflower has absorbed the flavors, turn off the heat.
Add Chopped fresh cilantro leaves (coriander leaves) immediately after turning the heat off. Mix well and serve with Naan, Roti, Rice or any other way you fancy! Prepare this dish an hour or two before serving time as it allows enough time for the flavors to marry.
Garnish with chopped green chillies (optional)
Optional step: When the vegetables are done, Add a spoon of fresh cream and mix it well to take this dish to another level. Turn off the heat within 1-2 mins after mixing. Add 1/2 tsp of garam masala powder and the crushed, roasted kasoori methi as well as the cilantro from step 8 above.
Five years ago, I published my last post. A lot has changed in these years. I have grown older [and hopefully wiser]. I have moved countries. Had another baby who is now four years old! However, the one thing that has remained constant through these big life changes, has been my love for Food and Photography.
When I decided to start blogging again, I found myself looking through some of my old posts and repeatedly asking myself this question, “What took you so long?”
I don’t have an answer to that . . .
Let’s just say, a lot has happened during this time and it hasn’t been easy to cope with. I turned 40 and started looking at my life in a very different light. Four years ago, I became a mother all over again. I moved from my comfortable home in Singapore to the suburbs of New Jersey. With feelings of deep sadness and a desire to embrace change, I made the big move across continents together with my family. Friends who were a part of me through my 20s and 30s, were gone overnight.
I had always heard change was hard, but this hard . . .?
From being a social animal who thrived on meeting people to someone who spends weeks at a stretch without any face to face contact with another adult (other than my husband), let’s just say that the transition has been far from easy. I am grateful to the friends I have made during these two years as well as my long distance friends and family, without whom I couldn’t have survived.
One Friday morning after finishing my morning chores, I was at home browsing through the glorious public lives of everyone (other than myself) on social media and I heard a knock on my door! I do not recall exactly but it could have easily been the first time my door knocked all week. It was my sweet neighbour, with a bowl of food in one hand and a cup of tea in the other. I was hungry! How could she have known? Perhaps the rumbling of my tummy was loud enough for her to hear or could it be that my need for some comfort food automatically wired out a telepathic message across our common walls? “Comfort food needed. A cup of Tea would be nice!”
She had made a bowl of Poha and a cup of Chai!
I was overwhelmed and full of gratitude. The first lesson I learnt almost immediately after moving here was that Food was God. And anyone who got you Food was an Angel!
As soon as she left, I made a dash in to the kitchen for a spoon. As I sat down with the warm bowl in my hand, I removed the foil that preserved the warmth and the aroma of that poha just made me ever so grateful for the food and love I had received. It is important that I mention that until this point in my life, I had never had any liking for poha.
Something inside me changed permanently as I had my first spoonful.
Never before had I eaten Poha so moist and flavourful. I enjoyed the complexity of flavors that were gently balanced between the sweet, savory, spicy and tangy! It had a soft texture and yet it wasn’t dry.
I was converted!
I had to try and replicate the texture and flavour that I had just witnessed! Over the weeks that followed, I tried to replicate what I had experienced and I think I may have finally nailed it.
So, here’s the recipe!
Recipe of Poha
For a Printable version of the recipe, click here.
Serves: 2-3
Ingredients:
Thick Brown rice Poha (Flattened brown rice, found in Asian stores) : 1 Cup. Wash with 2-3 changes of water and Soak in water for 5 mins. Transfer to a soup strainer to strain the poha and let it rest in the soup strainer.
Potatoes: 1 Cup, small diced. I used 1 medium sized red potato
Carrot: 1/2 Cup of finely chopped carrots (I used 1 carrot and chopped it fine using a chopper)
Frozen peas: 1/2 Cup. Cover the peas with enough water. Add a pinch of salt and microwave for 2 mins. Strain & keep aside.
Onion: 1 Cup, finely chopped
Ginger: 1 Tbsp, finely chopped
Oil: 1 Tbsp (I used avocado oil. You can use grapeseed oil or your regular cooking oil).
Mustard seeds: 2 tsp
Cumin seeds: 1 tsp
Curry leaves: 10-15
Asafetida: Generous pinch or two (if you like more)
Roasted peanuts (I prefer the asian variety which is smaller in size): Dry roasted, skin removed and lightly crushed.
Method:
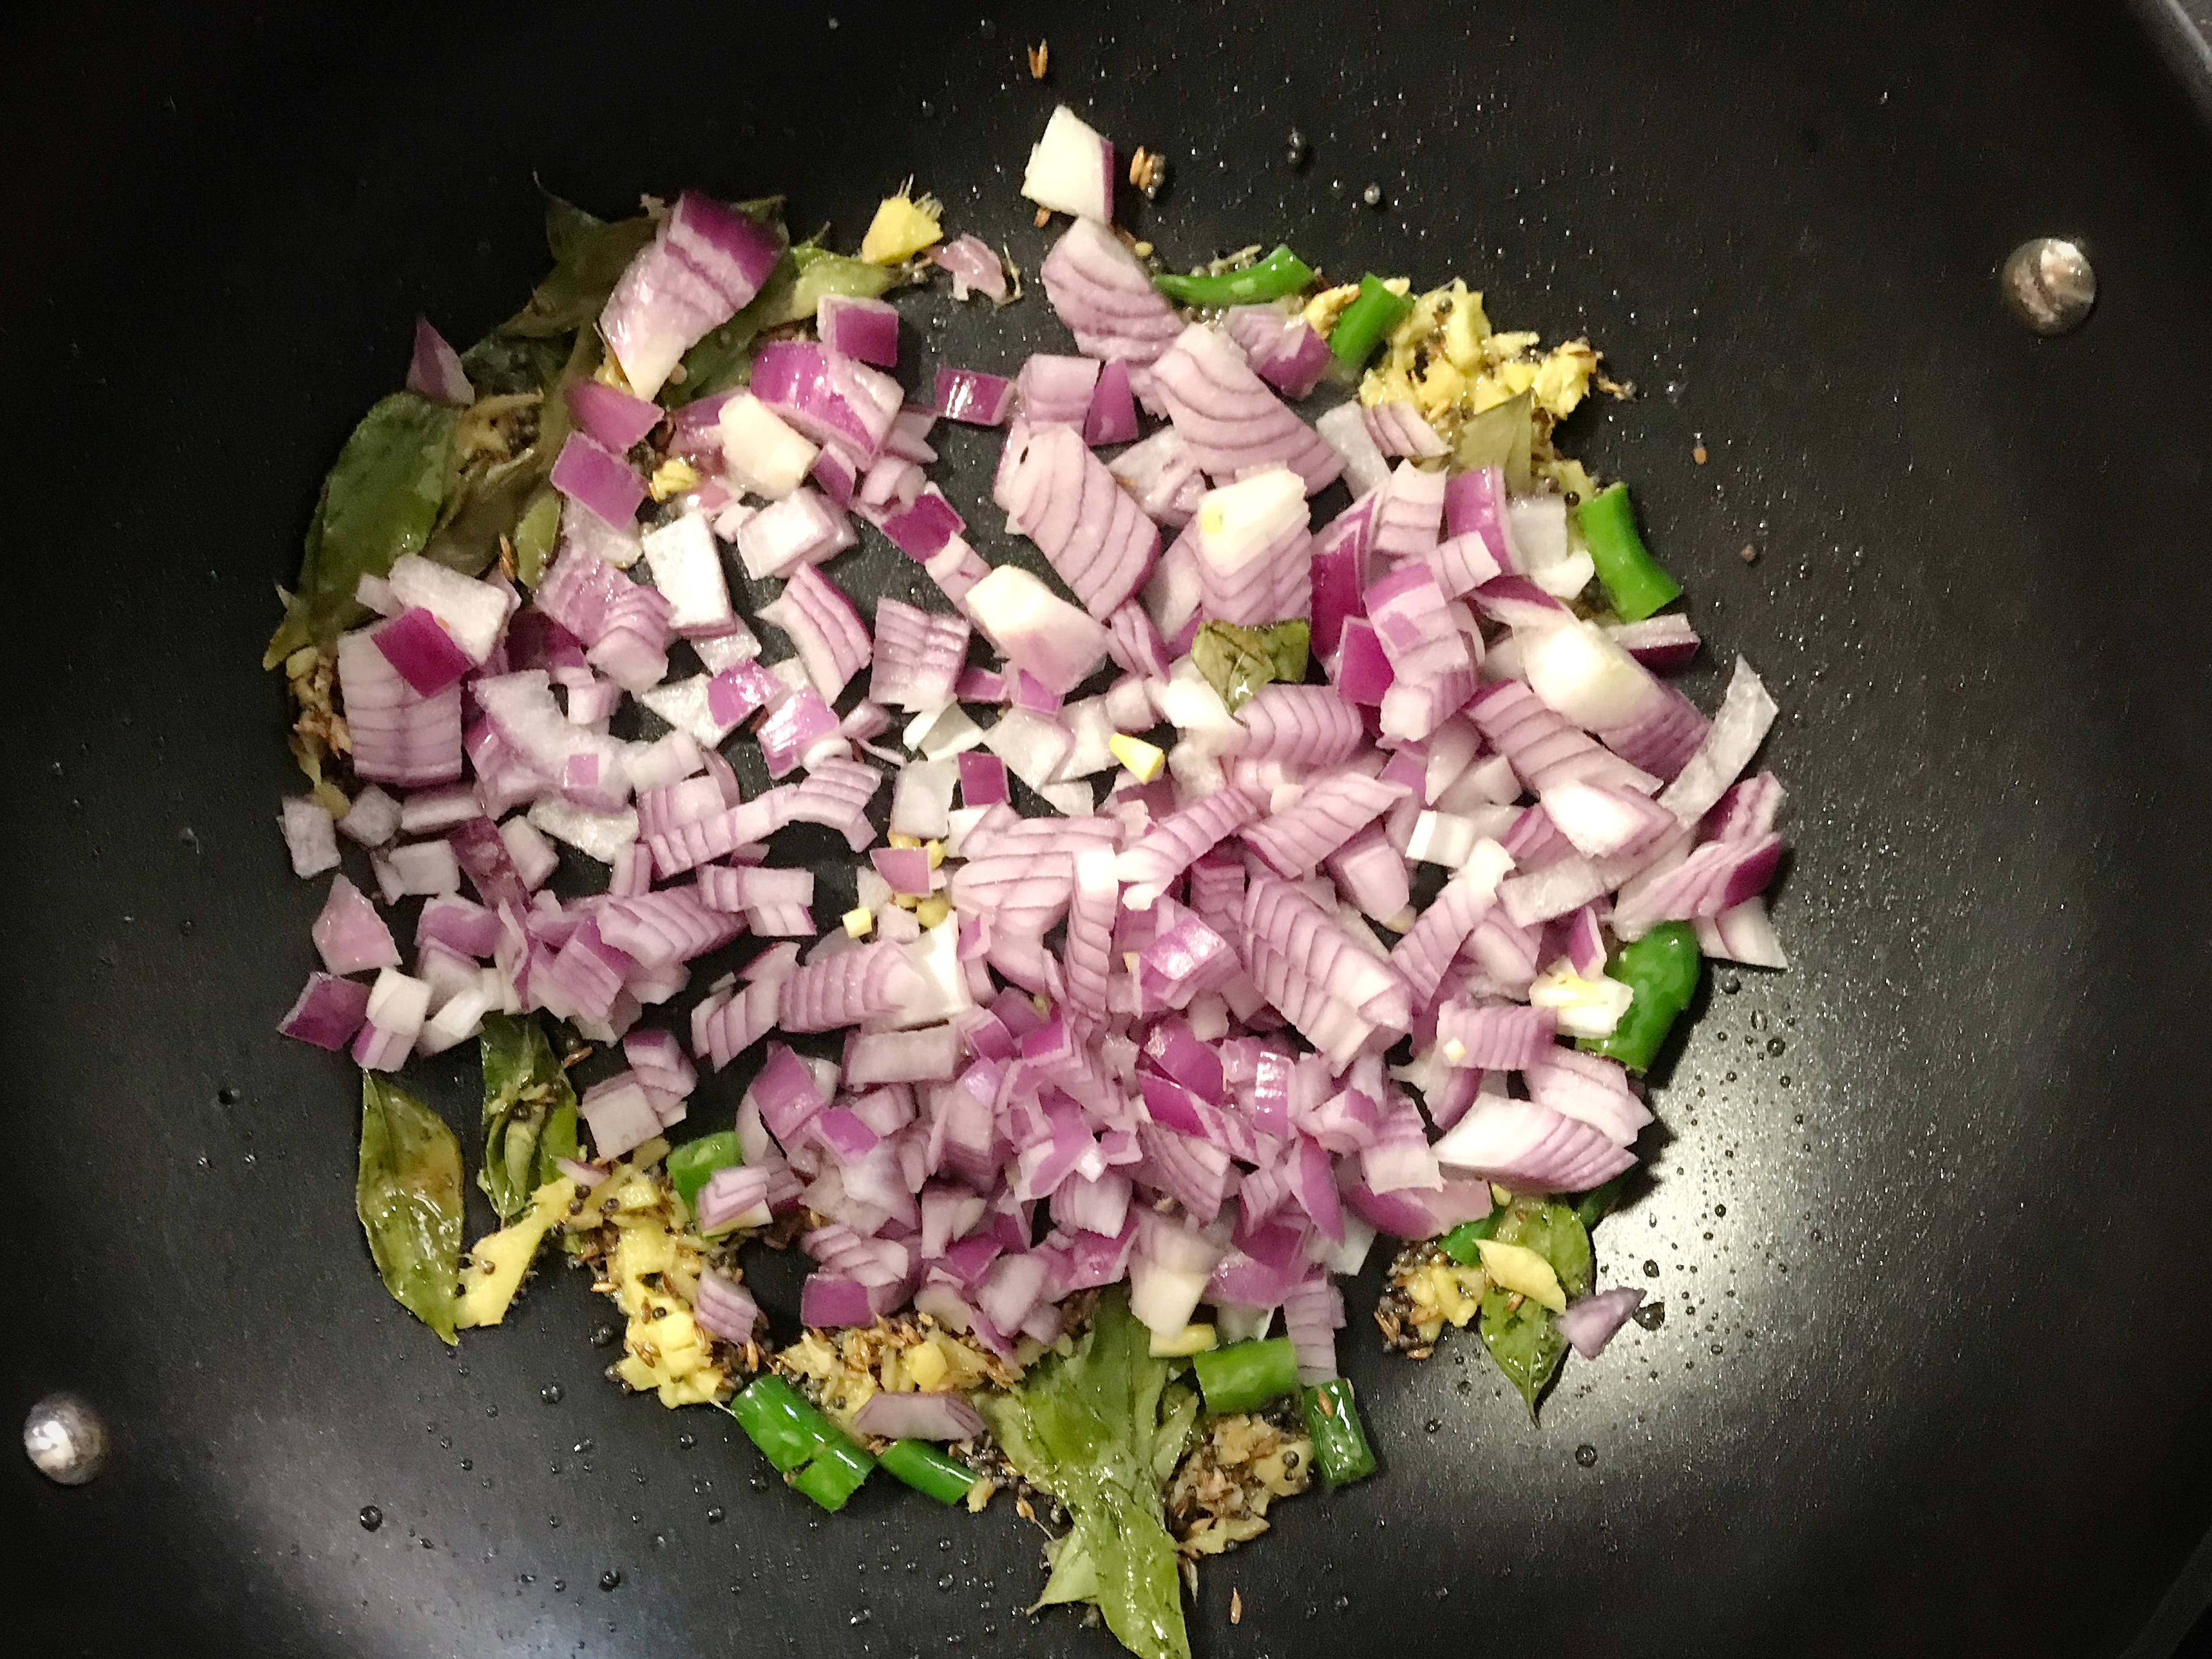
Heat a medium sized wok or heavy bottom pan. Add oil. Once the oil is hot, add the mustard seeds and wait for them to crackle. Once they start crackling, reduce heat and the add cumin seeds making sure they do not burn and let it cook for about 30 seconds.
Next add the onion, ginger, asafetida, green chillies and sugar. Continue to cook this on medium-low heat until the onions have turned soft and translucent (about 3-4 mins).
At this point, add the small diced potatoes along with some salt. Cover and cook them for 4-5 mins on medium-low heat. Add the peas and cook for another 3-4 mins until the peas and potatoes are cooked through.
Add the finely chopped carrots, turmeric and freshly ground black pepper powder and cook for a few more mins until the carrots are not raw any longer. The carrots are so finely chopped that this should not take more than 2-3 mins on medium heat.
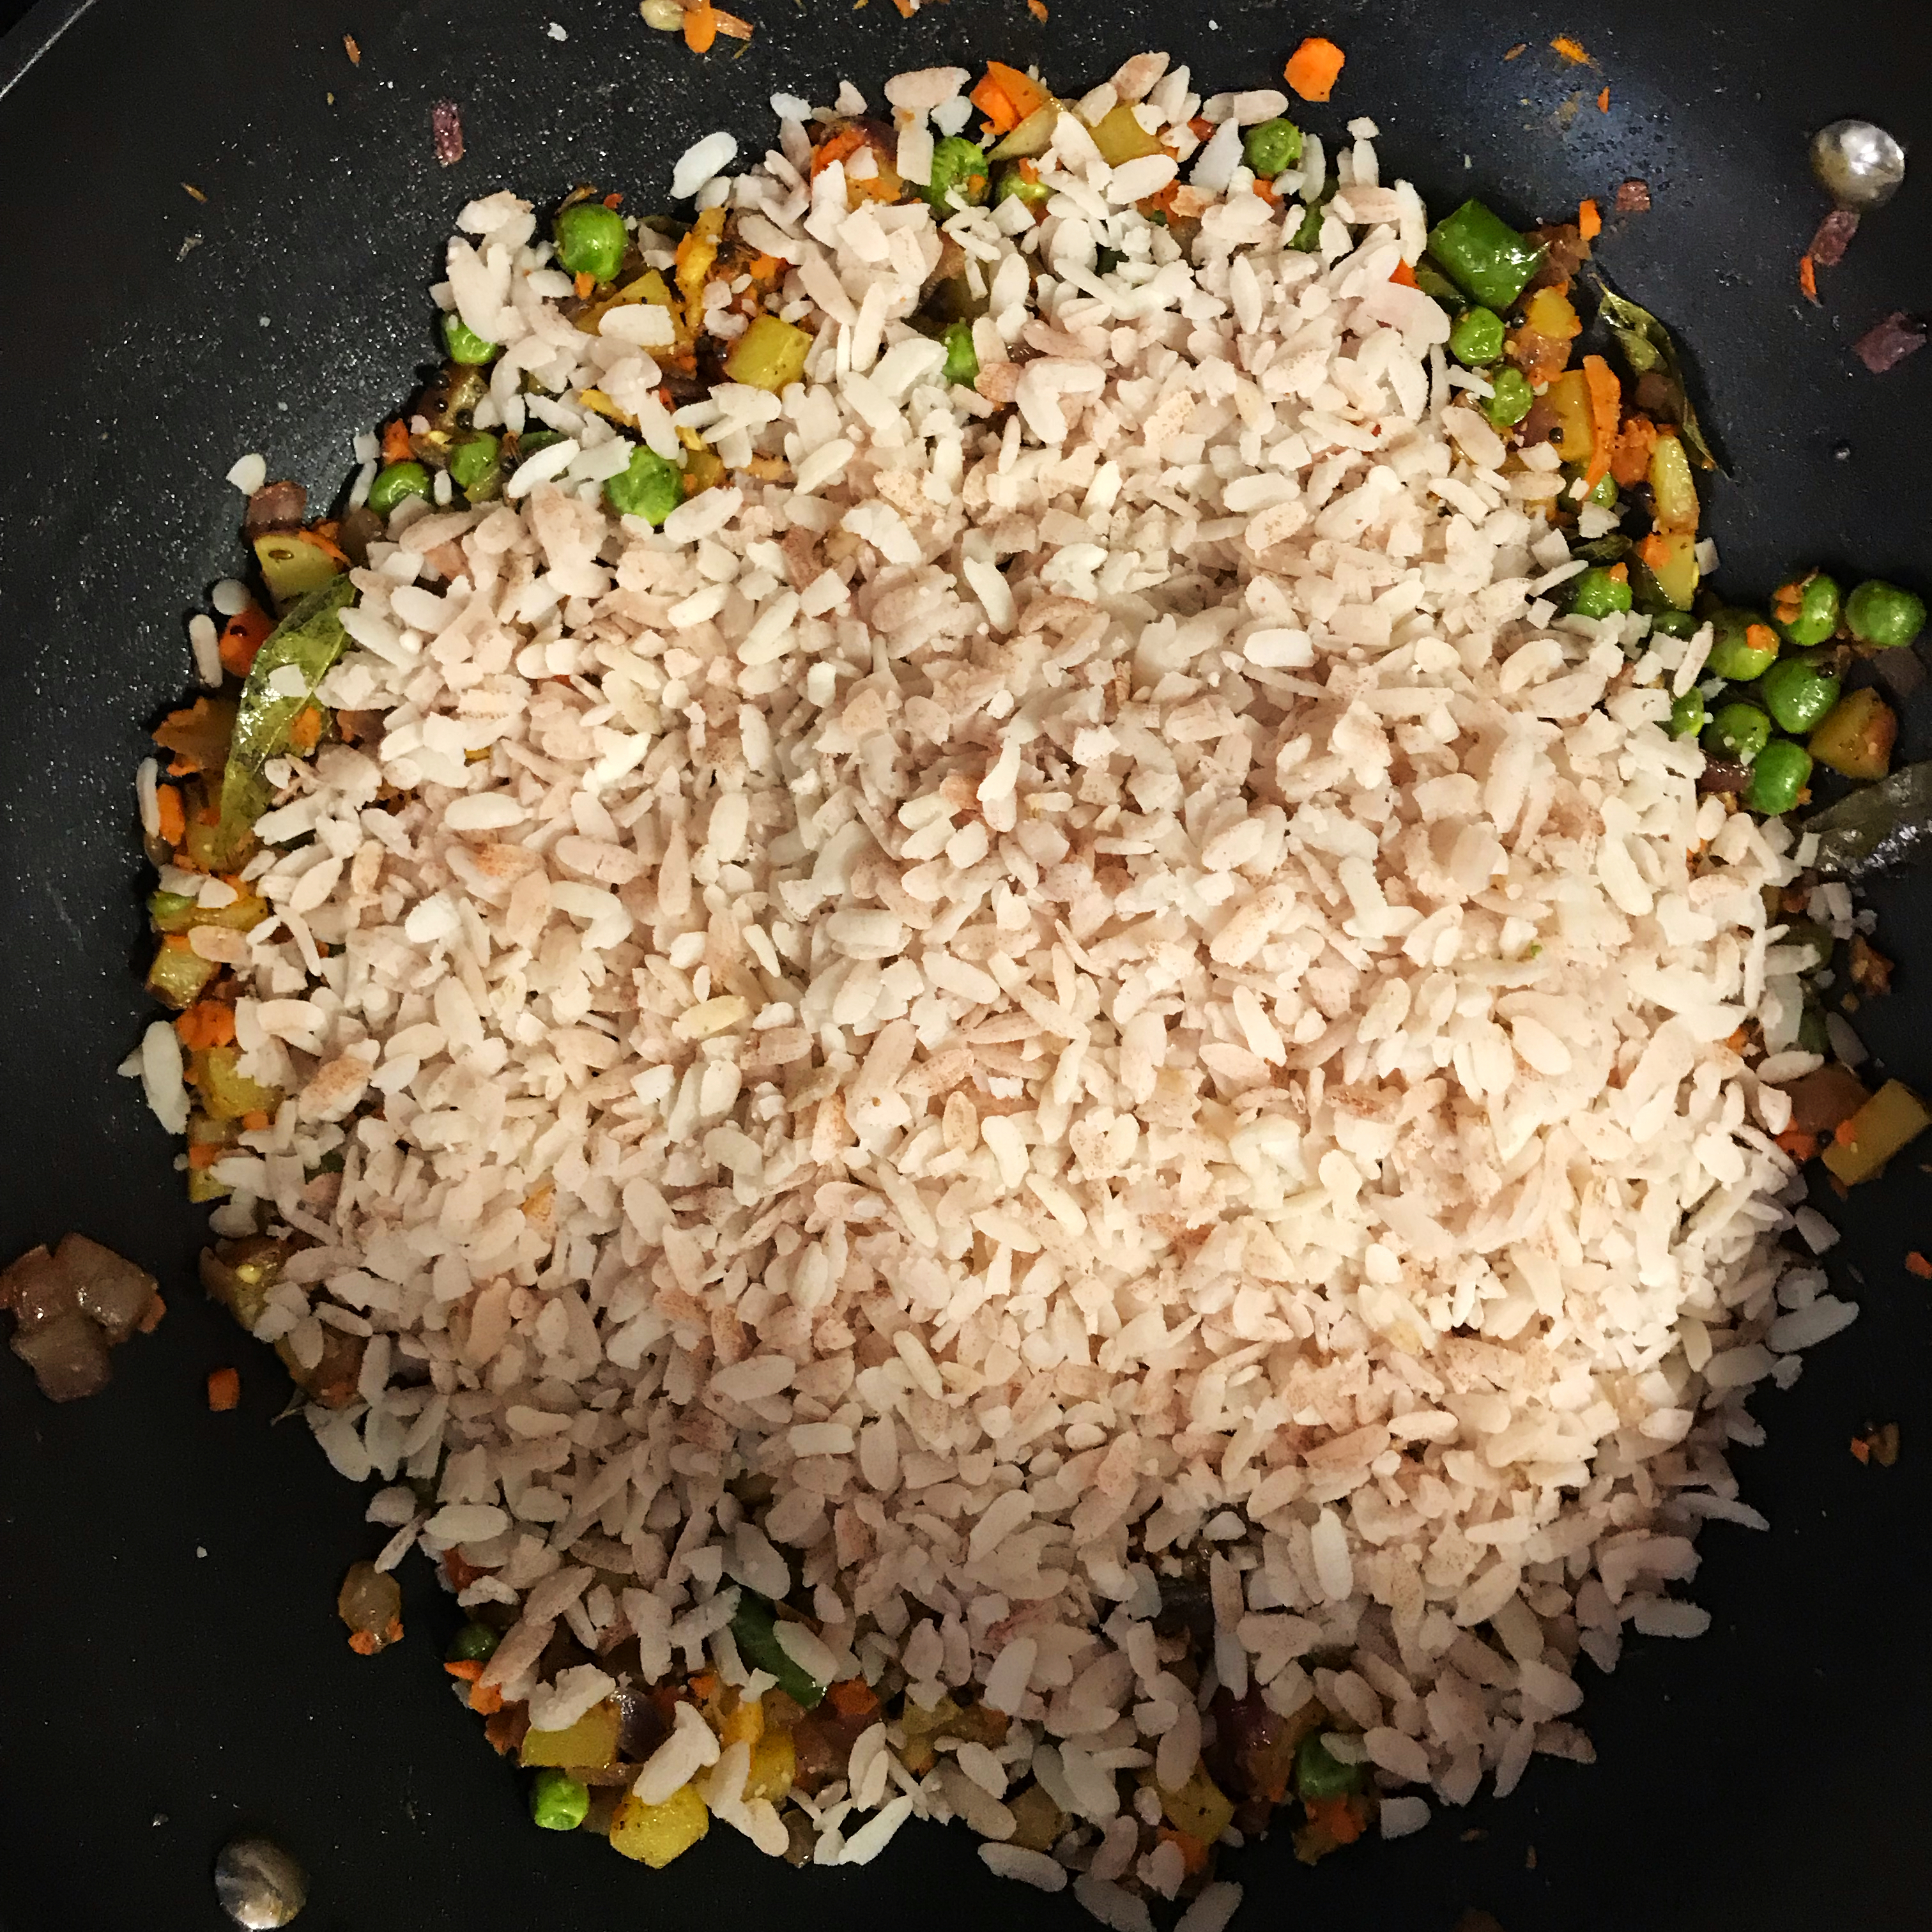
Add the poha, some more salt (taste and adjust according to your preference) and add about 2-3 tbsp of water sprinkled all over. This is an important step to keep the poha moist without making it mushy. Mix well, cover and simmer for a few mins until the flavors have married together. Once the poha, vegetables and spices seem to have come together, turn off the heat. Do not overcook as the poha will become dry.
With the heat turned off, add the ghee and freshly chopped cilantro. Mix well.
To plate the poha, serve it with a squeeze of lime topped with some crushed peanuts and some more cilantro if you like!
During my childhood years, there were many practices that were religiously followed at home. As we grew up, moved places, these rituals kept evolving and eventually there were a few such rituals which stood the test of time. One such ritual was that of an evening snack called Ghugni. It is a ritual which is still in place and practiced at least once a week in my parents home.
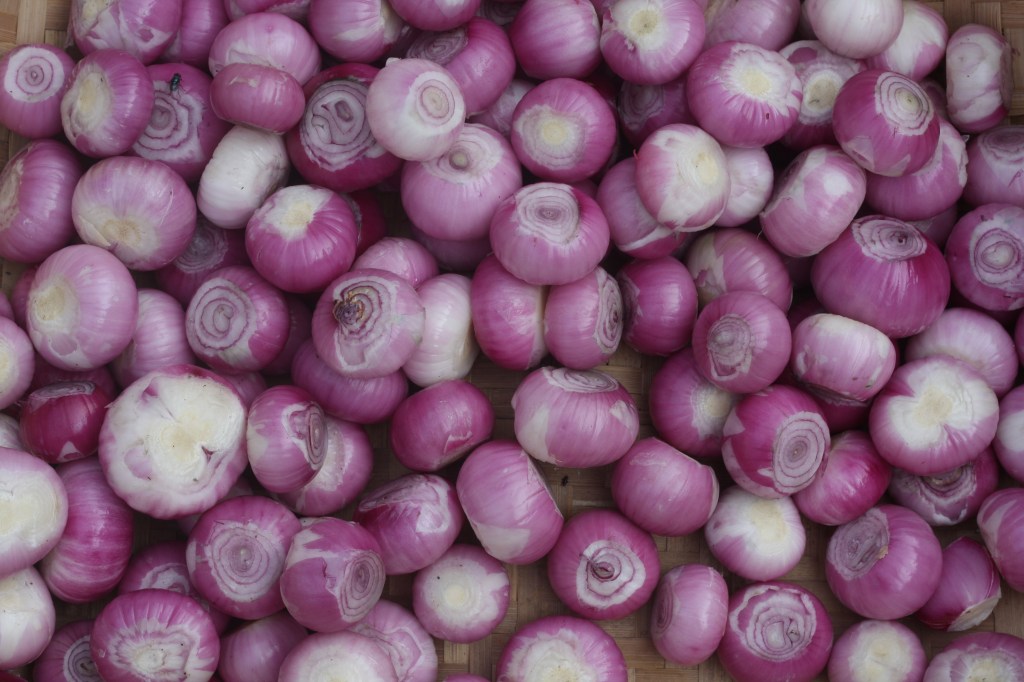
You may find it strange that I call this Ghugni and the picture shows dried black chickpeas. This is Ghugni as it is known in Bihar. It is different from the Ghugni I have posted previously. The previous one is made using dried peas with tamarind as the souring agent. This one is made using dried Black Chickpeas or Sookha Kaala Chana, simply known as kaala chana. Besides using different key ingredients, the two ghugnis are meant for the same purpose: snack / street food. However, they differ in their taste, texture as well as method of preparation.
Ma prepares for this Ghugni the night before. She soaks a generous amount of the Kaala Chana in water. The next morning she pressure cooks these soaked dried chickpeas with some salt. These cooked chickpeas are then ready to be cooked in some spices to make it into what is known in Bihar as “Ghugni”. This version of ghugni is usually had with some “chooda ka bhuja” or roasted/fried and spiced flattened rice(poha / chooda / chidva).
The good news is that Kala Chana has a number of health benefits. They are high in dietary fibre. They serve as a good source of proteins for vegetarians. Therefore, this is one of those snacks where you can eat as much, almost guilt free.
I find the Ghugni self sufficient as a snack. It definitely tastes much better the following day as the spices get sufficient time to infuse their flavours with the cooked chickpeas. It becomes a little dry with time so before serving, you will need to add some warm water and adjust the seasoning in order to suit your taste.
Bihari Ghugni Recipe: To print the recipe, click here.
Serves: 3-4 Preparation time: 8 hours soaking + 15 mins preparation [Mis en Place] Cooking time: Up to 1.5 hours including boiling the chickpeas.
A healthy vegetarian snack though it does require a little bit of advance planning.
Ingredients:
Black dried Chickpeas [Sookha Kaala Chana]: 1 cup
Ginger: 1 medium slice for boiling and 1 tbsp finely chopped for the masala
Garlic: 1 tbsp, finely chopped
Onion: 1 cup finely chopped
Oil: 1 ½ tbsp. [I used Mustard oil as that is used traditionally and I like it’s pungent smell and taste. You can use your regular cooking oil if you prefer]
Cumin seeds: 1/2 tsp
Cinnamon stick: 1 inch,
Bay leaf (dried): 1, medium sized
Dried red chilli: 1-2 (as per your tolerance).
Red onion: 1 cup, finely chopped
Dry Mango powder (Aamchoor): 2 ½ tsp
Ingredients for the spice paste:
Turmeric powder: 1/8 tsp or a generous pinch
Chilli powder: ½ tsp
Coriander powder: 1 tbsp
Cumin powder: 1 ½ tsp
Water: 2 tbsp
Ingredients for garnishing:
Onions: 1, finely chopped
Green chillies: 4-5, finely chopped
Lime: 1-2, cut anyway to squeeze the juice on the cooked ghugni.
How I did it:
Wash and soak the Sookha Kaala Chana overnight or for about 8 hours in water.
Wash it again. In a pressure cooker, add the Kaala chana, sufficient water making to cover the chickpeas as well as extra to make sure there is enough room for the chickpeas to expand in volume, a pinch of salt & a slice of ginger. Start the pressure cooker on high heat. After the steam builds up [first whistle], lower the heat to cook for another 15 mins. If using an open pot, make sure the chickpeas are cooked through – You should be able to crush them if you press them between two fingers. They should retain their shape and not be mushy at all. Allow the steam to release on it’s own. Discard the slice of ginger. Strain the mix, reserving the liquid for cooking.
In a deep bottomed pot or a wok / Kadhai, heat 1 tbsp mustard oil. Bring it to a smoking point, and then let it cool down. If using regular oil, simply heat the oil and move on to the next additions. Add cumin seeds, dry red chilli, cinnamon stick and bay leaf. Let the aroma release in the oil. Reduce heat if necessary, making sure the spices do not burn.
Next, add the finely chopped ginger and garlic. Fry for about 2 mins on low heat.
Add the finely chopped onions and a pinch of salt to season the masala. Fry on low-medium heat stirring continuously for about 7-8 mins until almost done. This is also called bhuno, a term used in Indian cooking which means to cook the spices slowly to ensure the maximum flavours are released and the raw smell from the spices and ingredients no longer exists. Doing this step right is essential to maximise the flavour of any dish.
While the onions are frying, mix together all the ingredients listed under ‘Spice Mix’ and add next.
Continue to cook the masala for another 2-3 mins until there is no raw smell of any masala.
Next add dry mango powder (aamchoor) & the drained and boiled Kaala Chana
Increase heat to high and continue to stir making sure the masala sticks to the kaala chana.
Keep adding 2-3 ladles of the reserved boiling liquid and continue cooking on low-medium heat until the liquid is absorbed by the Chana. The liquid additions should be enough to make sure the Chana has some extra liquid. The idea is to slowly infuse all the flavour from the liquid into the Chana while cooking the spices.
Repeat this process until all or most of the liquid is used up. Remember that the cooking liquid already contains salt. Taste often to adjust the salt if needed.
If serving later, heat up the chana, adding a little water to make it moist. We don’t want this to be too dry. If adding water, adjust the level of salt.
Serve in bowls or a plate, garnished with chopped onions, green chillies and lime. Traditionally, this is served with chooda ka bhooja or lightly spiced and roasted beaten rice. I find this tastes great on it’s own too.
Notes:
Chop the ingredients for garnishing just before serving. The freshness of the onions, green chilli and lime will elevate your snack to another level.
I spend a lot of time cooking this ghugni slowly. It helps to infuse flavours to these chickpeas and I find it totally worth the time and effort.