Beetroot Koshimbir(-ish)

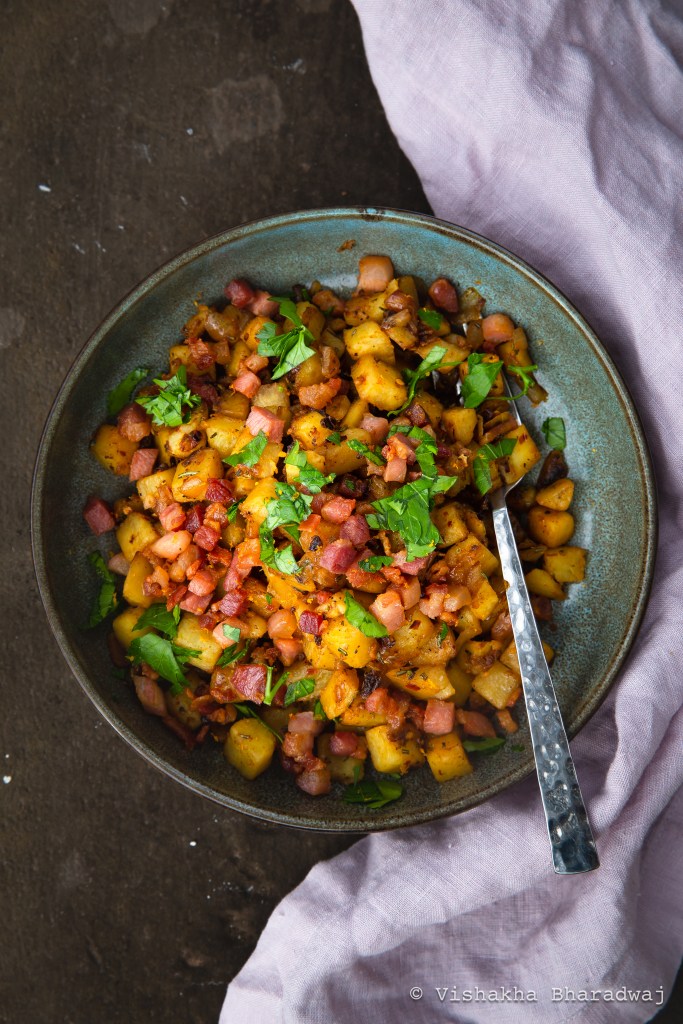
I wasn’t really in the mood to cook anything elaborate today .. well that’s me many days! I used to beat myself over it in the past. But over the years, I’ve come to realize that it can be a blessing in disguise. It makes me more efficient and creative in the process.

I checked my fridge and these beets were lying neglected in a corner. They demanded my attention and I was happy to give it to them, but … umm.. just not indulge them too much 😉

So that’s the birth story of this marvelous recipe 😉

Inspired by the Carrot Koshimbir, I learnt a couple of years ago from @indianfoodrocks, here’s what I did. Now this probably isn’t authentic and it wasn’t my attempt to make one either. But this is what I made and this is exactly what I’d like to share with you. I hope you enjoy it as much as my family and I did.

Serves 3-4 (as a side)

Ingredients:

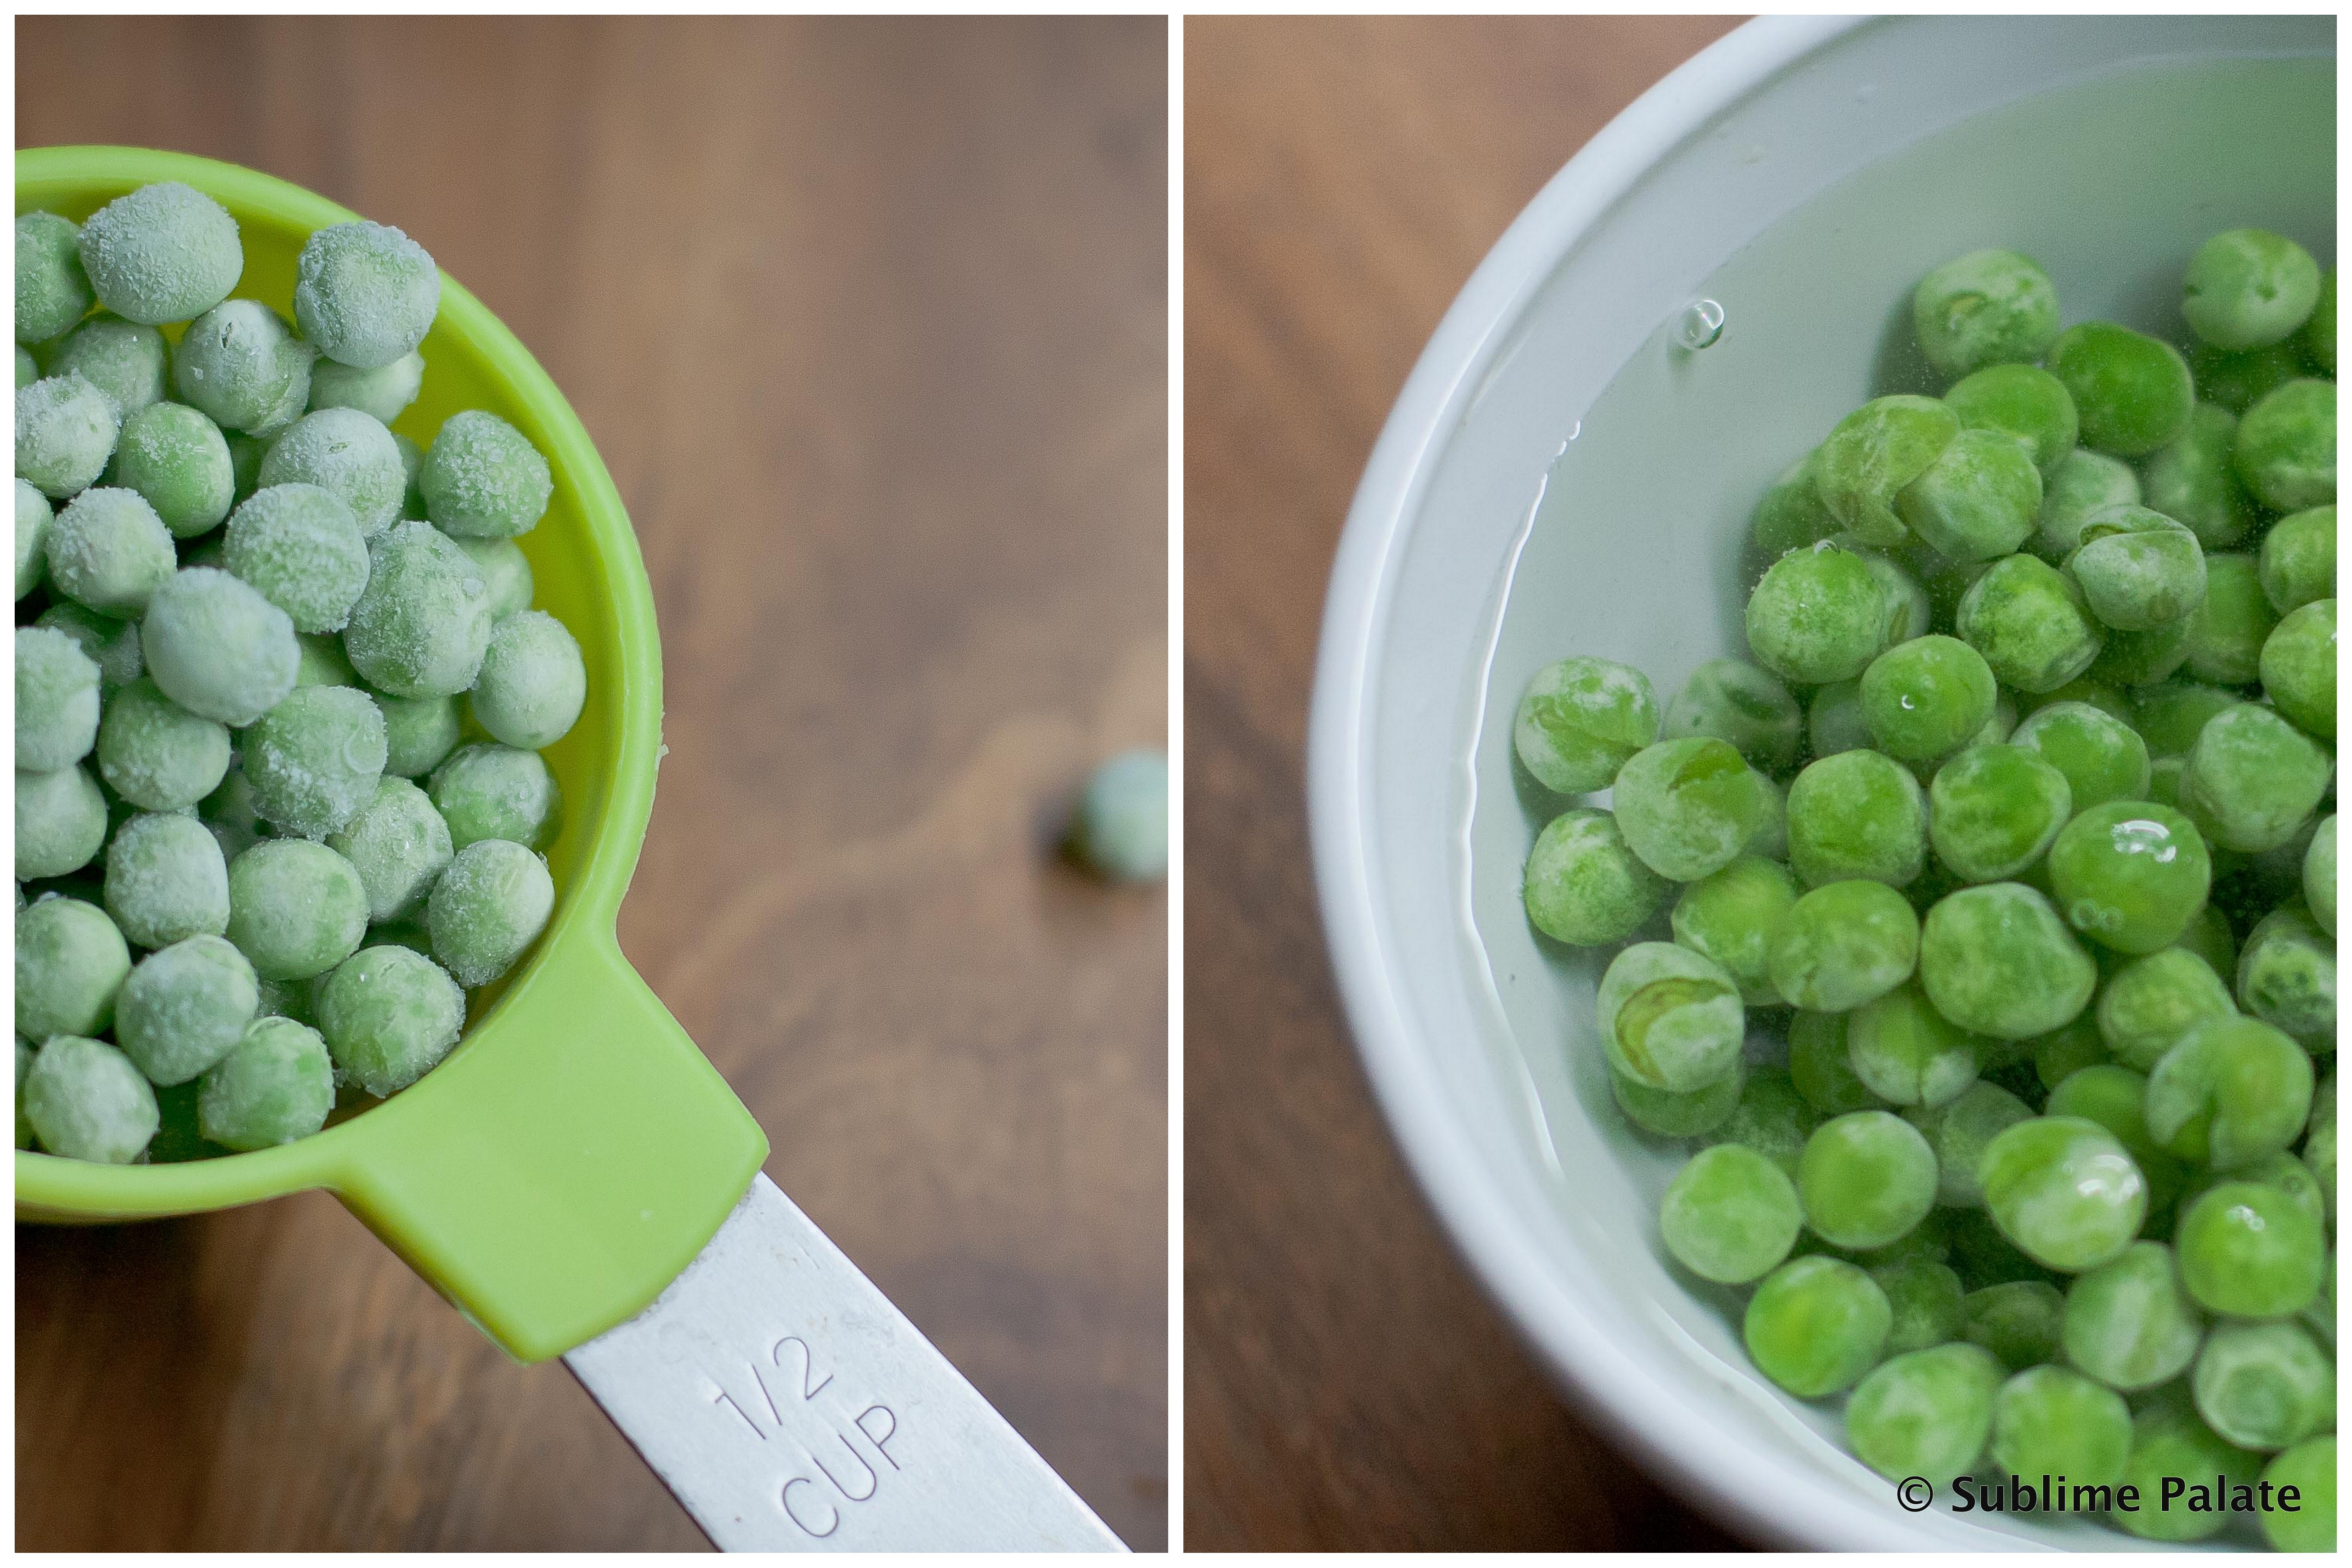
Beetroot : 2, large. Washed, Peeled and grated using the big holes of your box grater.
Lime: juice of 1 (adjust according to taste)
Salt: to taste
Ground black pepper: a pinch or two

For the tempering:

Coconut oil: 1 tbsp (you can replace it with any neutral oil if you like)
Mustard seeds: 1 tsp
Split,Skinless urad dal: 1 tbsp
Green chillies: 2 (My kids were eating it, so i kept the green chillies whole. You can chop it up if you like it spicy)
Dry red chillies: 2, torn in half
Curry leaves: 10
White sesame seeds: 1 tbsp
Sliced almonds: 2 tbsp (can be replaced with peanuts)
Salt (a pinch)

Method:

  1. In a microwaveable bowl/plate, add the grated beetroot and 3 tbsp of water. Cover it with a microwavable lid, leaving a little space for the steam to escape. Microwave for 2 mins. Stir. Then additional 1 min. I want them very slightly cooked, while still retaining their crunch.
  2. Remove from the microwave and squeeze the juice of 1 lime. Add some salt to taste and ground black pepper. Mix well. And let it sit for 20 mins. Transfer it to the serving plate.
  3. Make sure you have all the ingredients next to you before you start the tadka process. You’ll have to work very quickly now.
  4. After 20 mins, heat coconut oil in a tadka pan. You’ll have to work very quickly now as these ingredients burn fast. Add the mustard seeds. Once it starts to splutter, reduce heat and add the cumin seeds, urad dal, sliced almonds and dry red chillies. 
  5. Stir for a couple of seconds and add the green chillies, curry leaves and the sesame seeds. Keep stirring. A few seconds more and you’ll notice the almonds start to get darker in color. Turn off the gas at this stage. Sprinkle a pinch of salt in the tadka now, mix everything and add it over the grated and microwaved beetroot. That’s all it takes and you have an amazing Beetroot Koshimbir / salad / side ready in no time!

Advertisement

Sweet Potatoes w/ Pancetta, Rosemary and Mandarins.. Let’s get the party started!

Sweet Potatoes with Pancetta and Rosemary

A few weeks ago, I had a couple of these sweet beauties (sweet potatoes) lazing around. It was a Friday and the kids were in school, which meant, I could give my full attention to creating something with all of my senses fully present. There was no yelling, no interruptions and I had time to myself. If you have little kids at home, you know exactly what I am talking about! And if you don’t, then just take my word for it!

Going back to my story about the beautiful sweet potatoes… I opened my fridge for inspiration. I often do that before I start cooking. I stare at the produce and most days that is how I get inspired!

It’s like a party with a special guest list .. you know, the ones which say ‘By invitation only’ ! I opened the chiller and stared some more. Pancetta! There was a light bulb moment! And.. the idea of inviting Pancetta to this party got me super excited!

Now I also needed something earthy to match the meatiness of the pancetta while serving as a bridge between the sweet potatoes and the meat. I began a quiet search for this next guest. And there it was. The fresh rosemary stalks beautifully intertwined together with the confidence one has when they are the party starter!

I started prepping the ingredients, super excited but I got a certain uneasiness that I was missing out an important guest on the list. I needed something a little refreshing and zesty to lift it all up and make it fun! Just then, the mandarins said ‘hello, is it me you are looking for?’! (Sorry, I just couldn’t help it!)

The preparation was done and now we needed some music because what’s a good party without great music and dancing?!

This is an excellent party starter .. perfect for an appetizer or just by itself as a snack when you are in the mood for something delicious! Also, you can always make it vegetarian by removing the Pancetta, using ghee (or Oil for a vegan version) and topping it with some fried cashew nuts!

So, without further ado, let’s get the PARTY started!

Sweet Potato with Pancetta & Rosemary with hints of mandarin!

Total time: 30 mins
Preparation time: 10 mins
Cook time: 20 mins

Ingredients:

Pancetta : 1 store bought packet or 4 oz or 113 gms (I used 1 4 oz packet of Boar’s Head brand diced uncured Pancetta)
Garlic: 2 cloves of garlic – sliced or if you prefer, you can chop it finely
Onion: ½ cup of finely chopped onions (I used yellow onions)
Ghee or any oil of your choice: 1 tsp
Salt
Pepper: to taste
Rosemary: 2 stalks, washed, stems removed, leaves finely chopped
Dry Chilli flakes or freshly chopped Thai red chilli peppers – 1. Just a hint of spice is needed
Sweet Potatoes: 2 cups of medium diced sweet potatoes (As a ballpark, I used around 2)
Mandarin: Juice of ½ a mandarin + Zest of 1 mandarin
Fresh parsley: a small handful, Finely chopped, as garnish

Preparation:

  1. Finely slice the garlic, if you are lazy like me and you love garlic. Otherwise, mince it finely.
  2. Finely chop the onions to yield ½ cup of onions. I used yellow onions. You could try with red onions, shallots. They would all go well.
  3. Wash the rosemary stalks. Pat them dry. Now remove the leaves from the stem and finely chop them.
  4. Peel the sweet potatoes. And cut them into medium dice.
  5. Take the zest of a mandarin. Cut it into half and juice ½ the mandarin. I challenge you to not juice the other half directly in your mouth and get some of that zesty orange juice stuff all over your face.

Method:

  1. Heat a flat, heavy-bottom pan. I would recommend using something which has a broad surface area that can be used for cooking.
  2. Add the pancetta and mix it around until it renders fat and turns nice, brown and crispy.
  3. Now remove it from the pan. If the oil left behind is enough, you don’t need to add any more oil. If not, you could add a tsp of oil or ghee. I used ghee because I love ghee.
  4. Add the garlic and stir it around until it releases aroma. Do not brown it.
  5. Next add the onions/shallots or whatever you are using. If you are using fresh Thai chilli peppers, finely chop them and add them together with the onions. Season with salt & pepper and sweat it. Go for a translucent colour without browning.
  6. Next, add the rosemary leaves and the diced Sweet potatoes. Season again with salt and pepper. Cook this covered for the next few mins on medium-low heat to get them cooked through but remember stirring them every few.
  7. Once the sweet potatoes are cooked, add the zest and keep heat to medium and just let the edges turn a little brown. Now deglaze the pan by adding the juice of ½ a mandarin. It will sizzle and who doesn’t love a good sizzling sound! Combine the flavours and remove them into your serving dish. Now top it with the Pancetta and a little bit of fresh parsley and you are good to go!

Notes:

  • If you choose to make a vegan version of this, do not include the pancetta. Use coconut oil or any oil of your choice and instead you could add some dry roasted, crushed peanuts as a topping to replace the Pancetta.

Cooking in the backyard: Thai style Tuna Fried Rice

IMG_7698

Thailand, a country full of little family-owned café’s. These little café’s are usually set in a comforting, home-style environment. Here you’ll experience what I call ‘cooking in the backyard’. It is also how a lot of traditional homes are designed with a wet kitchen in the backyard. You’ll often see the young school going teenager lending a helping hand to his or her parents. During rush hour, the kids even help with the cooking. It’s inspiring to see these young chefs cook with such exuberating confidence.

IMG_7718

I stand there watching, as the man on my side of the counter passes a white slip over to the Cook. The Cook, a lady probably in her late 40s, has a very pleasant disposition. She smiles at me as she gently heats up the wok while taking a quick glance at the white slip of paper. She’s probably done it a thousand times over and over again. She looks like she could do this with her eyes closed.

As the wok heats up, she takes some garlic and chillies and gently pounds them using a mortar and pestle. The mortar and pestle is always by her side. She is extremely organised with each ingredient placed less than an arms distance away, just where it should be. She always has a big icebox next to her where all the chilled meat is kept. She opens it just a bit, takes out the required portion of the meat and closes it again until the next order comes in.

IMG_7703

An artist in her own right, she knows how to play with her tools – the mortar and pestle, the wok, the ladle and the fire. She uses the fish sauce, sugar, soya sauce, pepper and other herbs and spices to tell her story. She fires up the wok, turning and tossing the ingredients, adding them one after the other, all in good time, adjusting the heat as she deems appropriate. Within minutes, she creates food that is a treat to all your senses. A modest melamine plate in basic white, with or without patterns is placed right next to her. She plates her food and places a few slices of cucumber and a slice of lime, all in such an artistic manner.

IMG_7706

As the plate makes its journey from the wok to my table, my eyes see the color coordination including the Thai green chillies and the freshness of the lime. As it is placed in front of me, I get the smoky aroma that creates a suspense that I want to unfold, almost immediately. As I take the first bite, I know it has touched all my senses and a memory has just been formed.

 As the lady moves on to the next white slip where the orders are scribbled, a quick rinse and a scrub is all it takes to have her Wok ready to create the same brilliance all over again for the next waiting customer.

IMG_7701

Here is my version of a Thai style Tuna Fried Rice, a dish I had for many lunches during the years that I lived in Thailand.

For the printed recipe, click here.

Serves: 3

Ingredients:

Pre-cooked and cooled Thai Rice (preferably cooked the night before): 2 ½ cups
Red Onion: 1 Cup finely chopped
Thai Green chillies: 4-5, chopped fine (This makes it very spicy, adjust to your own tolerance)
Garlic, lightly pounded: 3 cloves
Olive Oil: 1 tbsp
Canned Tuna flakes in EVOO (use any other similar variety): 150 gms, oil drained.
Spring onions (Scallions), finely chopped (green parts): ¼ cup
Fish sauce: 1 Tbsp
Dark soya sauce: 1 tsp
Worcestershire sauce: 2 tsp
Black Pepper powder (coarsely powdered): ¼ tsp (or adjust to taste)
Salt: a pinch

IMG_7711

How I did it:

  1. The rice needs to be precooked and cold. This is important to ensure the grains of rice are separate and not lumpy when making the fried rice. When cooking the rice for fried rice, put a little less water than you would do normally.
  2. Heat a wok. When the wok is hot, add oil to it.
  3. Add the lightly pounded garlic. Reduce the fire and let the garlic cook for a few seconds without getting burnt. Add the chopped onions and green chillies. Let it soften while stirring continuously. Onions will change colour to a beautiful pink. Approx 3 mins on low heat.
  4. When the onions turn pink, add the cold and precooked rice and a tiny pinch of salt and increase the heat to high. Using the back of a ladle/spatula, push the rice towards the centre of the wok, removing any lumps while mixing it with the onions.
  5. Now add the tuna followed by all the sauces and the black pepper powder. Bring it together on high heat.
  6. Add the chopped spring onions. Give it one last good stir and serve it immediately with some sliced cucumbers and wedges of lime.

Collages30

Notes:

–        Fish sauce is quite salty. I would suggest that you add half the quantity of fish sauce first and adjust the taste as per your liking.
–        In my opinion, a fried rice cannot have the same texture and taste if it’s cooked with freshly cooked or hot rice. Therefore, try to cook the rice at least a few hours in advance.
–        If you don’t have spring onions, replace it with some finely chopped fresh coriander leaves or cilantro. That little bit of green is essential to provide a little freshness to this simple fried rice.
–        I had to cook for my 4 year old son, so I added the green chillies right in the end. If not, I would have added them together with the onions, or lightly pound them together with the garlic in the very beginning. Go ahead and do whatever suits your situation. If you are making this for kids, omit the green chillies.

The simple things in life: Mung Dal [no onion-no garlic]


IMG_7686


When life begins to feel complicated, I take a moment to reflect on the meaning of happiness and what it is for me. Is it really a bigger house, more money, an expensive bag or things like that? Yes, I would be lying if I said these things didn’t make me feel good at all. It does, but for that moment and may be a few days more. The only problem is if I continue to seek happiness in such things, my definition of happiness will keep getting complex.. and there’s really no end to it. There is always a want for more… and more. Nothing wrong with it but I find it important to take a moment, think back and put things in perspective.

It’s always the simple things in life that gives me true happiness. I am sure it’s the same for you too. In my quest for happiness, I listed a few things (not in any particular order) that make me truly happy:
A hug from my 4 year old child
Being a Mom
A good cup of ginger tea (chai) early in the morning
An unknown, probably insignificant, little flower my child picked up from the roadside. Just for me.
A conversation with my closest friends
A breath of fresh air
Soaking the sun rays
Companionship
Recalling childhood memories
A simple home made meal: Dal-Chawal

IMG_7696

Dal-Chawal or Lentils-Rice. A combination which is a staple in India. It may be in different variations depending on which part of India or which home it has been cooked, but essentially it is lentils or Dal and Rice.

Every time I travel, I immerse myself in the food and culture of that place. It’s an unspoken rule that we never order Indian food when traveling [outside of India]. However, when I come back home, the first meal cooked, without fail, is a very simple Dal-Chawal.

I wouldn’t even want to call this a recipe considering this is such a staple in Indian households. I still choose to write the method down as every home has their unique way of cooking lentils. Dal is cooked in a lot of Indian homes, almost every day. And that is also the reason, why one gets bored of eating it ever so often. In order to bring variety to Dal, I like to rotate the kind of lentils I cook. My pantry is stocked with some 7 different types of lentils/beans. I don’t cook Dal all 7 days a week but it definitely finds it’s way to our dining table at least 3 to 4 times a week in various forms.

IMG_7680

This preparation is quite simple – No onions, No garlic. A simple Dal flavoured with cumin seeds, asafetida and tomatoes. The cumin seeds, asafetida and tomato are the main players in this act. Asafetida gives it a pungent taste and tomatoes add a mild sour flavour to the Dal. It’s a little tough to tell which one is more dominating – the asafetida or the tomatoes, but together, they rule the otherwise modest Mung beans.

IMG_7685

The process of making this Dal is two fold. Part one involves roasting the Mung beans and then softening the beans while infusing it with some fresh ginger. Part two is the tadka or tempering that will add the flavours to the Mung. The tempering is done in ghee or clarified butter with cumin seeds, asafetida, finely chopped (or grated) tomatoes and some Kashmiri chilli powder for a mild spicy touch.

IMG_5770

I am also sending this recipe to Aparna of My Diverse Kitchen for the 61st edition of MLLA. My Legume Love Affair (MLLA) was started by Susan of the Well-Seasoned Cook and is now being carried forward by Lisa of Lisa’s Kitchen.

Mung Dal with Asafetida and Tomatoes (no onion-no garlic)
Serves: 3-4
Time: 30 mins

Ingredients:
Yellow Mung beans / dal / lentils: ¾ cup
Asafetida (hing): ½ tsp
Cumin seeds: 1 tsp
Tomatoes: 2 medium sized (about 1 + ¼ cup of finely chopped)
Kashmiri Chilli powder: ½ tsp
Ginger (grated): 1 tsp
Turmeric: 1/8 tsp or roughly a big pinch
Salt: to taste
Water: 2 cups
Ghee: 1 tbsp

IMG_7679

Method:

  1. Dry roast the Mung beans. I do this in a pressure cooker to avoid getting too many utensils dirty. Keep stirring the beans constantly to ensure they are evenly roasted. I did this on medium heat for about 5-6 mins. When roasted, take it off the heat. Rinse with water 2-3 times.
  2. In a pressure cooker, add the rinsed Mung beans, 2 cups of water, a pinch of turmeric, ginger and salt. Cook the beans until soft while still retaining their texture. If you are using a pressure cooker, let the steam build up on high flame. Then lower the flame and let it cook for another 5 minutes until done.
  3. While the Mung beans are getting cooked, heat ghee in a pan. Add cumin seeds. When they are done, add the asafetida and chilli powder. Let it cook for a few seconds. Then add the chopped tomatoes and a pinch of salt. With the heat on high, cook the tomatoes constantly stirring it to ensure they are not burnt and until the raw smell no longer exists.
  4. When the tomatoes are cooked, reduce the flame. Add the Mung beans. Add water to a consistency you want and adjust the salt as per your taste. If you want to add chillies, add 2-3 slit chillies (a combination of green and red adds a nice colour.. You can add just green too and skip the drama). Let it come to a boil on high heat and then simmer for 3 minutes.
  5. Garnish with coriander leaves and serve hot with rice and any vegetables of your choice.

2013-07-30

Roasted Chicken with Rosemary

‘I don’t know what to cook tonight’ – a dilemma many of us face on a day-to-day basis. Every time, ok almost every time, you think of making dinner, you probably end up saying that to yourself. I do! A close friend has just initiated a group on Facebook by precisely that name – ‘I don’t know what to cook tonight’. She is a great cook herself and there are already some interesting recipes being shared there. Do hop on over there and join us:)

The first post in that group also happens to be a Rosemary Chicken. To see her recipe, check out the group. I promised to share to share my version as well, so here we go.

One warm, humid night in October last year, I made this absolutely juicy and flavourful chicken dish for the nth time. I took photos of the process, almost making the recipe dummy-proof. In case you are thinking how brilliant my memory is, just hold on to that thought. The reality is – it isn’t! The place where I live, is warm and humid practically most of the year 😉

Roasted Chicken with rosemary

So let’s rewind back to October 2012, I took out my [then brand new and now almost hammered phone], and clicked pictures of the making of this dish. Honestly, there are times when I really couldn’t be bothered with how the photograph turns out. And there are these other times, where I can go to any extent to get the photograph I want.

This Chicken is great for a weeknight meal, though you’ll need to do the marination before hand. 2 hours would be great but 1 hour will give you good results too. There’s no long list of spices for the marination. And other than the rosemary and the chicken, it’s ingredients which you’d most likely have in your pantry. The marination is an important step to give this dish that depth of flavour. The process of searing and then roasting at the right temperature is important to make the chicken juicy and packed with flavour.

For the printed recipe, click here.

Here’s how I did it :

Serves: 2-3
Marination time: 1-2 hours
Cooking time: 5 minutes for Searing + 20 minutes for roasting

Ingredients:

Chicken thigh (Boneless) : 230 gm each x 2 pcs (approx)
Dried rosemary herbs : 1 tbsp
Fresh rosemary stalk (optional) : You can skip this if you don’t have. I just added it while roasting because I had them this time : 2
Minced garlic : 1 tbsp
Olive oil : 1/2 tbsp to marinate + 1/2 tbsp for searing the marinated chicken.
Lime juice : 1 tsp
Coarsely ground black pepper powder : 1/4 tsp
Salt : to taste

Method:

1. Using a knife, make slits on the Chicken pieces. Marinate the Chicken for 1-2 hours with the above ingredients reserving 1/2 tbsp of oil for searing the Chicken. Make sure you rub the ingredients into the slits of the Chicken so that the flavours can go deep into the meat.

2. Preheat oven to 180 deg C.

3. In a skillet, heat 1/2 tbsp of olive oil. When the oil is hot and on high heat, sear the marinated chicken pieces on both sides for about 1-2 mins on each side. The idea is to give a golden brown colour to the chicken without completely cooking it.

4. Line a baking tray w aluminium foil. Place the seared chicken pieces on the aluminium foil and set it to roast for 20 minutes.

5. Remove from oven. Let it rest for 5 minutes before serving. We usually have this with some stir fried vegetables and a pasta or a pasta with vegetables in it.

Note: I have made this with Chicken breast meat as well and it tastes just as good. If using Chicken breast, roast for 15 minutes only or it will become very dry.

Step by Step

photo_

Crispy Salmon with Garlic Coriander sauce

Crispy Salmon with Garlic Coriander Sauce

There are 2 kinds of people in this world: Those that love Salmon. And those that don’t. That’s probably true of most things, but I couldn’t come up with a better opening line. So, there you go!

I happen to be the former and so is little V. I hereby declare my eternal love for Salmon. R, on the other hand, doesn’t quite get what the fuss is all about! But we [V and I] find a way to work around it. We just make him eat it. 😉 And he does.

We especially love the crisp skin of the Salmon. The skin absorbs a bit more salt than the rest of the fish and that makes it even more desirable. When there’s Salmon on the dinner table, all else doesn’t quite matter, does it? 🙂

I have made this countless number of times for V and it’s quick and easy to make. If you are a Salmon lover like me, I won’t need to sell the recipe to you because you will probably love it anyway 🙂

In it’s simplest form, all you need is some crushed garlic, salt, pepper and olive oil marinade with the salmon. Pan fry (with minimal oil) and you are done. In this version, I added a slight variant – fresh coriander leaves or cilantro. If you have a particular dislike for coriander, feel free to omit the coriander leaves.

We usually have this Crispy Salmon for dinner on a weeknight when I don’t want to spend too much time cooking. This goes well with a simple vegetable pasta or just plain rice and stir fried vegetables.

To print the recipe, click here.

Crispy Salmon with garlic coriander sauce

Serves: 2
Total time taken: Under 30 minutes
Preparation time: 20 minutes
Cooking time: 7-8 minutes

Ingredients:
Salmon fillet with skin on (about 250 gms)
Garlic cloves: 1-2 (adjust to taste)
Fresh coriander leaves – a bunch. Discard the roots.
Black pepper powder: a tiny pinch
Juice of ¼ of a lemon
Zest of ½ a lemon
Olive oil: 1 tbsp
Sea salt: to taste

How I did it:

1. Squeeze the lemon juice and zest on the salmon fillet. Sprinkle sea salt to taste. Put a little less than required as we will also season the sauce.

2. Prepare a quick blend of the garlic, coriander leaves including stalk but not the roots, a tsp of olive oil and sea salt.

Preparing the garlic-coriander sauce.

3. Rub the prepared coriander, garlic sauce (the marinade) on the salmon. Sprinkle a dash of black pepper powder. Let the Salmon marinate for about 15 minutes.

Rub the Marinade on the salmon.

4. Heat a pan. Add the remaining olive oil (2 tsp). Make sure the the oil is hot before placing the salmon fillet in it. This step is important to prevent the fish from breaking and disintegrating.

5. Place the salmon fillet, skin down first. Reduce flame to lowest. Cover and let it cook for 5 minutes.

Heat a pan. Add olive oil and place the marinated Salmon, skin down. Cover & let it cook for 5 minutes.

6. After 5 minutes, turn the salmon for another minute. Do not cook on this side for long as the salmon will start to overcook.

Turn the Salmon over and cook for another minute.

7. Serve w lemon wedges.

Crispy Salmon with Garlic Coriander Sauce

Cranberry, Cauliflower and Peas Pulao

IMG_1164

Hello everyone,

Yes, it has been an awfully long time since I have been away. Thank you to those who have missed me, checked on me and encouraged me to come back. It means a lot and thank you for being there! I have missed sharing my thoughts and recipes on this platform.

I am looking forward to sharing some of the food that I have been eating and cooking. Let’s start with rice dish – a staple in my house.

Did I ever mention my dislike for raisins? I am not, I mean, really NOT fond of raisins. No, not even a bit. On the other hand, little V, who, by the way, is not that little any more, can survive on raisins alone. That is, if he had his way 🙂 He can have as many raisins as he can get his hands on.

I was cooking a quick + less effort lunch for us one week day when I thought of adding raisins in the pulao (pilaf) to please him. But to my surprise, he suggested dried cranberries instead. I immediately jumped with joy and happily took his suggestion. His love for cranberries comes a close second to raisins. So, there you go! We had a win-win situation.

When my rice was soaking and I had some time to think, I just happened to glance on the bottles of sunflower and pumpkin seeds which were kept on the kitchen counter and I normally add to oats for breakfast. I thought – why not?! So there we go, at the end of it, we had a beautiful and crunchy twist to the usual Pulao. I roasted them in a little bit of ghee together with half of the dried cranberries and added them as a garnish. It gave the Pulao a whole new dimension!

IMG_1155

For a printable recipe, click here. 

Serves: 2
Cooking time: 15 minutes + 5 minutes resting time
Preparation time: 30 minutes

Ingredients:

Rice: ½ cup
Dried bay leaves: 1-2
Cloves: 4
Cumin seeds: ¼ tsp
Whole black pepper: 8 nos.
Star anise: 1
Cauliflower: 8-10 medium and evenly sized florets
Peas: ½ cup frozen or fresh (I used frozen)
Cranberries: 15 pcs approx. (adjust to your liking)
Sunflower seeds & Pumpkin seeds: In equal amounts ¼ cup in all
Cashew nuts: about 6 pcs, roughly broken in twoCinnamon stick: 1 thin stick
Ghee: ½ tsp for the rice and another ½ tsp for frying the garnish
Salt to taste
Boiling water: 1and ¼ cups

Method :

Rinse the rice with water at least twice. Soak the rice for 15 mins. At the end of 15 mins, set it aside to drain for 10 mins using a strainer. Put about 2-3 cups of water to boil which we will need later.

Final CPWhile my rice was soaking, I soaked 1/2 a cup of frozen peas in water for at least 10 mins.

Final CP1-002

Now that the peas were taken care of, I quickly went on to cut / break cauliflower into about 8-10 pcs of of medium sized florets. I also roughly chopped the cashew nuts in halves. When these were done, I put my garam masalas aside to make sure I had everything ready when the pot went on!

Final CP3

I heated half a tsp of ghee in a pot in which I was going to make the pulao. I added the cumin seeds and all the whole garam masalas.

At this point, I lowered the heat to make sure they don’t burn. When the garam masalas start to emit a nice aroma and before they burn, I added the cashew nuts and half of the cranberries. Make sure you stir it continuously and keep the heat to low. It’s really easy to burn them at this stage. When they get a nice color (1-2 mins on low heat), it’s time to add in the vegetables.

Collages22

Add the peas and the cauliflower florets with the heat on medium. Fry for another minute. Next, add the rice and mix it without breaking it to make sure the rice is coated with every bit of ghee there is in the pot.

Final CP6

Now carefully add 1 and ¼ cup of the boiling water and salt. Gently mix and taste for salt. A pulao is never too salty, so go easy on the amount of salt you add. Quickly lower the heat to the lowest mark, cover with a tight lid to not allow any or minimum steam to escape during this process. Set your timer for 11 minutes.

Final CP7

Meanwhile, heat a little ghee in a small frying pan. Have your sunflower seeds + pumpkin seeds + remaining dried cranberries ready by your side.

Final CP4

As soon as the ghee melts, add these beauties and fry them on low heat until the seeds get a nice warm golden color. The cranberries just swell up a little and they look absolutely gorgeous.

Final CP8

At the end of 11 minutes, turn off the heat from the pot of Pulao. Now, I know if you are like me, you’ll just want to open the lid to see what happened in there, but hold back for just  5 mins more.

Open the lid when it’s rested. Your Pulao is waiting to be garnished and served.

Garnish with the cranberry, pumpkin and sunflower seeds we fried earlier and serve immediately. This can be eaten as part of an elaborate meal with a spicy curry. It’s really that simple and you can include it very easily to make any regular weekday meal a little more exciting. Have it with some achaar (pickle) and yogurt / raita.

IMG_1160

IMG_1161

Notes:
– Add the cashew nuts as a garnish and fry it together with the cranberries and seeds instead of adding it in the beginning. That helps to add more crunch.
– Now if you are like little V, you could have this entire dish with raisins in place of cranberries.
– In it’s simplest form, you can make the cauliflower and peas pulao without any cashewnuts, cranberries, sunflower seeds or pumpkin seeds. Follow the same instructions but skip these ingredients.

Destination: Bangkok [Vegetarian Thai fried rice or Khao Pad Chae]

August 1996, New Delhi.

I had left Delhi under very chaotic circumstances. No, Delhi did not get more chaotic, but my life on that day most certainly was! The courier company had screwed up my package with the air tickets. Apparently, they had sent it to Bombay! My dad was in Bangkok at that time and I was to fly to Bangkok at midnight. I could see the world conspiring against me.. It would be meaningless to take the next flight as I was flying just a day before my Uni entrance exams. I retired into my room after a very stressful day of angry phone calls and a never ending wait…

Bang! Bang! Bang!

I woke up rubbing my eyes.. Some one was banging on the door! It’s only 10:30 pm for heaven’s sake! Let me sleep, I mumbled..

I opened the door somewhat pissed off. It was my uncle. He had just returned from work. The tickets had arrived! But, it was 10:30 pm. I hadn’t even packed! I was leaving the country!  This can’t be happening!!

In the next 10 minutes, my mother dumped my essentials into a bag and we were on the road. It was a good 30 minutes drive to the airport. I went in to the check-in counter while the rest of my family waited outside the airport. It was closed. I pleaded, I almost cried. It had worked in the past. And, it did, again! A staff came back, opened the counter for me. Before I knew, I was through immigration!

My family was waiting outside the airport not knowing whether I am flying or not.. And I was running inside the airport with no sense of what was going on. I was going where I was meant to go, worried that my family must be waiting outside. In those days, we didn’t have mobile phones. I was desperate to send a message across to my family, that I am flying off.. and a hug.. and a good bye.. In all the rush, I saw an airline staff just before boarding the flight. There was something about her which made me trust her.. or may be I did not have any other option. I asked her if she could page my uncle to let him know that I am flying off. She agreed. I came to know the next day that she did:)

That evening, as the flight took off, I was sad. I was leaving my country for a long long time without saying good bye to my family and close friends…

I was out of the airport in Bangkok, all alone, expecting to see my Dad. But, there was no one. Not for the next 10 minutes. Not for the next 30 minutes. I decided to call him using a public telephone. And suddenly it hit me! I had no money!!! Nothing at all. Not even a coin to make a phone call. In all the mad rush of last night, everyone forgot about money! I asked someone for help, all in sign language. This stranger gave me a coin and told me how to use the phone, all in gestures. I could not have asked for more!!

Thanks to the time difference and chaos, my Dad wasn’t aware that I had eventually boarded the flight last night! In the next 30 minutes, my Dad arrived and I was on the way to my new home…

And now.. for today’s recipe. This one is my mom’s favorite! She is a vegetarian and one that loves all her veges nice and crunchy! If you love your veges, you’ve gotta try this out!

To print this recipe, click here.

Ingredients:

String Beans: 2 to 3
Carrot: 1/3 of a medium sized carrot
Capsicum: 1/4th of a big capsicum
Cabbage: roughly 5 to 6 leaves
Thai / Chinese green leaves: 4 to 5 leaves. I used Xiao Ban Cye (you can use any other locally available greens)
Thai Garlic (or any other garlic) – 6pcs if using small Thai garlic. 3 if using the bigger garlic
Thai Chillies: 2 red and 2 green (tone this down if you don’t like it extra spicy)
Lime leaves: 3
A Bowl of cold pre-cooked rice
1/2 medium sized Onion (optional)
Vegetarian oyster sauce – 1 tbsp
Light Soya sauce – 1 tbsp
Oil – 1 1/2 tbsp
Wok
Sliced cucumber for garnishing
2 chopped chillies with 3 to 4 tbsp light soya sauce (in case the 4 chillies were not enough like they weren’t for me!)

How I did it:

Cut the long beans, capsicum and carrot into 2″ long pieces. Carrots should be cut into thin and long pieces. Roughly cut the cabbage and green leaves into big chunky leafy pieces. Pound the garlic and chillies together in a mortar and pestle.

In order to make fried rice, as far as possible, use left over rice from the fridge. When freshly cooked rice is used, it does not turn out the same way as freshly cooked rice tends to stick together into lumps.

Heat a wok. Once hot, add the oil. When it gets smoky, add the pounded garlic and chilli mix into the oil. Stir fry for 30 seconds. If using onions, add sliced onions at this point. Let it turn translucent. Next, add the carrots and beans. Continue to stir on high heat. Reduce heat for 1 min to let the beans and carrot cook.

Now add the cabbage, green leaves, capsicum and the torn kaffir lime leaves. Increase heat to high. Add the soya sauce. The smoke adds a nice flavor to this dish. It is important to stir this continuously to avoid the veges from getting burnt. This may take 30 seconds to a minute.

Once the veges are crunchy and cooked, add the bowl of cold rice, basil leaves and vegetarian oyster sauce. Stir continuously and on high heat. Check for salt and add more soya / vegetarian oyster sauce, if needed. Combine all the ingredients (on high heat). This may take up to 1 minute depending on the heat.

Serve with sliced cucumber and chopped chillies with soya sauce. The vegetables lose their crunchiness if kept cooked for long. So enjoy it immediately after cooking! 🙂

Basil Chicken Spaghetti

Hello World!

I have always wanted to enter the world of blogging ever since I knew about it! I have made several attempts in the past… but, unsuccessful. This time, I am determined to start this whole new journey…

Here’s to a new beginning!

Although I was born in India and went to school there, I have had the fantastic opportunity to spend 5 years in Bangkok and live life as a local there. I believe there is no better way to know a place than to be and to do as the locals do. I spent some of the best years of my life there. When I arrived in Bangkok from Delhi, I was only 17. Bangkok was so different. I had a major culture shock. I had left all my friends back in India to start a new life. The first 6 months were depressing. I remember complaining to my friends about how much I hated the place and wanted to take the first flight back, if only it was possible!

There were many hurdles, language being the biggest. I had to learn how to order my food, how to give directions, how to take a bus to college and back, and a lot more. The smell of street food would drive me mad! I remember a particular street food vendor near our house selling deep fried chicken feet!! You read it right! Deep Fried Chicken Feet! It was the worst smell I could have ever imagined! There were many such street food vendors and I remember squeezing my nose past those stalls & running away as quickly as possible – or better still – take a Motorbike taxi home for 5 Baht from the Main Road to the house 🙂

It took a couple of months for me and I don’t exactly remember how or when… my love affair with Thai Food started. The same smells made me hungry! If you have been to Thailand, you would know that fish sauce with chopped chillies is a common sight. It is usually kept on the table just like salt and pepper. That fish sauce with chopped chillies just makes me drool now!

Therefore, it is no surprise that Thai Cuisine holds a special place in my heart. I love the spice and the herbs which combine together to get those unique flavors. I love cooking Thai food just as much as I love eating it! No, wait! I love eating it more than I love cooking it! errr… No! That’s not correct. Bottom line: I simply love Thai Food. So, my first post is dedicated to the cuisine that will always remain my first love.

Click here for a printer-friendly version of this recipe.

Ingredients:

Spaghetti – 150 gms (enough for 3 people).
Minced Chicken: 100 gms
Button Mushrooms sliced – 1/2 cup
1/2 Capsicum – cut into long pieces
4 Long beans cut into small pcs (about an inch long)
Basil leaves – a generous bunch!
Garlic: 1-2 tbsp pounded (If you can get hold of Thai garlic, use that. Thai garlic is smaller and has very thin skin. The smell is absolutely out of this world and it adds that authentic flavor to the dish!)
Chopped fresh red and green chillies – 1 tbsp (I love my food spicy… so if you don’t like it spicy, reduce the number of chillies)
Cooking oil: 1 -2 tbsp
Fish sauce
Oyster sauce
A wok

Thai garlic

How I did it:

  • Boil Spaghetti al dente as per instructions on the pack.
  • Cool down under running cold water to stop the cooking process. Add a little oil to the spaghetti and keep aside.
  • Take a small pan and cook the mushrooms with salt. This may take a few minutes. Keep aside.

  • Add 1 tbsp of fish sauce to the minced chicken.
  • Add oil to the wok. Turn up the heat. Wait for the oil to get a little smoky.
  • Once it gets smoky, add garlic. Continue to stir or the garlic will burn. If it is too hot, reduce the heat.
  • Add the minced chicken seasoned with the fish sauce to the wok now. The heat should be high/medium at all times unless you feel that the food is burning. You will need to continue to stir the chicken very frequently to ensure it is cooked but not burnt.

  • Add the chopped chillies and keep stirring. With the back of the ladle, mash the chillies to make the spice go all the way into the chicken – if you like it really spicy! 🙂
  • This next step is optional. If you can get your hands on a packet of “mama” noodles (the Thai Tom Yum flavor noodles absolutely to die for!), this recipe can be spiked up by using the spice powder (masala) from the “Mama” noodles packet.
  • Now add the long beans. Stir fry for 2 mins on high heat.
  • Next add the capsicum. Remember to keep the heat on high once the vegetables are added to ensure they are stir fried and crunchy!

  • Add the spaghetti. Next add 2 to 3 tbsp oyster sauce. Stir continuously. Check for salt and spice and adjust accordingly. The balance (oyster sauce and fish sauce) is important and the amount will vary depending on your preference. Oyster sauce adds to the color of the dish and fish sauce adds that pungent & salty taste which I absolutely love!

  • Now add a generous bunch of fresh basil leaves. Stir well and serve immediately. Remember, this should be eaten absolutely hot ! Nothing like a glass of chilled beer with spicy basil chicken spaghetti 😉

Cheers! Enjoy;)

P.S: After my first few months in Bangkok, and when I could not resist the smell of that deep fried chicken feet any longer, I just had to try it! The result: a little disappointment, it wasn’t for me 😉