The simple things in life: Mung Dal [no onion-no garlic]


IMG_7686


When life begins to feel complicated, I take a moment to reflect on the meaning of happiness and what it is for me. Is it really a bigger house, more money, an expensive bag or things like that? Yes, I would be lying if I said these things didn’t make me feel good at all. It does, but for that moment and may be a few days more. The only problem is if I continue to seek happiness in such things, my definition of happiness will keep getting complex.. and there’s really no end to it. There is always a want for more… and more. Nothing wrong with it but I find it important to take a moment, think back and put things in perspective.

It’s always the simple things in life that gives me true happiness. I am sure it’s the same for you too. In my quest for happiness, I listed a few things (not in any particular order) that make me truly happy:
A hug from my 4 year old child
Being a Mom
A good cup of ginger tea (chai) early in the morning
An unknown, probably insignificant, little flower my child picked up from the roadside. Just for me.
A conversation with my closest friends
A breath of fresh air
Soaking the sun rays
Companionship
Recalling childhood memories
A simple home made meal: Dal-Chawal

IMG_7696

Dal-Chawal or Lentils-Rice. A combination which is a staple in India. It may be in different variations depending on which part of India or which home it has been cooked, but essentially it is lentils or Dal and Rice.

Every time I travel, I immerse myself in the food and culture of that place. It’s an unspoken rule that we never order Indian food when traveling [outside of India]. However, when I come back home, the first meal cooked, without fail, is a very simple Dal-Chawal.

I wouldn’t even want to call this a recipe considering this is such a staple in Indian households. I still choose to write the method down as every home has their unique way of cooking lentils. Dal is cooked in a lot of Indian homes, almost every day. And that is also the reason, why one gets bored of eating it ever so often. In order to bring variety to Dal, I like to rotate the kind of lentils I cook. My pantry is stocked with some 7 different types of lentils/beans. I don’t cook Dal all 7 days a week but it definitely finds it’s way to our dining table at least 3 to 4 times a week in various forms.

IMG_7680

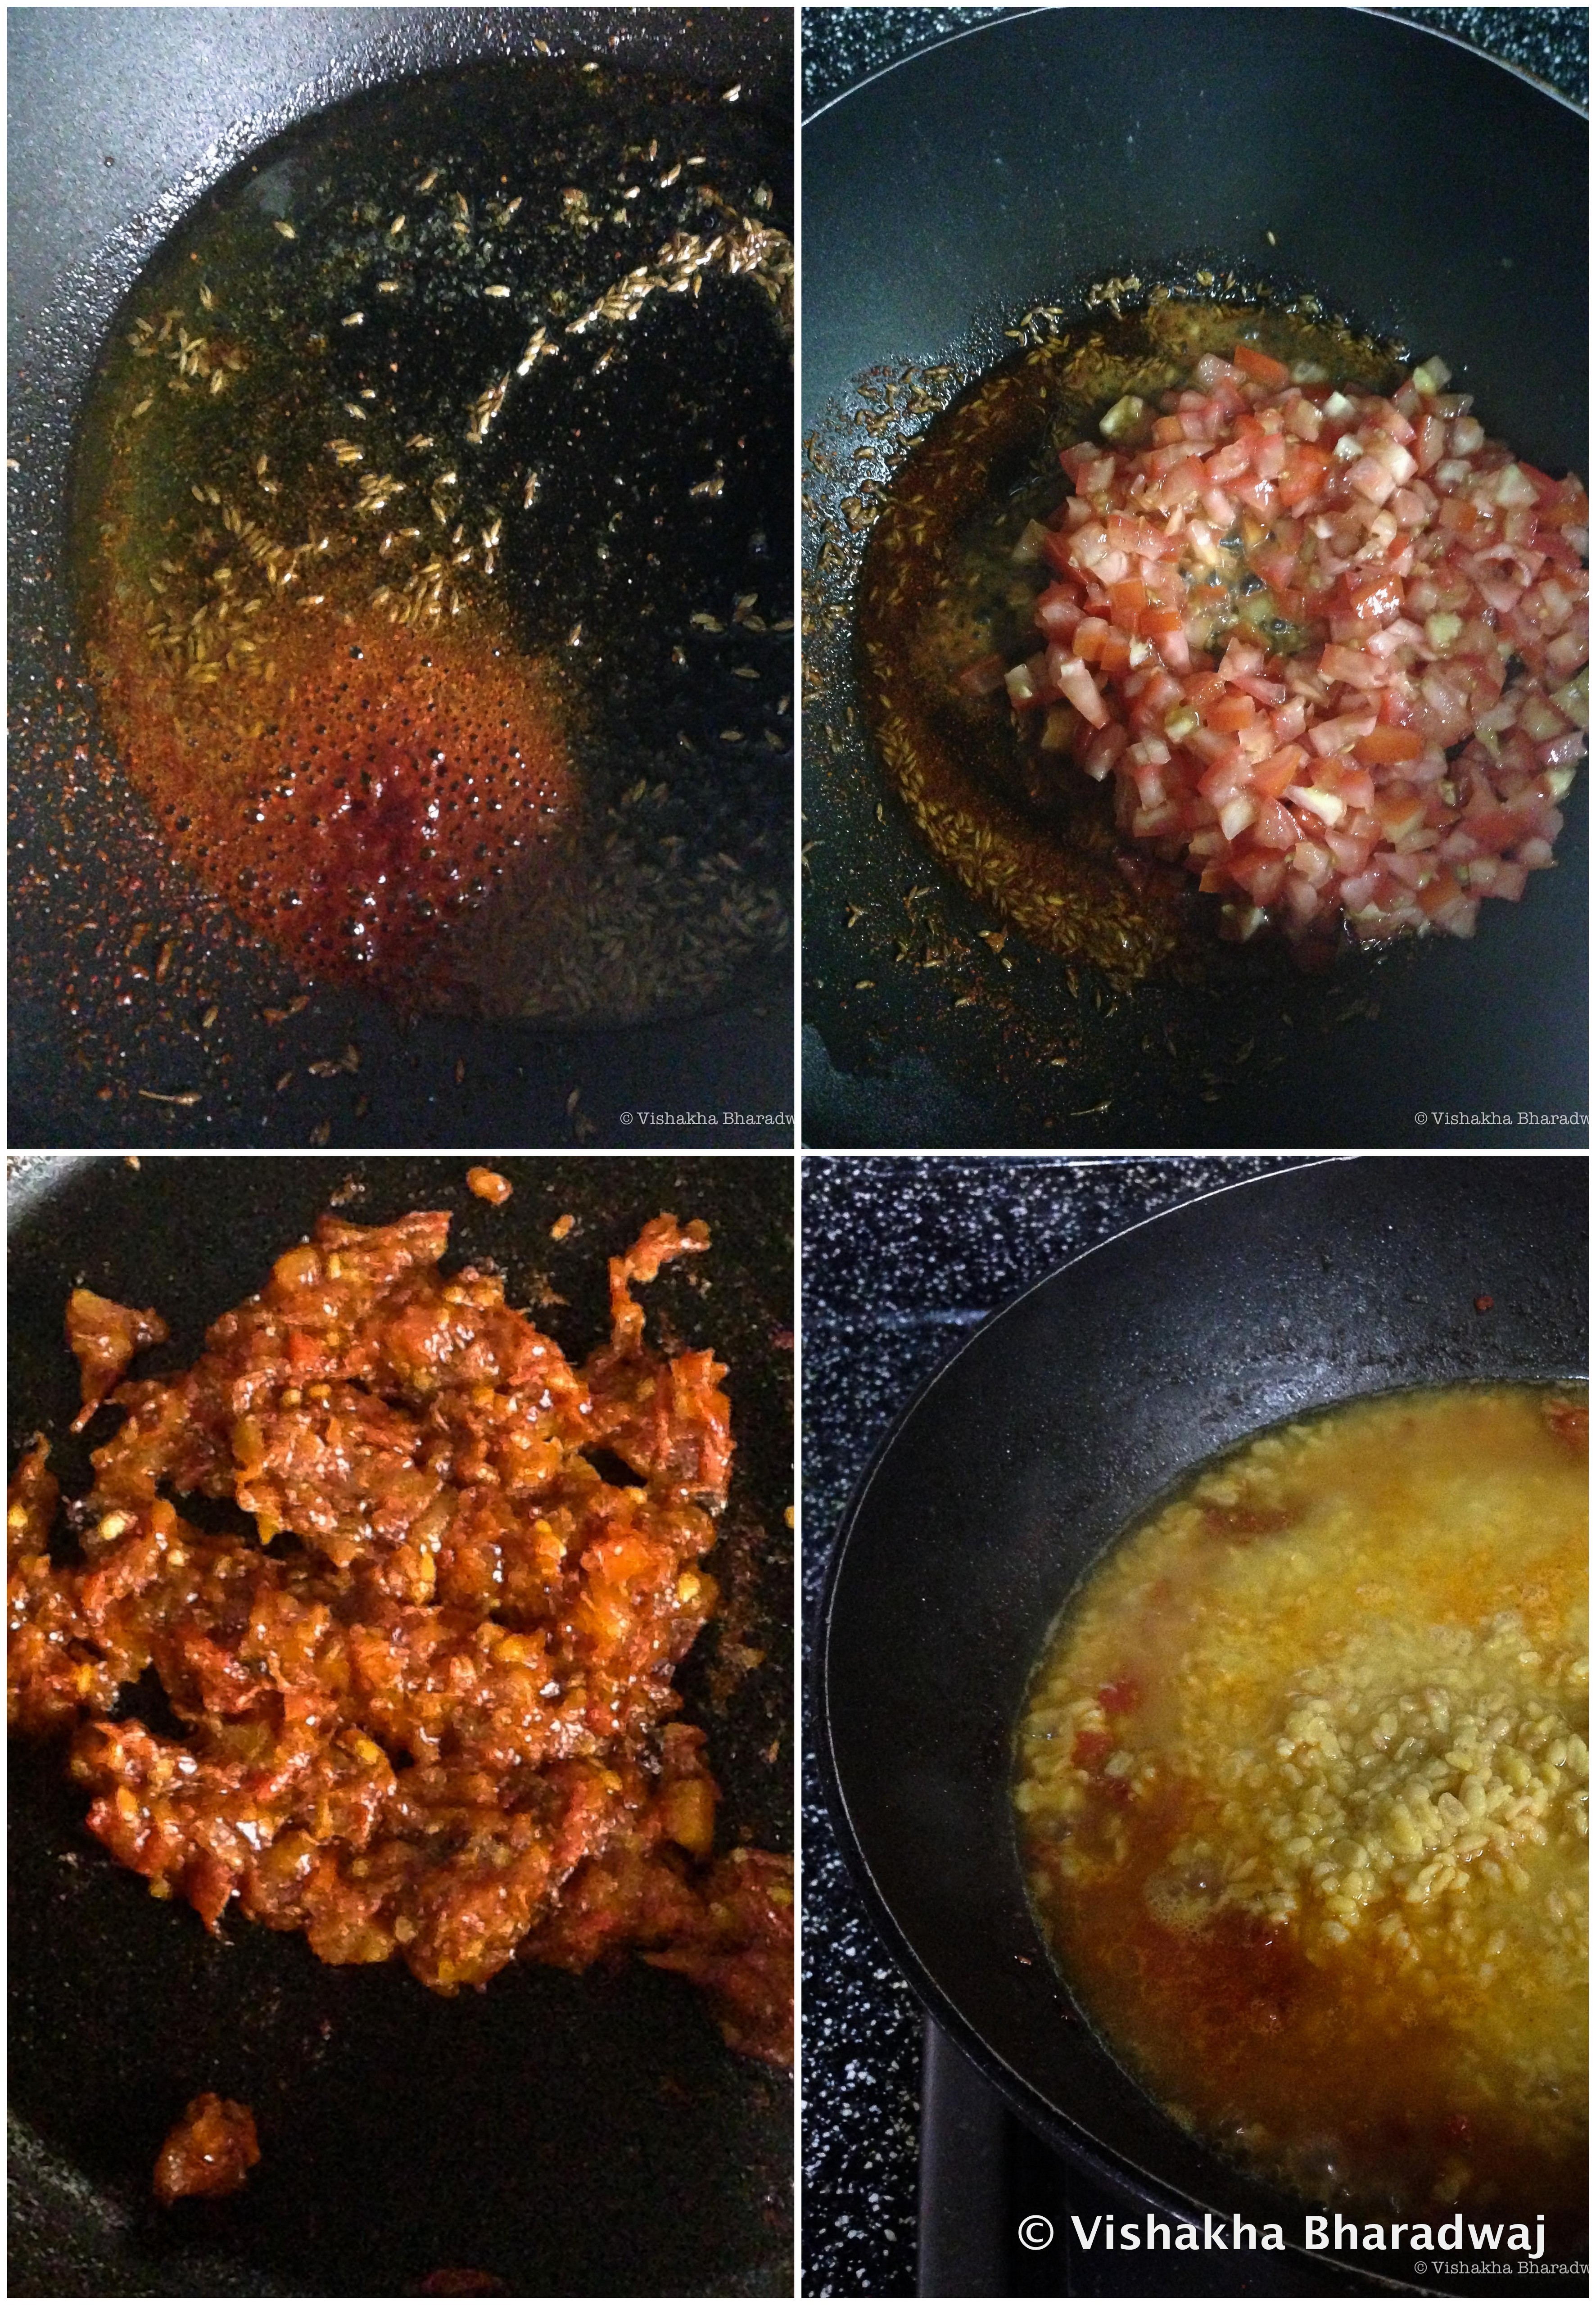
This preparation is quite simple – No onions, No garlic. A simple Dal flavoured with cumin seeds, asafetida and tomatoes. The cumin seeds, asafetida and tomato are the main players in this act. Asafetida gives it a pungent taste and tomatoes add a mild sour flavour to the Dal. It’s a little tough to tell which one is more dominating – the asafetida or the tomatoes, but together, they rule the otherwise modest Mung beans.

IMG_7685

The process of making this Dal is two fold. Part one involves roasting the Mung beans and then softening the beans while infusing it with some fresh ginger. Part two is the tadka or tempering that will add the flavours to the Mung. The tempering is done in ghee or clarified butter with cumin seeds, asafetida, finely chopped (or grated) tomatoes and some Kashmiri chilli powder for a mild spicy touch.

IMG_5770

I am also sending this recipe to Aparna of My Diverse Kitchen for the 61st edition of MLLA. My Legume Love Affair (MLLA) was started by Susan of the Well-Seasoned Cook and is now being carried forward by Lisa of Lisa’s Kitchen.

Mung Dal with Asafetida and Tomatoes (no onion-no garlic)
Serves: 3-4
Time: 30 mins

Ingredients:
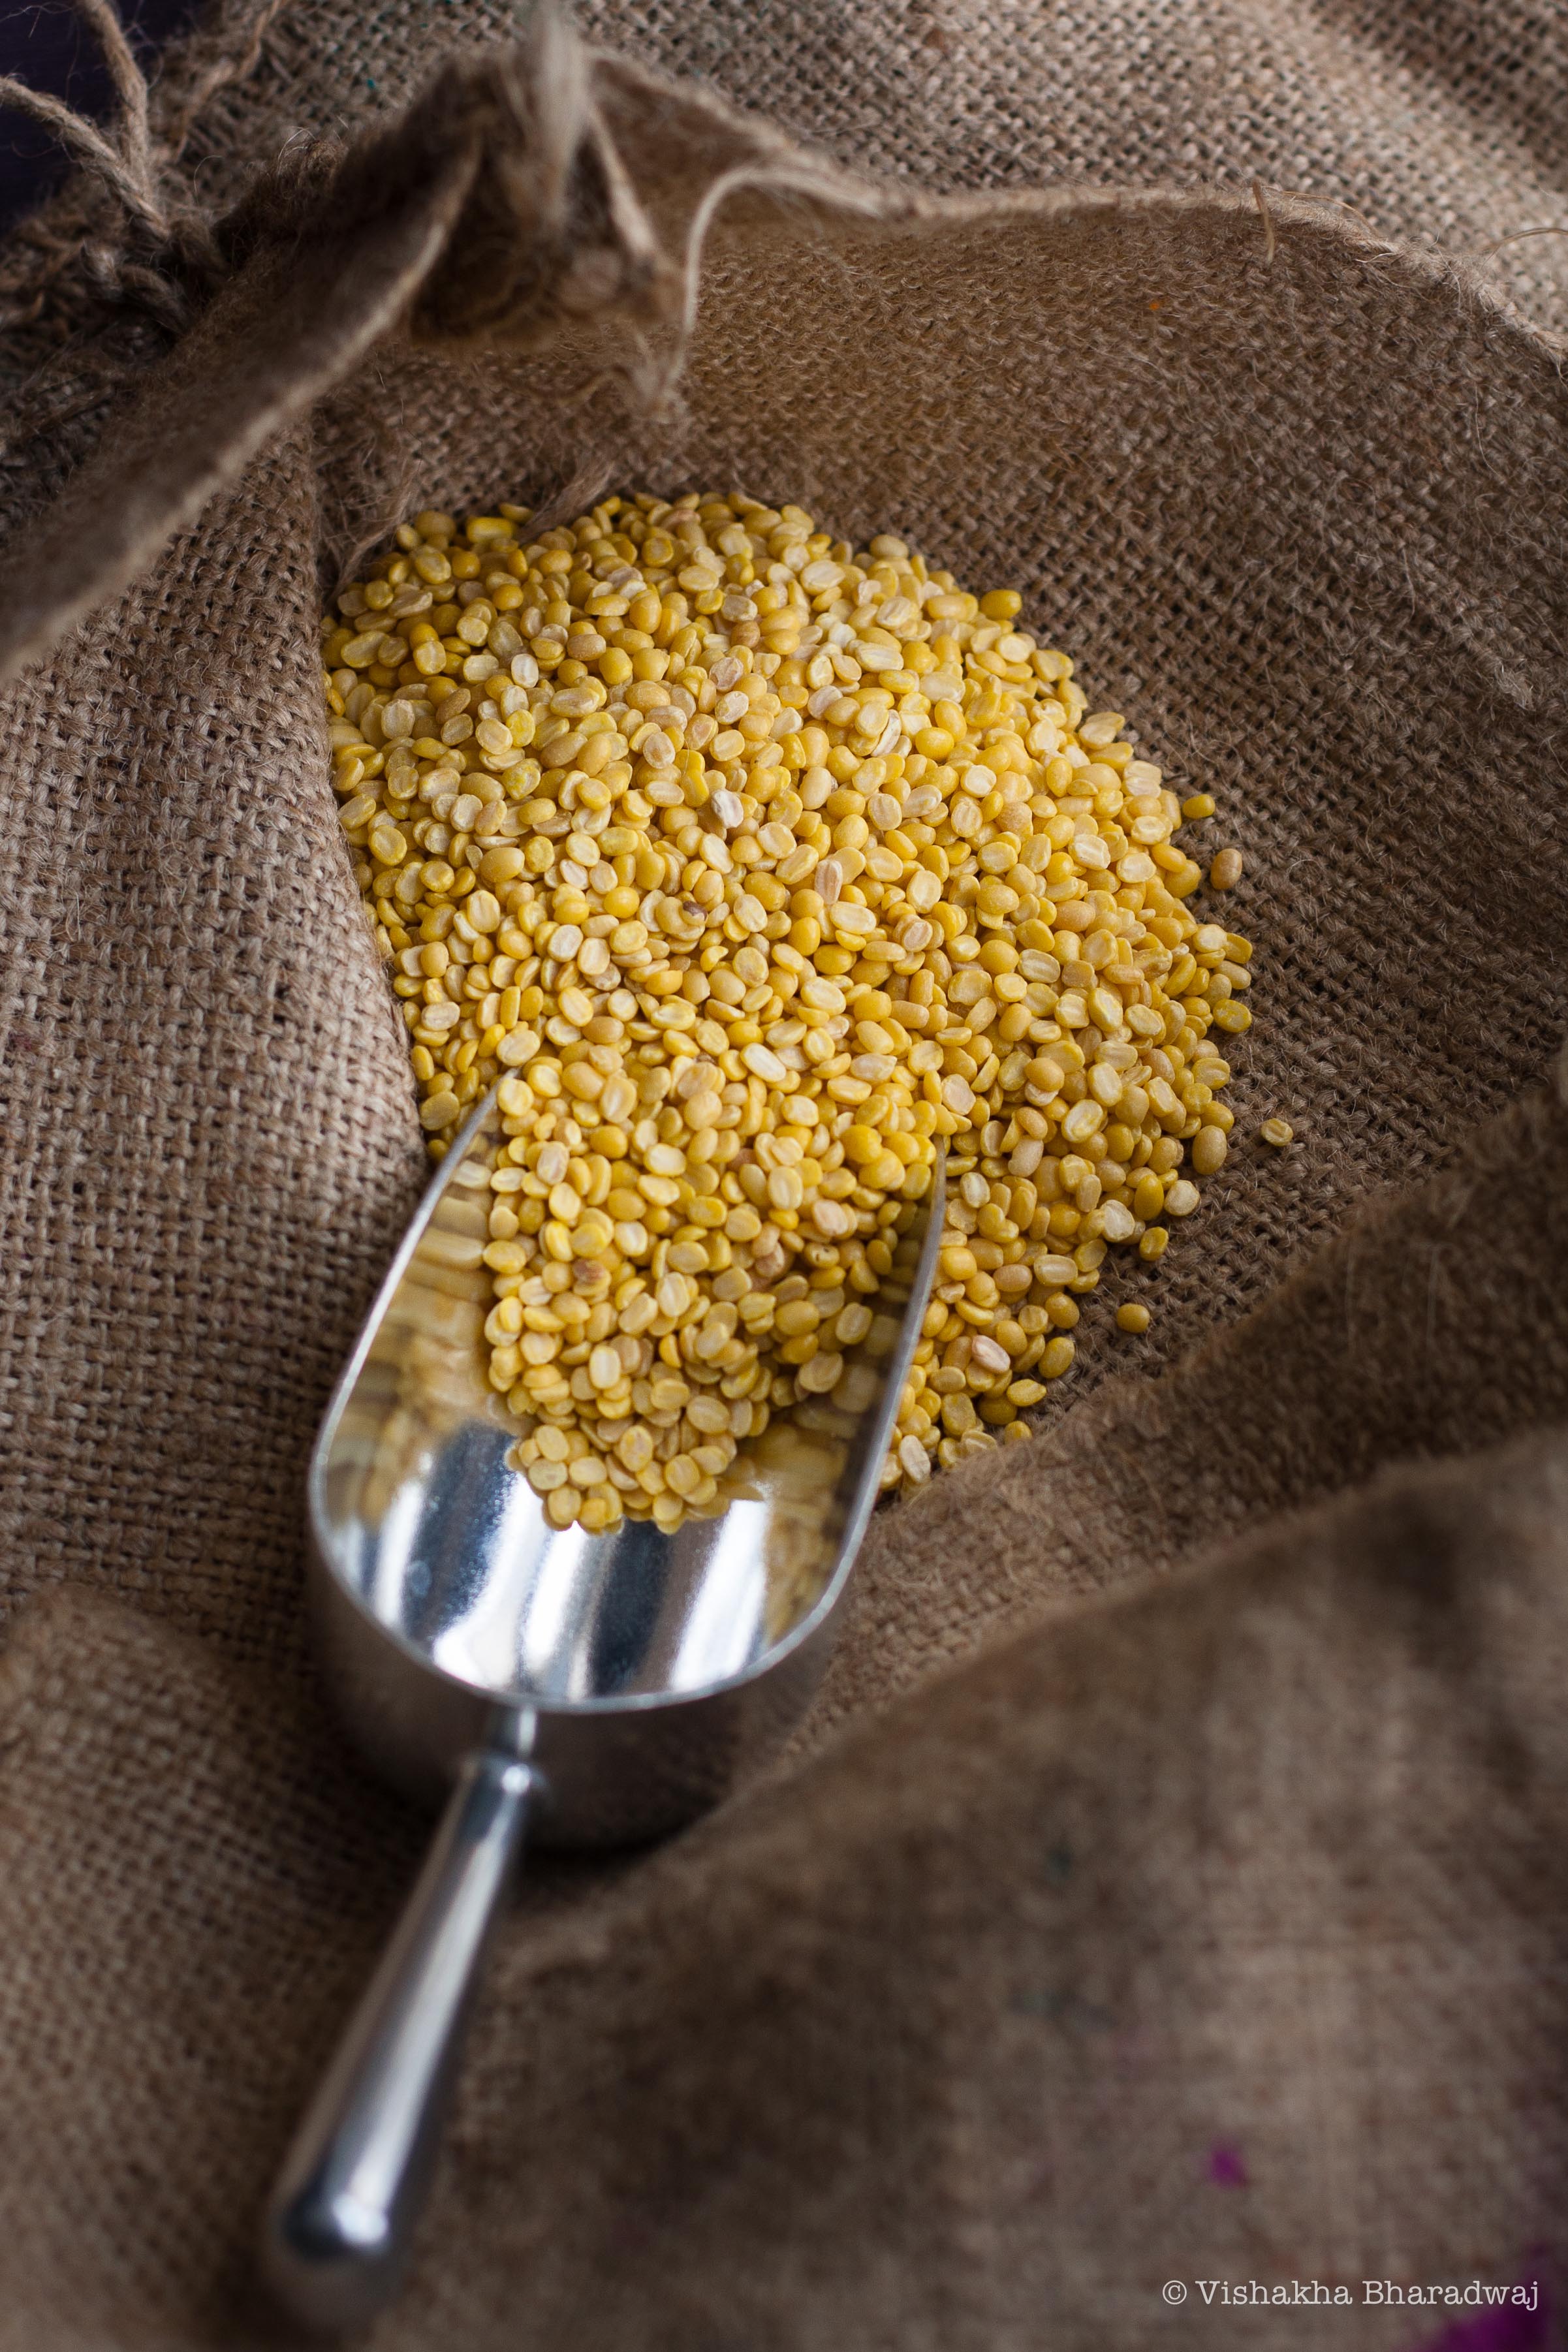
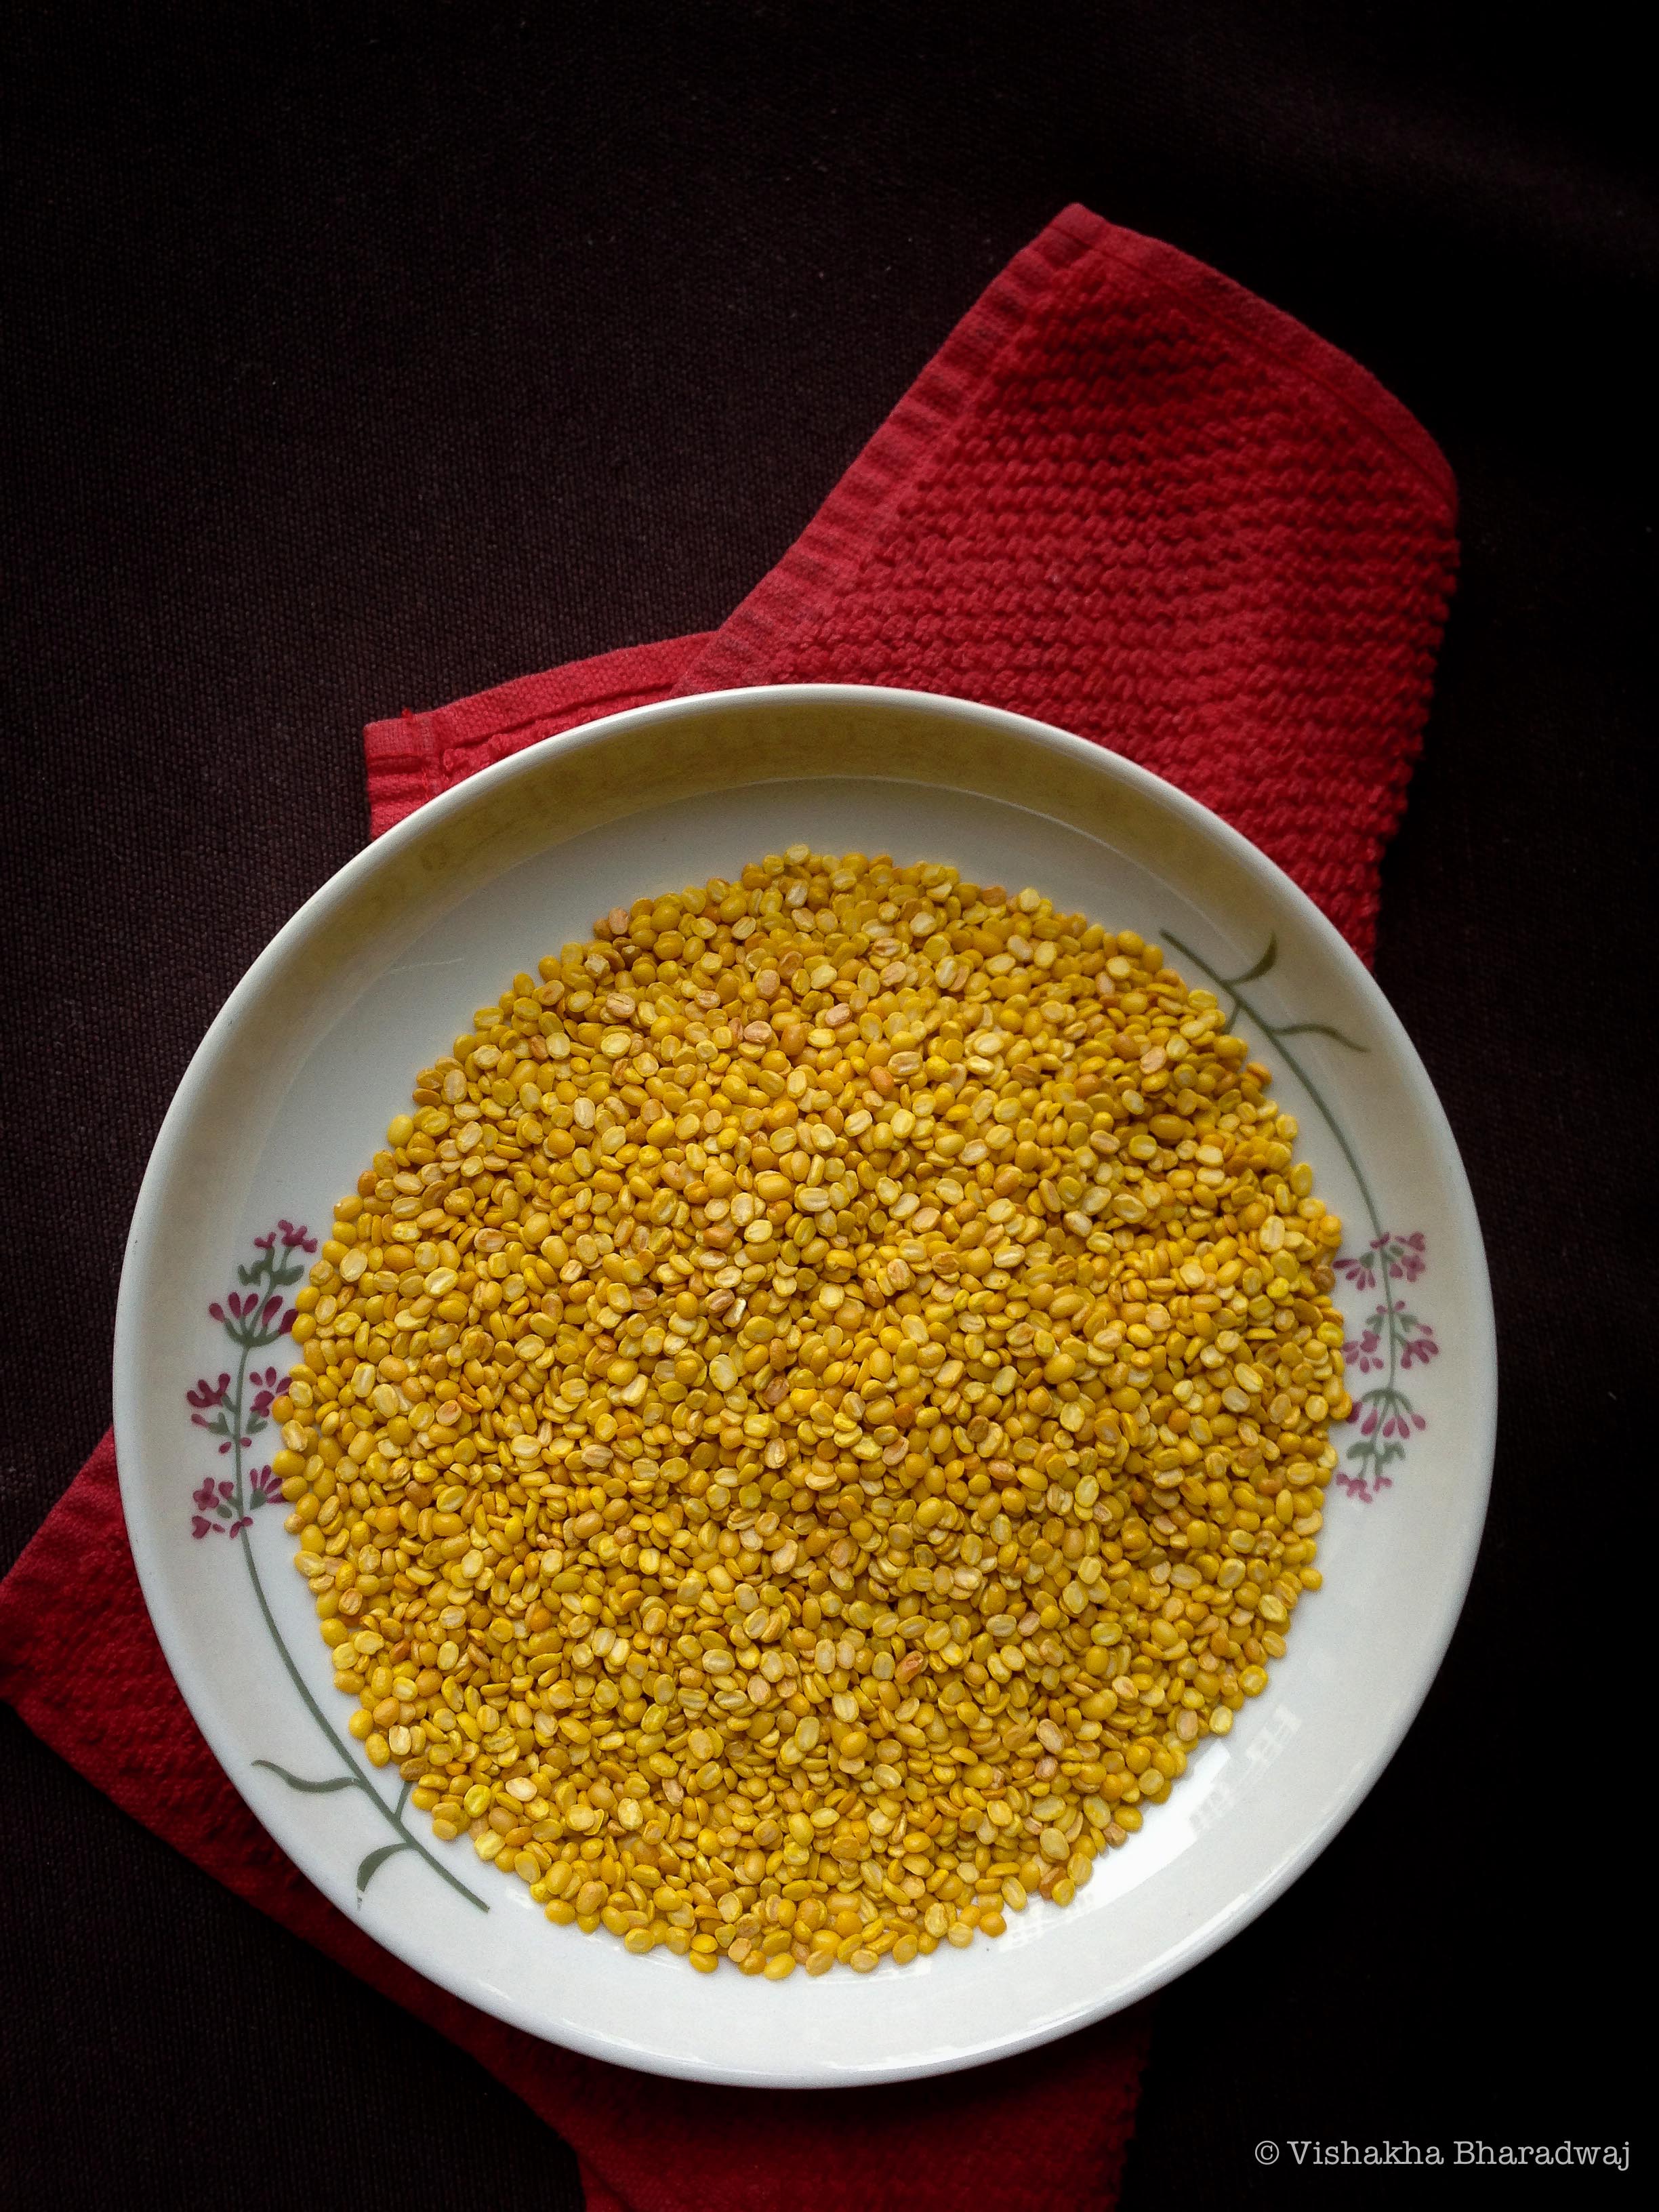
Yellow Mung beans / dal / lentils: ¾ cup
Asafetida (hing): ½ tsp
Cumin seeds: 1 tsp
Tomatoes: 2 medium sized (about 1 + ¼ cup of finely chopped)
Kashmiri Chilli powder: ½ tsp
Ginger (grated): 1 tsp
Turmeric: 1/8 tsp or roughly a big pinch
Salt: to taste
Water: 2 cups
Ghee: 1 tbsp

IMG_7679

Method:

  1. Dry roast the Mung beans. I do this in a pressure cooker to avoid getting too many utensils dirty. Keep stirring the beans constantly to ensure they are evenly roasted. I did this on medium heat for about 5-6 mins. When roasted, take it off the heat. Rinse with water 2-3 times.
  2. In a pressure cooker, add the rinsed Mung beans, 2 cups of water, a pinch of turmeric, ginger and salt. Cook the beans until soft while still retaining their texture. If you are using a pressure cooker, let the steam build up on high flame. Then lower the flame and let it cook for another 5 minutes until done.
  3. While the Mung beans are getting cooked, heat ghee in a pan. Add cumin seeds. When they are done, add the asafetida and chilli powder. Let it cook for a few seconds. Then add the chopped tomatoes and a pinch of salt. With the heat on high, cook the tomatoes constantly stirring it to ensure they are not burnt and until the raw smell no longer exists.
  4. When the tomatoes are cooked, reduce the flame. Add the Mung beans. Add water to a consistency you want and adjust the salt as per your taste. If you want to add chillies, add 2-3 slit chillies (a combination of green and red adds a nice colour.. You can add just green too and skip the drama). Let it come to a boil on high heat and then simmer for 3 minutes.
  5. Garnish with coriander leaves and serve hot with rice and any vegetables of your choice.

2013-07-30

Advertisement

Crispy Salmon with Garlic Coriander sauce

Crispy Salmon with Garlic Coriander Sauce

There are 2 kinds of people in this world: Those that love Salmon. And those that don’t. That’s probably true of most things, but I couldn’t come up with a better opening line. So, there you go!

I happen to be the former and so is little V. I hereby declare my eternal love for Salmon. R, on the other hand, doesn’t quite get what the fuss is all about! But we [V and I] find a way to work around it. We just make him eat it. 😉 And he does.

We especially love the crisp skin of the Salmon. The skin absorbs a bit more salt than the rest of the fish and that makes it even more desirable. When there’s Salmon on the dinner table, all else doesn’t quite matter, does it? 🙂

I have made this countless number of times for V and it’s quick and easy to make. If you are a Salmon lover like me, I won’t need to sell the recipe to you because you will probably love it anyway 🙂

In it’s simplest form, all you need is some crushed garlic, salt, pepper and olive oil marinade with the salmon. Pan fry (with minimal oil) and you are done. In this version, I added a slight variant – fresh coriander leaves or cilantro. If you have a particular dislike for coriander, feel free to omit the coriander leaves.

We usually have this Crispy Salmon for dinner on a weeknight when I don’t want to spend too much time cooking. This goes well with a simple vegetable pasta or just plain rice and stir fried vegetables.

To print the recipe, click here.

Crispy Salmon with garlic coriander sauce

Serves: 2
Total time taken: Under 30 minutes
Preparation time: 20 minutes
Cooking time: 7-8 minutes

Ingredients:
Salmon fillet with skin on (about 250 gms)
Garlic cloves: 1-2 (adjust to taste)
Fresh coriander leaves – a bunch. Discard the roots.
Black pepper powder: a tiny pinch
Juice of ¼ of a lemon
Zest of ½ a lemon
Olive oil: 1 tbsp
Sea salt: to taste

How I did it:

1. Squeeze the lemon juice and zest on the salmon fillet. Sprinkle sea salt to taste. Put a little less than required as we will also season the sauce.

2. Prepare a quick blend of the garlic, coriander leaves including stalk but not the roots, a tsp of olive oil and sea salt.

Preparing the garlic-coriander sauce.

3. Rub the prepared coriander, garlic sauce (the marinade) on the salmon. Sprinkle a dash of black pepper powder. Let the Salmon marinate for about 15 minutes.

Rub the Marinade on the salmon.

4. Heat a pan. Add the remaining olive oil (2 tsp). Make sure the the oil is hot before placing the salmon fillet in it. This step is important to prevent the fish from breaking and disintegrating.

5. Place the salmon fillet, skin down first. Reduce flame to lowest. Cover and let it cook for 5 minutes.

Heat a pan. Add olive oil and place the marinated Salmon, skin down. Cover & let it cook for 5 minutes.

6. After 5 minutes, turn the salmon for another minute. Do not cook on this side for long as the salmon will start to overcook.

Turn the Salmon over and cook for another minute.

7. Serve w lemon wedges.

Crispy Salmon with Garlic Coriander Sauce

Cranberry, Cauliflower and Peas Pulao

IMG_1164

Hello everyone,

Yes, it has been an awfully long time since I have been away. Thank you to those who have missed me, checked on me and encouraged me to come back. It means a lot and thank you for being there! I have missed sharing my thoughts and recipes on this platform.

I am looking forward to sharing some of the food that I have been eating and cooking. Let’s start with rice dish – a staple in my house.

Did I ever mention my dislike for raisins? I am not, I mean, really NOT fond of raisins. No, not even a bit. On the other hand, little V, who, by the way, is not that little any more, can survive on raisins alone. That is, if he had his way 🙂 He can have as many raisins as he can get his hands on.

I was cooking a quick + less effort lunch for us one week day when I thought of adding raisins in the pulao (pilaf) to please him. But to my surprise, he suggested dried cranberries instead. I immediately jumped with joy and happily took his suggestion. His love for cranberries comes a close second to raisins. So, there you go! We had a win-win situation.

When my rice was soaking and I had some time to think, I just happened to glance on the bottles of sunflower and pumpkin seeds which were kept on the kitchen counter and I normally add to oats for breakfast. I thought – why not?! So there we go, at the end of it, we had a beautiful and crunchy twist to the usual Pulao. I roasted them in a little bit of ghee together with half of the dried cranberries and added them as a garnish. It gave the Pulao a whole new dimension!

IMG_1155

For a printable recipe, click here. 

Serves: 2
Cooking time: 15 minutes + 5 minutes resting time
Preparation time: 30 minutes

Ingredients:

Rice: ½ cup
Dried bay leaves: 1-2
Cloves: 4
Cumin seeds: ¼ tsp
Whole black pepper: 8 nos.
Star anise: 1
Cauliflower: 8-10 medium and evenly sized florets
Peas: ½ cup frozen or fresh (I used frozen)
Cranberries: 15 pcs approx. (adjust to your liking)
Sunflower seeds & Pumpkin seeds: In equal amounts ¼ cup in all
Cashew nuts: about 6 pcs, roughly broken in twoCinnamon stick: 1 thin stick
Ghee: ½ tsp for the rice and another ½ tsp for frying the garnish
Salt to taste
Boiling water: 1and ¼ cups

Method :

Rinse the rice with water at least twice. Soak the rice for 15 mins. At the end of 15 mins, set it aside to drain for 10 mins using a strainer. Put about 2-3 cups of water to boil which we will need later.

Final CPWhile my rice was soaking, I soaked 1/2 a cup of frozen peas in water for at least 10 mins.

Final CP1-002

Now that the peas were taken care of, I quickly went on to cut / break cauliflower into about 8-10 pcs of of medium sized florets. I also roughly chopped the cashew nuts in halves. When these were done, I put my garam masalas aside to make sure I had everything ready when the pot went on!

Final CP3

I heated half a tsp of ghee in a pot in which I was going to make the pulao. I added the cumin seeds and all the whole garam masalas.

At this point, I lowered the heat to make sure they don’t burn. When the garam masalas start to emit a nice aroma and before they burn, I added the cashew nuts and half of the cranberries. Make sure you stir it continuously and keep the heat to low. It’s really easy to burn them at this stage. When they get a nice color (1-2 mins on low heat), it’s time to add in the vegetables.

Collages22

Add the peas and the cauliflower florets with the heat on medium. Fry for another minute. Next, add the rice and mix it without breaking it to make sure the rice is coated with every bit of ghee there is in the pot.

Final CP6

Now carefully add 1 and ¼ cup of the boiling water and salt. Gently mix and taste for salt. A pulao is never too salty, so go easy on the amount of salt you add. Quickly lower the heat to the lowest mark, cover with a tight lid to not allow any or minimum steam to escape during this process. Set your timer for 11 minutes.

Final CP7

Meanwhile, heat a little ghee in a small frying pan. Have your sunflower seeds + pumpkin seeds + remaining dried cranberries ready by your side.

Final CP4

As soon as the ghee melts, add these beauties and fry them on low heat until the seeds get a nice warm golden color. The cranberries just swell up a little and they look absolutely gorgeous.

Final CP8

At the end of 11 minutes, turn off the heat from the pot of Pulao. Now, I know if you are like me, you’ll just want to open the lid to see what happened in there, but hold back for just  5 mins more.

Open the lid when it’s rested. Your Pulao is waiting to be garnished and served.

Garnish with the cranberry, pumpkin and sunflower seeds we fried earlier and serve immediately. This can be eaten as part of an elaborate meal with a spicy curry. It’s really that simple and you can include it very easily to make any regular weekday meal a little more exciting. Have it with some achaar (pickle) and yogurt / raita.

IMG_1160

IMG_1161

Notes:
– Add the cashew nuts as a garnish and fry it together with the cranberries and seeds instead of adding it in the beginning. That helps to add more crunch.
– Now if you are like little V, you could have this entire dish with raisins in place of cranberries.
– In it’s simplest form, you can make the cauliflower and peas pulao without any cashewnuts, cranberries, sunflower seeds or pumpkin seeds. Follow the same instructions but skip these ingredients.

Teesi – Indian Spiced Flax seeds Powder

Summer. A season not many appreciate or look forward to. Especially if it is anything like the summer one experiences in many parts of India. I, on the other hand, have a different story to tell.

For as far back as I can remember, I always looked forward to summer. The heat didn’t dampen my spirits. The train journey to my grandparents home, the love of mangoes and lychees, the day and night fun with cousins, the self-declared little or no studying just made it my favorite season of the year!

Every summer vacation started with a long train journey to visit my grandparents. A journey where getting the window seat was of utmost importance, almost like my life in the next 24 hours depended on it. Well, it almost was. With a constant gaze outside the window at surroundings that kept changing every kilometer or less, I soaked in the countryside of India. A journey where I could peek into the daily lives of many, often left wondering what their story was… Where little children played fearlessly beside the train tracks.. Where hawkers that came every few minutes made the journey seem worthwhile.

Mom always prepared meals for the train, so we never got to eat the meals sold onboard. I wasn’t too happy about it then. It was not until recently that I ate the meals served on the train. The verdict: A deep appreciation of my Mom’s efforts in preparing food for the entire family!

Summer vacation was synonymous to abundance of mangoes followed by lychees, all from my grandparents’ orchard. We would get boxes (or petis as they are called in the local dialect) of mangoes and lychees as they came in season – sheer bliss!

Apart from the freshest seasonal produce, we were privileged to have some of the best home cooked meals. My grandmother (or Mai as we called her) was one of the best cooks I have ever known. Her cooking philosophy involved using different types of spices but in the right balance. Every spice in her spice box came with a purpose and it was through the magic in her fingers that she would use them in the right place and the right proportion to transform something extremely simple to exemplary.

One of my favorite things that Mai prepared was “Teesi”. Teesi is traditionally had in Bihar. It is prepared by dry-roasting brown flax seeds together with some spices and stored as a powder. It is usually prepared and stored in airtight bottles to prevent moisture from coming in. We always packed Teesi on the way back home and enjoyed it for the next 2-3 months.


Indian Spiced Flaxseed Powder or Teesi
:

To Print this recipe, click here.

Ingredients:

Flax seeds: 1 cup
Dried bay leaves: 3 small
Dry red chillies: 4 (Use more if you like)
Coriander seeds: 2 tablespoons
Salt: 1/3 tsp (adjust to taste)

How I Did it:

Heat a pan. On slow heat, Dry roast each of the ingredients above (except salt) separately. The ingredients should be roasted separately as the roasting time for each ingredient varies. In order to avoid any burning, make sure you stir continuously during the roasting process.

Flax seeds when done start to sputter. Be careful and make sure the heat is slow and the flax seeds don’t get burnt.

Once all the ingredients are roasted, allow them to cool.

When the ingredients have cooled off, combine all the ingredients together with the salt and dry grind it to a coarse powder using the dry grinder / miller attachment of your food processor.

Store in an air tight jar at room temperature. Teesi is usually had as a condiment with your regular meal or added to natural yoghurt (dahi) to make it more flavorful. You can simply add it to your regular Dal and Rice for adding flavor to an otherwise regular meal. The usual serving of Teesi is about 2 tablespoons. Having said that, food is a personal experience and has to be had in the way that one enjoys it. So, go on and enjoy this simple, healthy and flavorful condiment in the way you like it.