A Bengali Brunch: Koraishootir kochuri [Pooris stuffed with a spicy peas masala]

IMG_7786

R and I had been dating for many years before we got married. Our conversations used to revolve around our families, our lives together, our cultural differences, amongst many other things which young dating couples from different cultural backgrounds talk about.

R’s family is from West Bengal, a state in the Eastern part of India that is often known for its politics, literary history, culture, a daily diet that MUST include fish, and people who are extremely fond of sweets! My family, on the other hand, comes from the neighbouring state of Bihar, a state that is often the subject of conversation for its politics, lawlessness and poverty. The harsh reality is that we live in a world of stereotypes. The only silver lining is that we also live in a world where travel has become a lot easier and internet ensures there is enough information for people who seek out for it. This is definitely helping people to see beyond these stereotypes.

Before I got married, I was only worried about how I was going to deal with the sweet palate of the Bengali family and relatives because I definitely didn’t have one. It would be rude to refuse a sweet offered so lovingly and generously. Fortunately, it wasn’t really as difficult as I had made it out to be. Word spread about my love for fish and my lack of appetite for sweets.  The rest is history. I have been fortunate to have some of the best food in many Bengali homes. No restaurant can match up to that taste, variety and depth of flavour that is created in these home kitchens.

My Mother-in-Law is one of the best cooks I know. I owe a lot of my understanding of Bengali food to her. There are also a couple of other relatives and friends who have wholeheartedly welcomed me in their kitchen and given me the opportunity to watch, ask questions and learn. That learning over the years has given me the confidence to cook a lot of traditional Bengali food at home.

IMG_7888

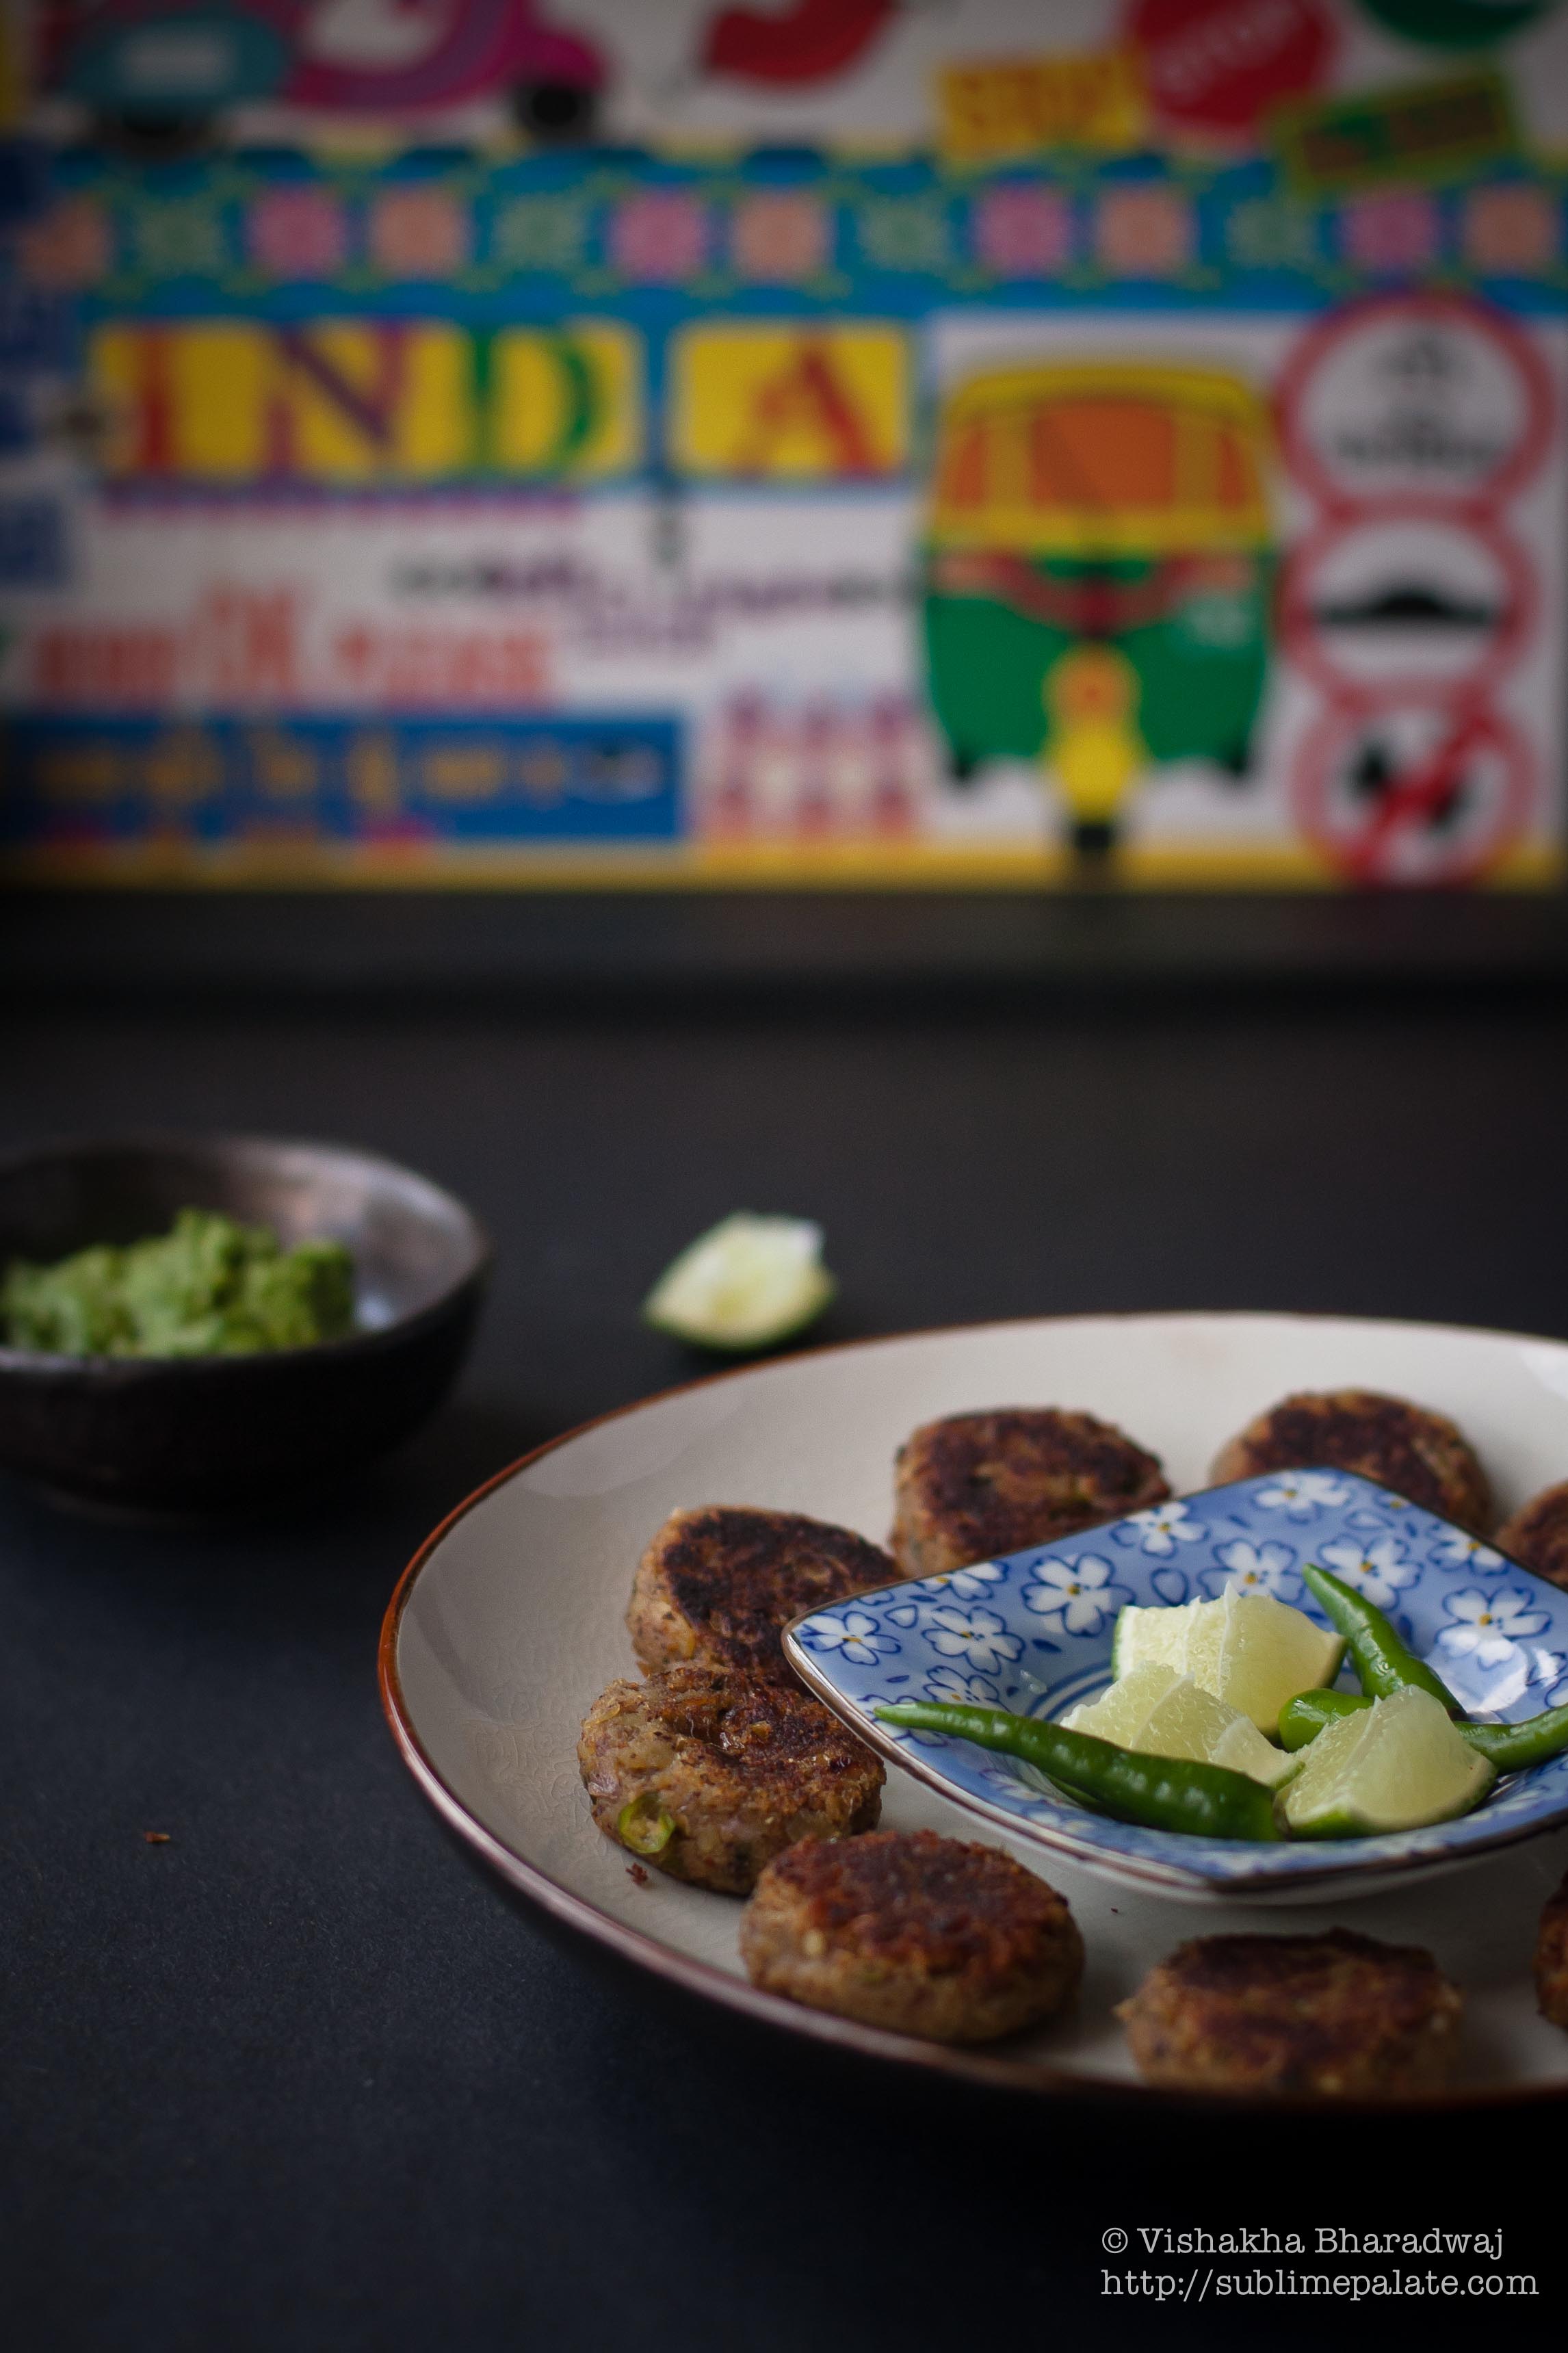
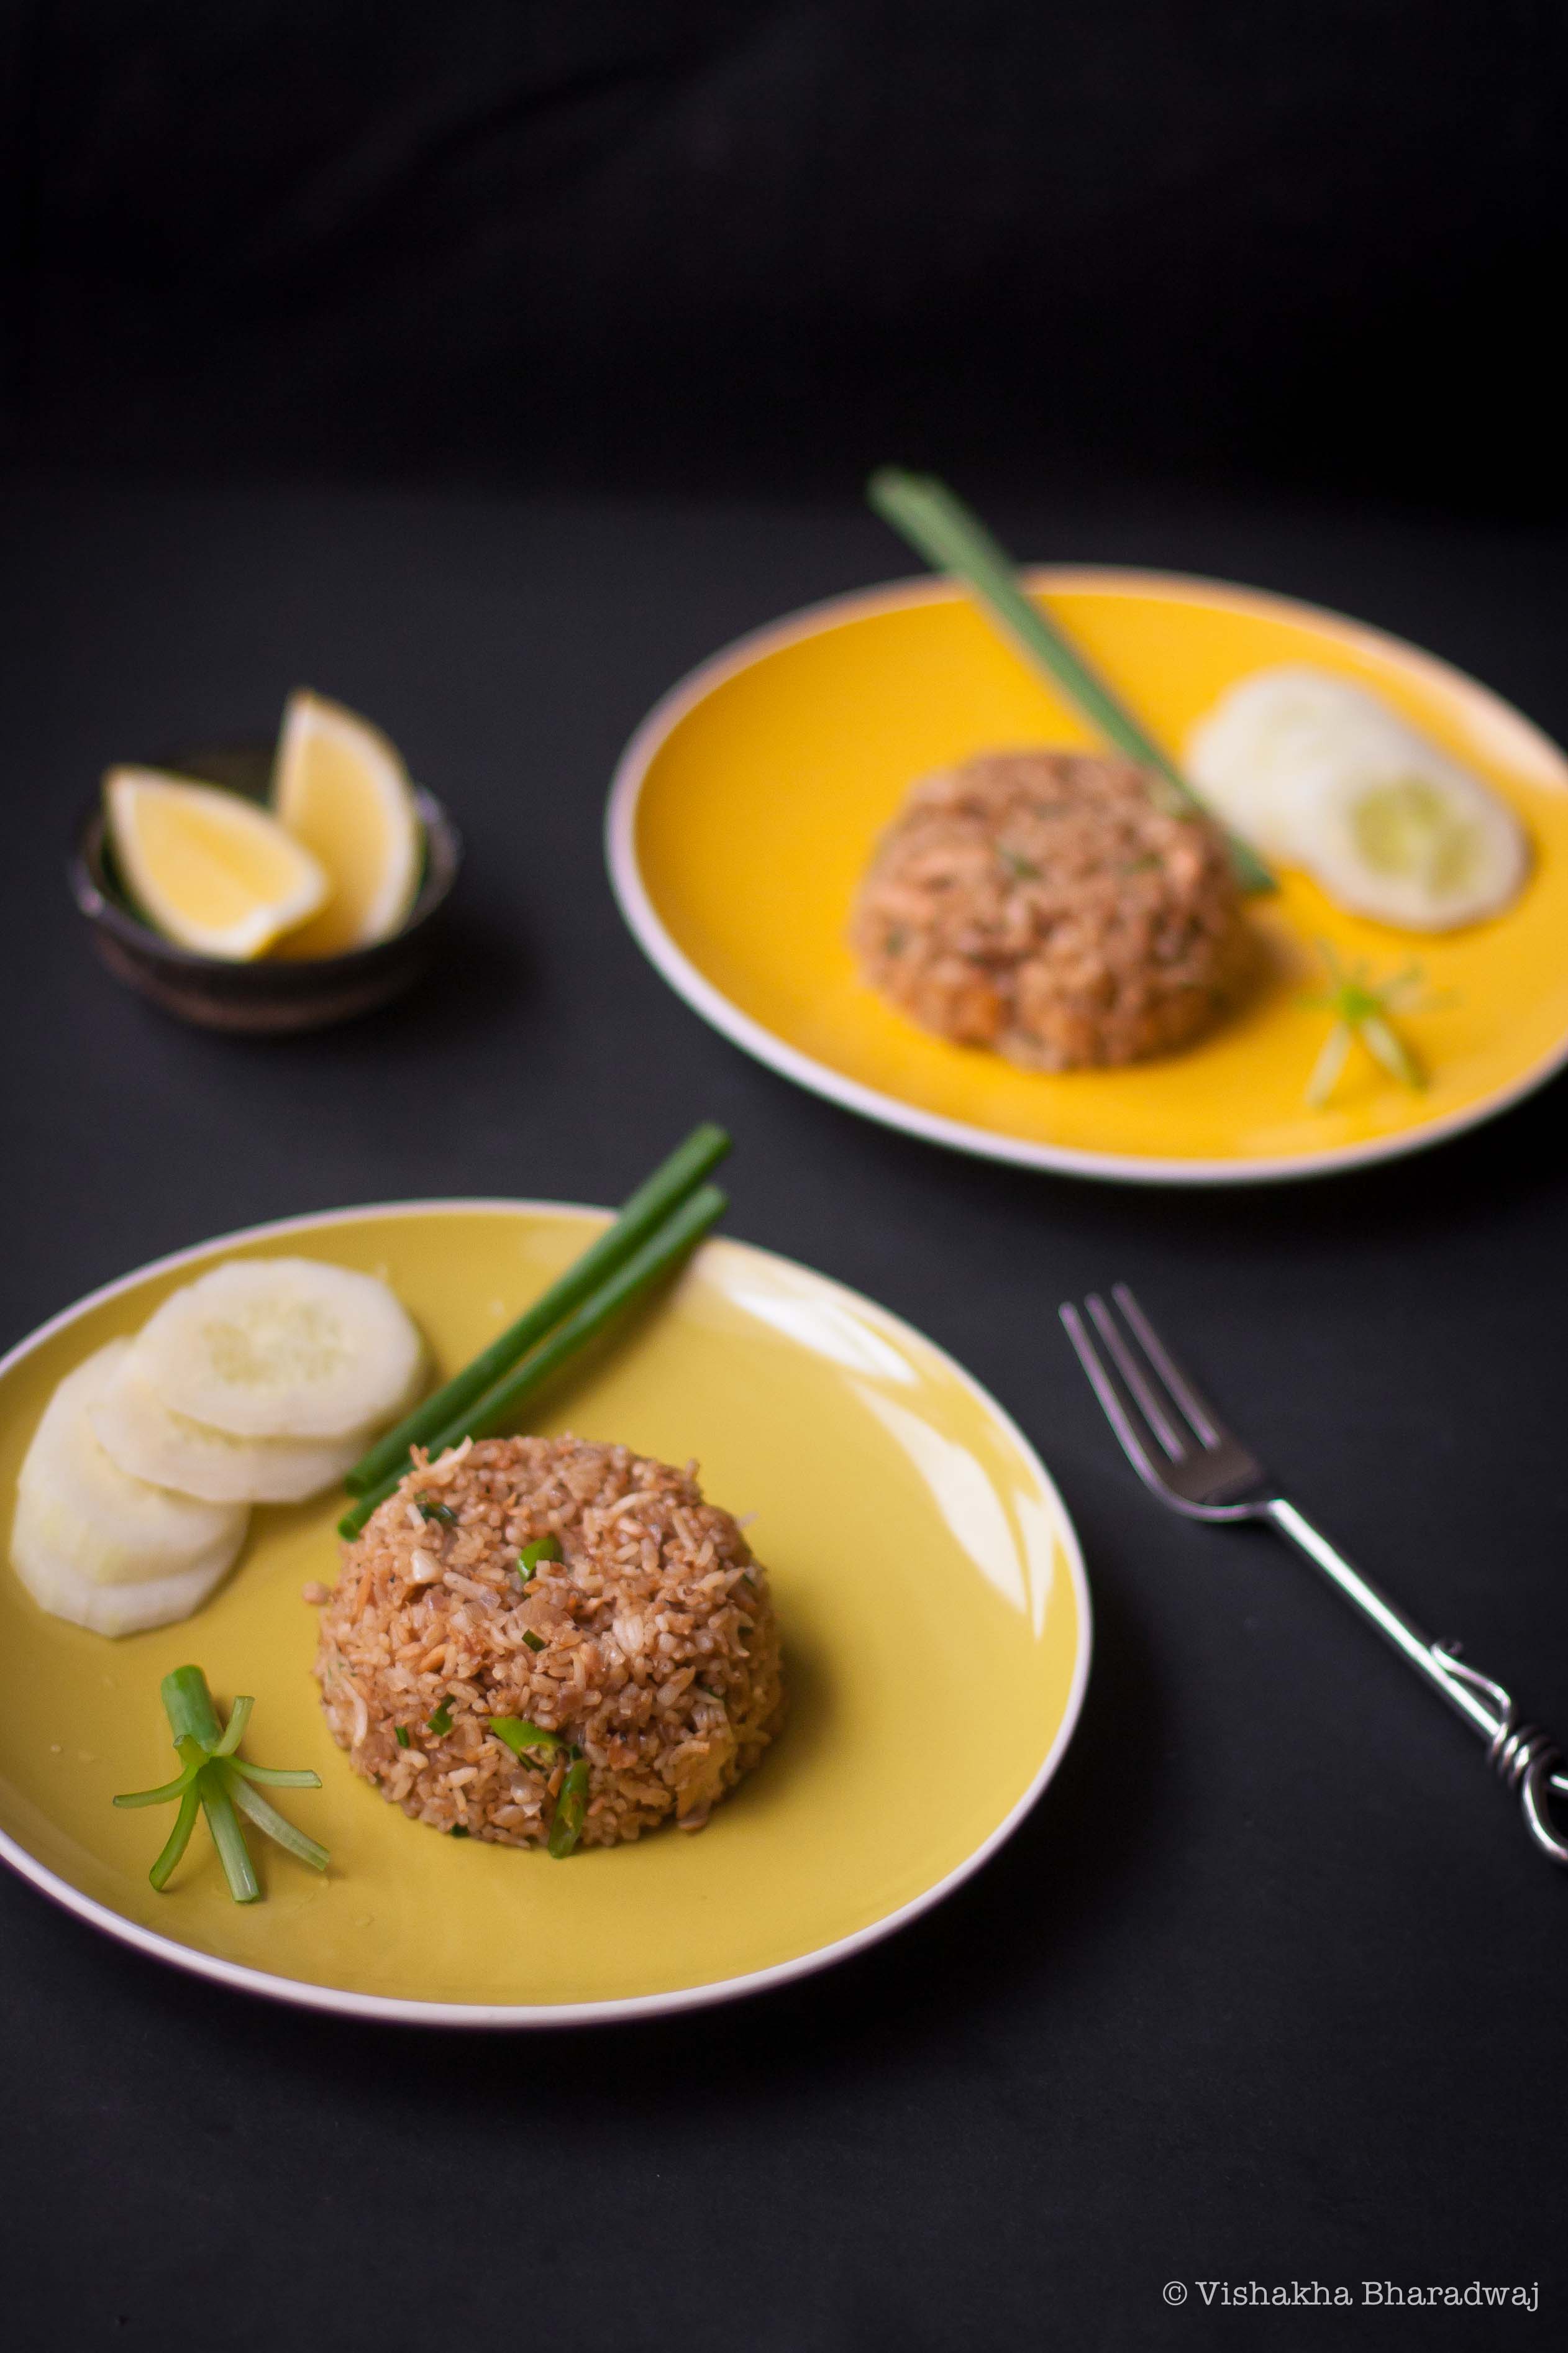
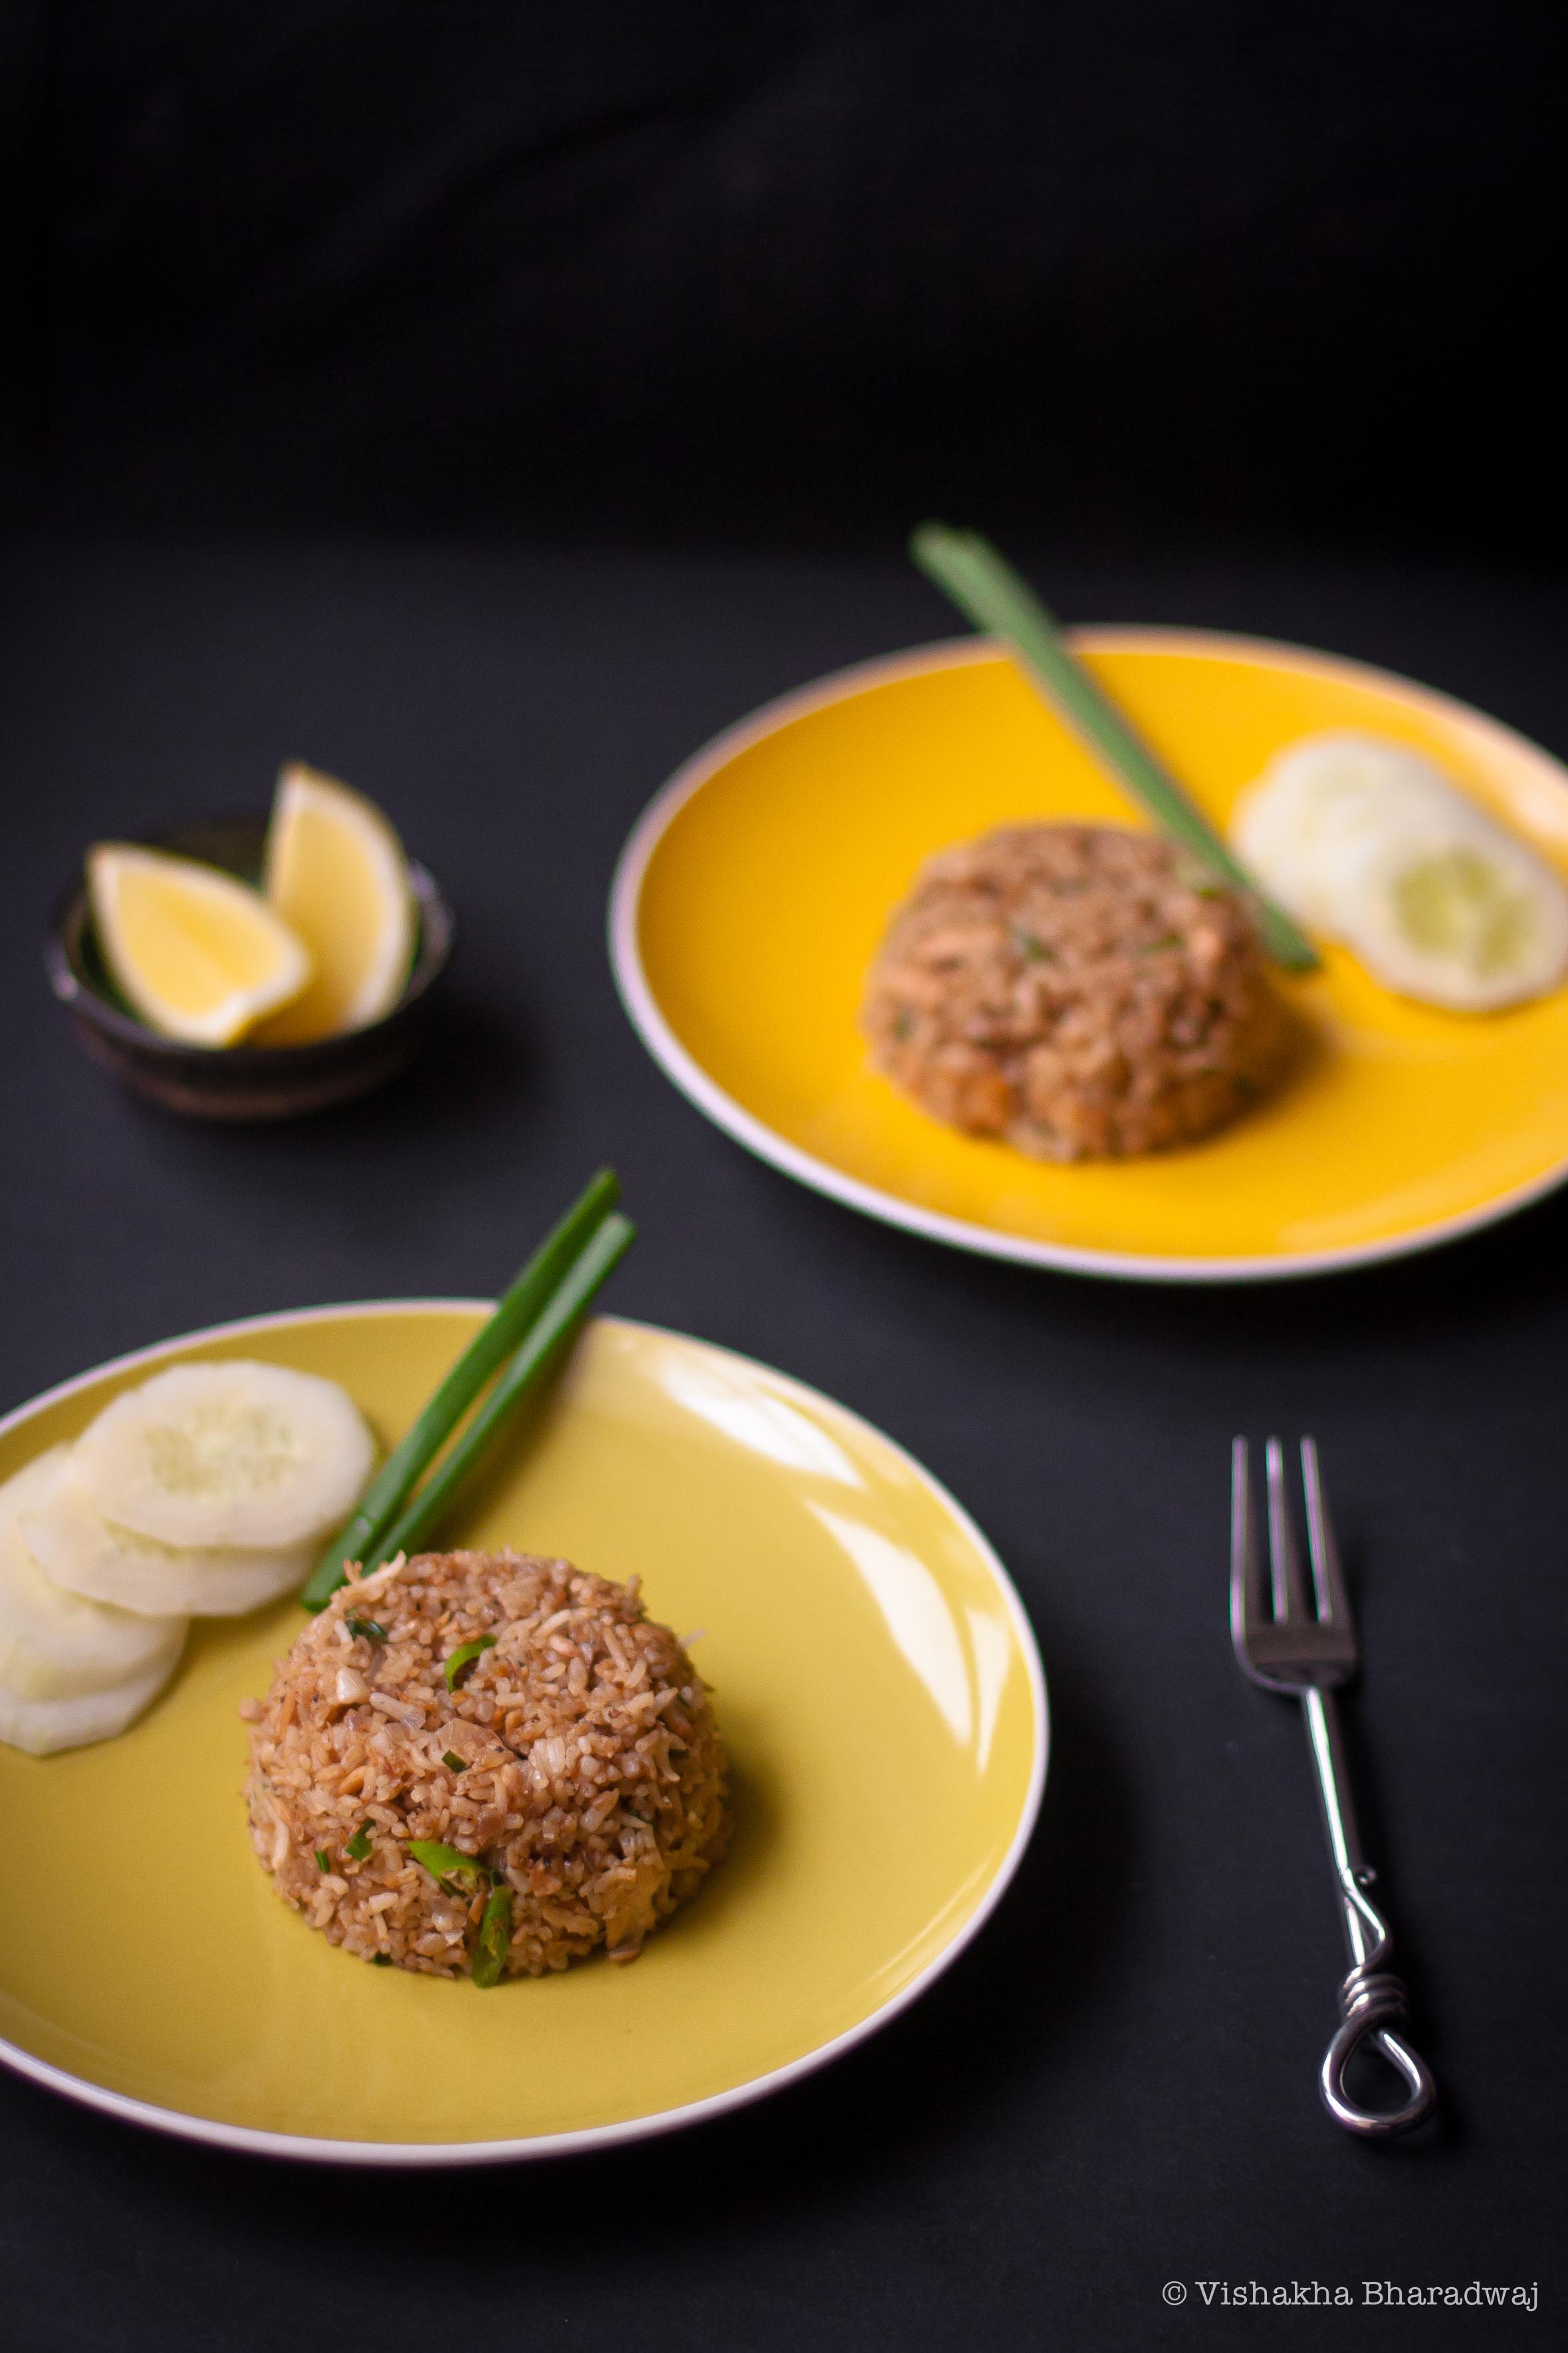
Today, I am sharing my recipe of a traditional Bengali Brunch – ‘Koraishootir Kochuri’ or Pooris stuffed with a spicy peas masala. Do not confuse them with “Kachori” from North India. The two are quite different in texture, appearance and taste.

IMG_7790

Koraishootir kochuri is a popular homemade breakfast especially in the winter months when peas are in season. I didn’t have to wait for winters as I used frozen peas which are fortunately available year round! 😉 Koraishootir Kochuri is almost always served with some Indian pickles (aachhaar / achaar) and a spicy semi-dry dish made with potatoes called aaloo dom in Bengali or aaloo dum in Hindi. I promise to share a recipe of aaloo dom / aaloo dum very soon!

IMG_7759

The filling used here is a spicy mixture of peas dominantly flavoured by asafetida. Asafetida or hing, is a very strong and pungent spice. It is used quite extensively in a lot of Indian vegetarian dishes, especially for cooking where no onions or garlic are used. Most commonly available in a powder form, when fried for a few seconds in oil, it releases a very pleasant aroma and enhances the flavour of a dish immediately. A little goes a long way is apt for this spice. It is also an essential ingredient for flavoring many Indian pickles / achaar / aachaar.

Traditionally, Maida or refined flour is used to make this dish. I prefer to use wholewheat flour instead.

IMG_7773

To print this recipe, click here.

Koraishootir Kochuri or Pooris with a spicy Peas Masala filling:

Yield: About 18-20 pcs
These are quite heavy as they are thicker than the usual pooris and they have filling inside.

Things I needed:

A Paraath or a huge plate which is common in most Indian homes. It is used to knead dough.
A deep bottomed kadhai or Indian style wok or a deep pot for deep frying.
A Chakla
A rolling pin

For more information on the essential utensils for an Indian kitchen, you should check out the blog written by my friend, Nisha. She blogs at Spusht and has done a brilliant job of making an inventory for any one new to Indian cooking. Check this and many other interesting recipes and ideas on her blog, Spusht.

IMG_7767

Ingredients for the Dough:

Wholewheat flour: 2 cups [I used Aashirvaad Wholewheat aata]
Ghee: 1 tbsp
Carom seeds or Ajwain: ½ tsp
Warm water: ¾ cup
Salt: a pinch or to taste
Oil for deep frying

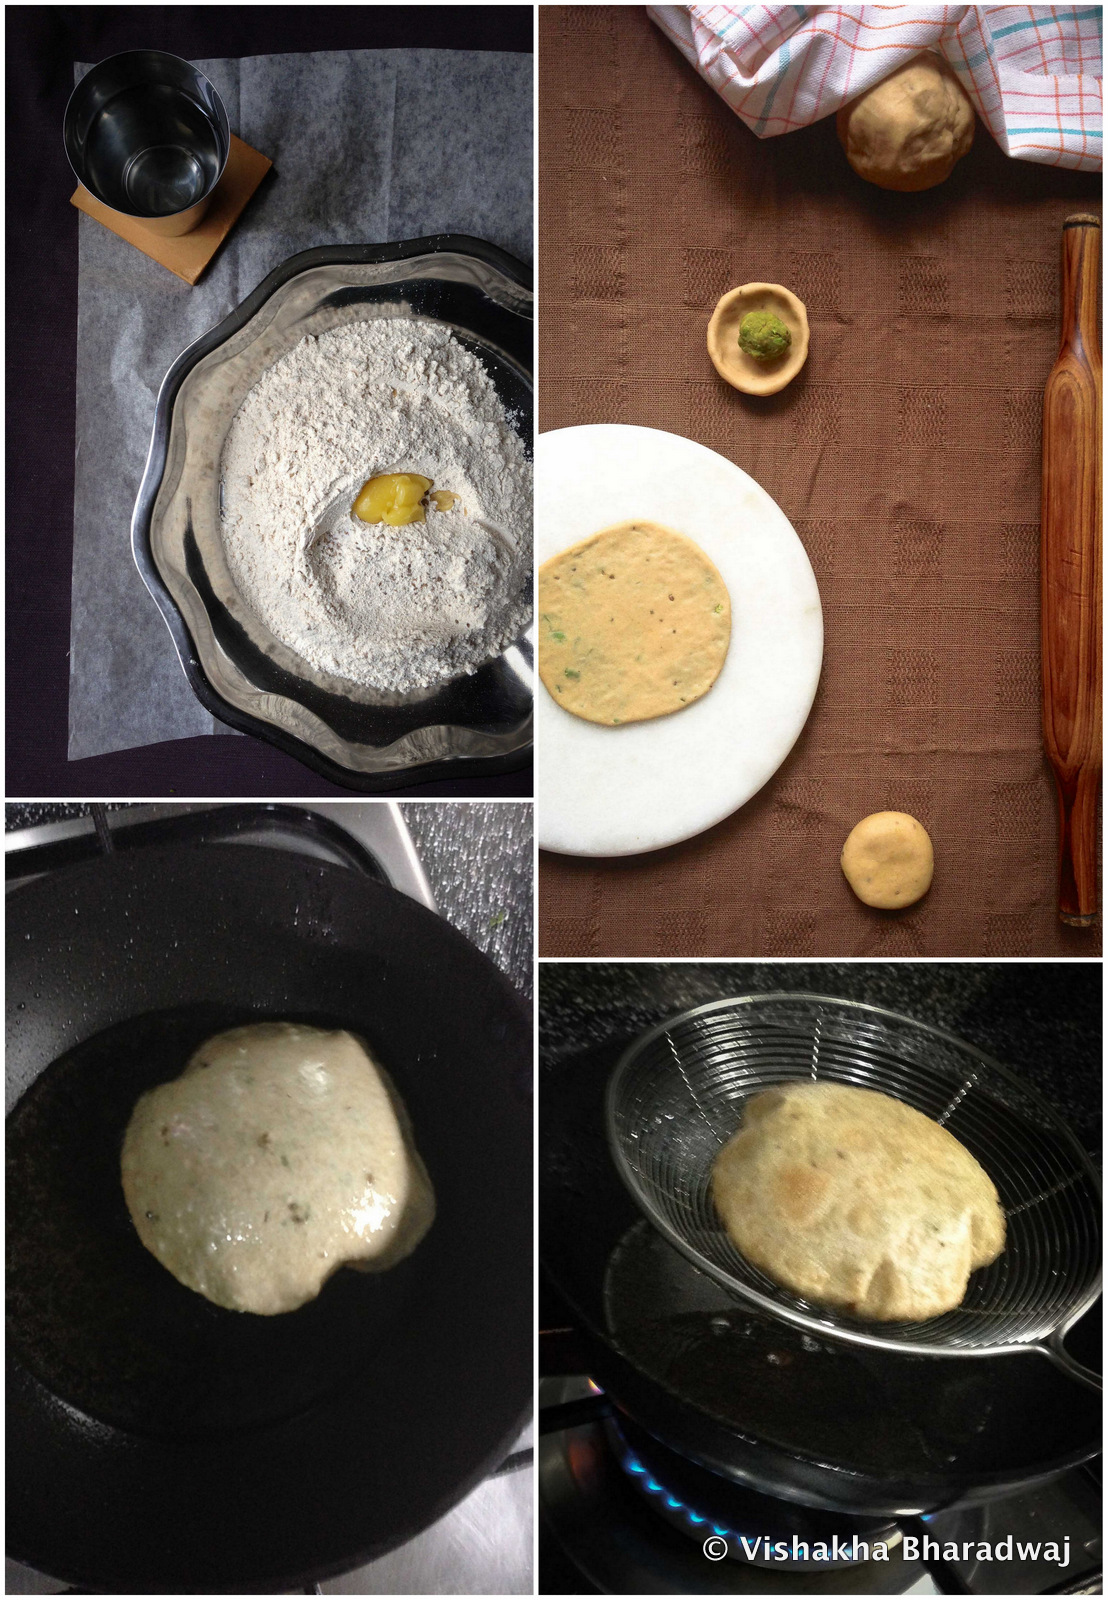
In a paraath or a big flat deep plate used in most Indian homes for kneading dough, add the flour, carom seeds (ajwain) and salt. Using your hands mix all the dry ingredients so that they are uniformly spread. Now add ghee (at room temperature) to the flour and rub it in between your palms. Repeatedly rub the flour and ghee mixture in this manner for 3-4 minutes to have the smell and flavour of ghee spread across the flour.

Next, make a well and add 1/3 cup water in the middle. Knead the dough mixing the flour with the water, adding water a little at a time. You may not need to use all the water but Add another 1/3 cup warm water and continue kneading. If the dough is sticky, just add a little flour and knead it again until smooth. We are looking for a dough which is not too firm but not very soft either – somewhere in between!

Ingredients for the Peas filling:
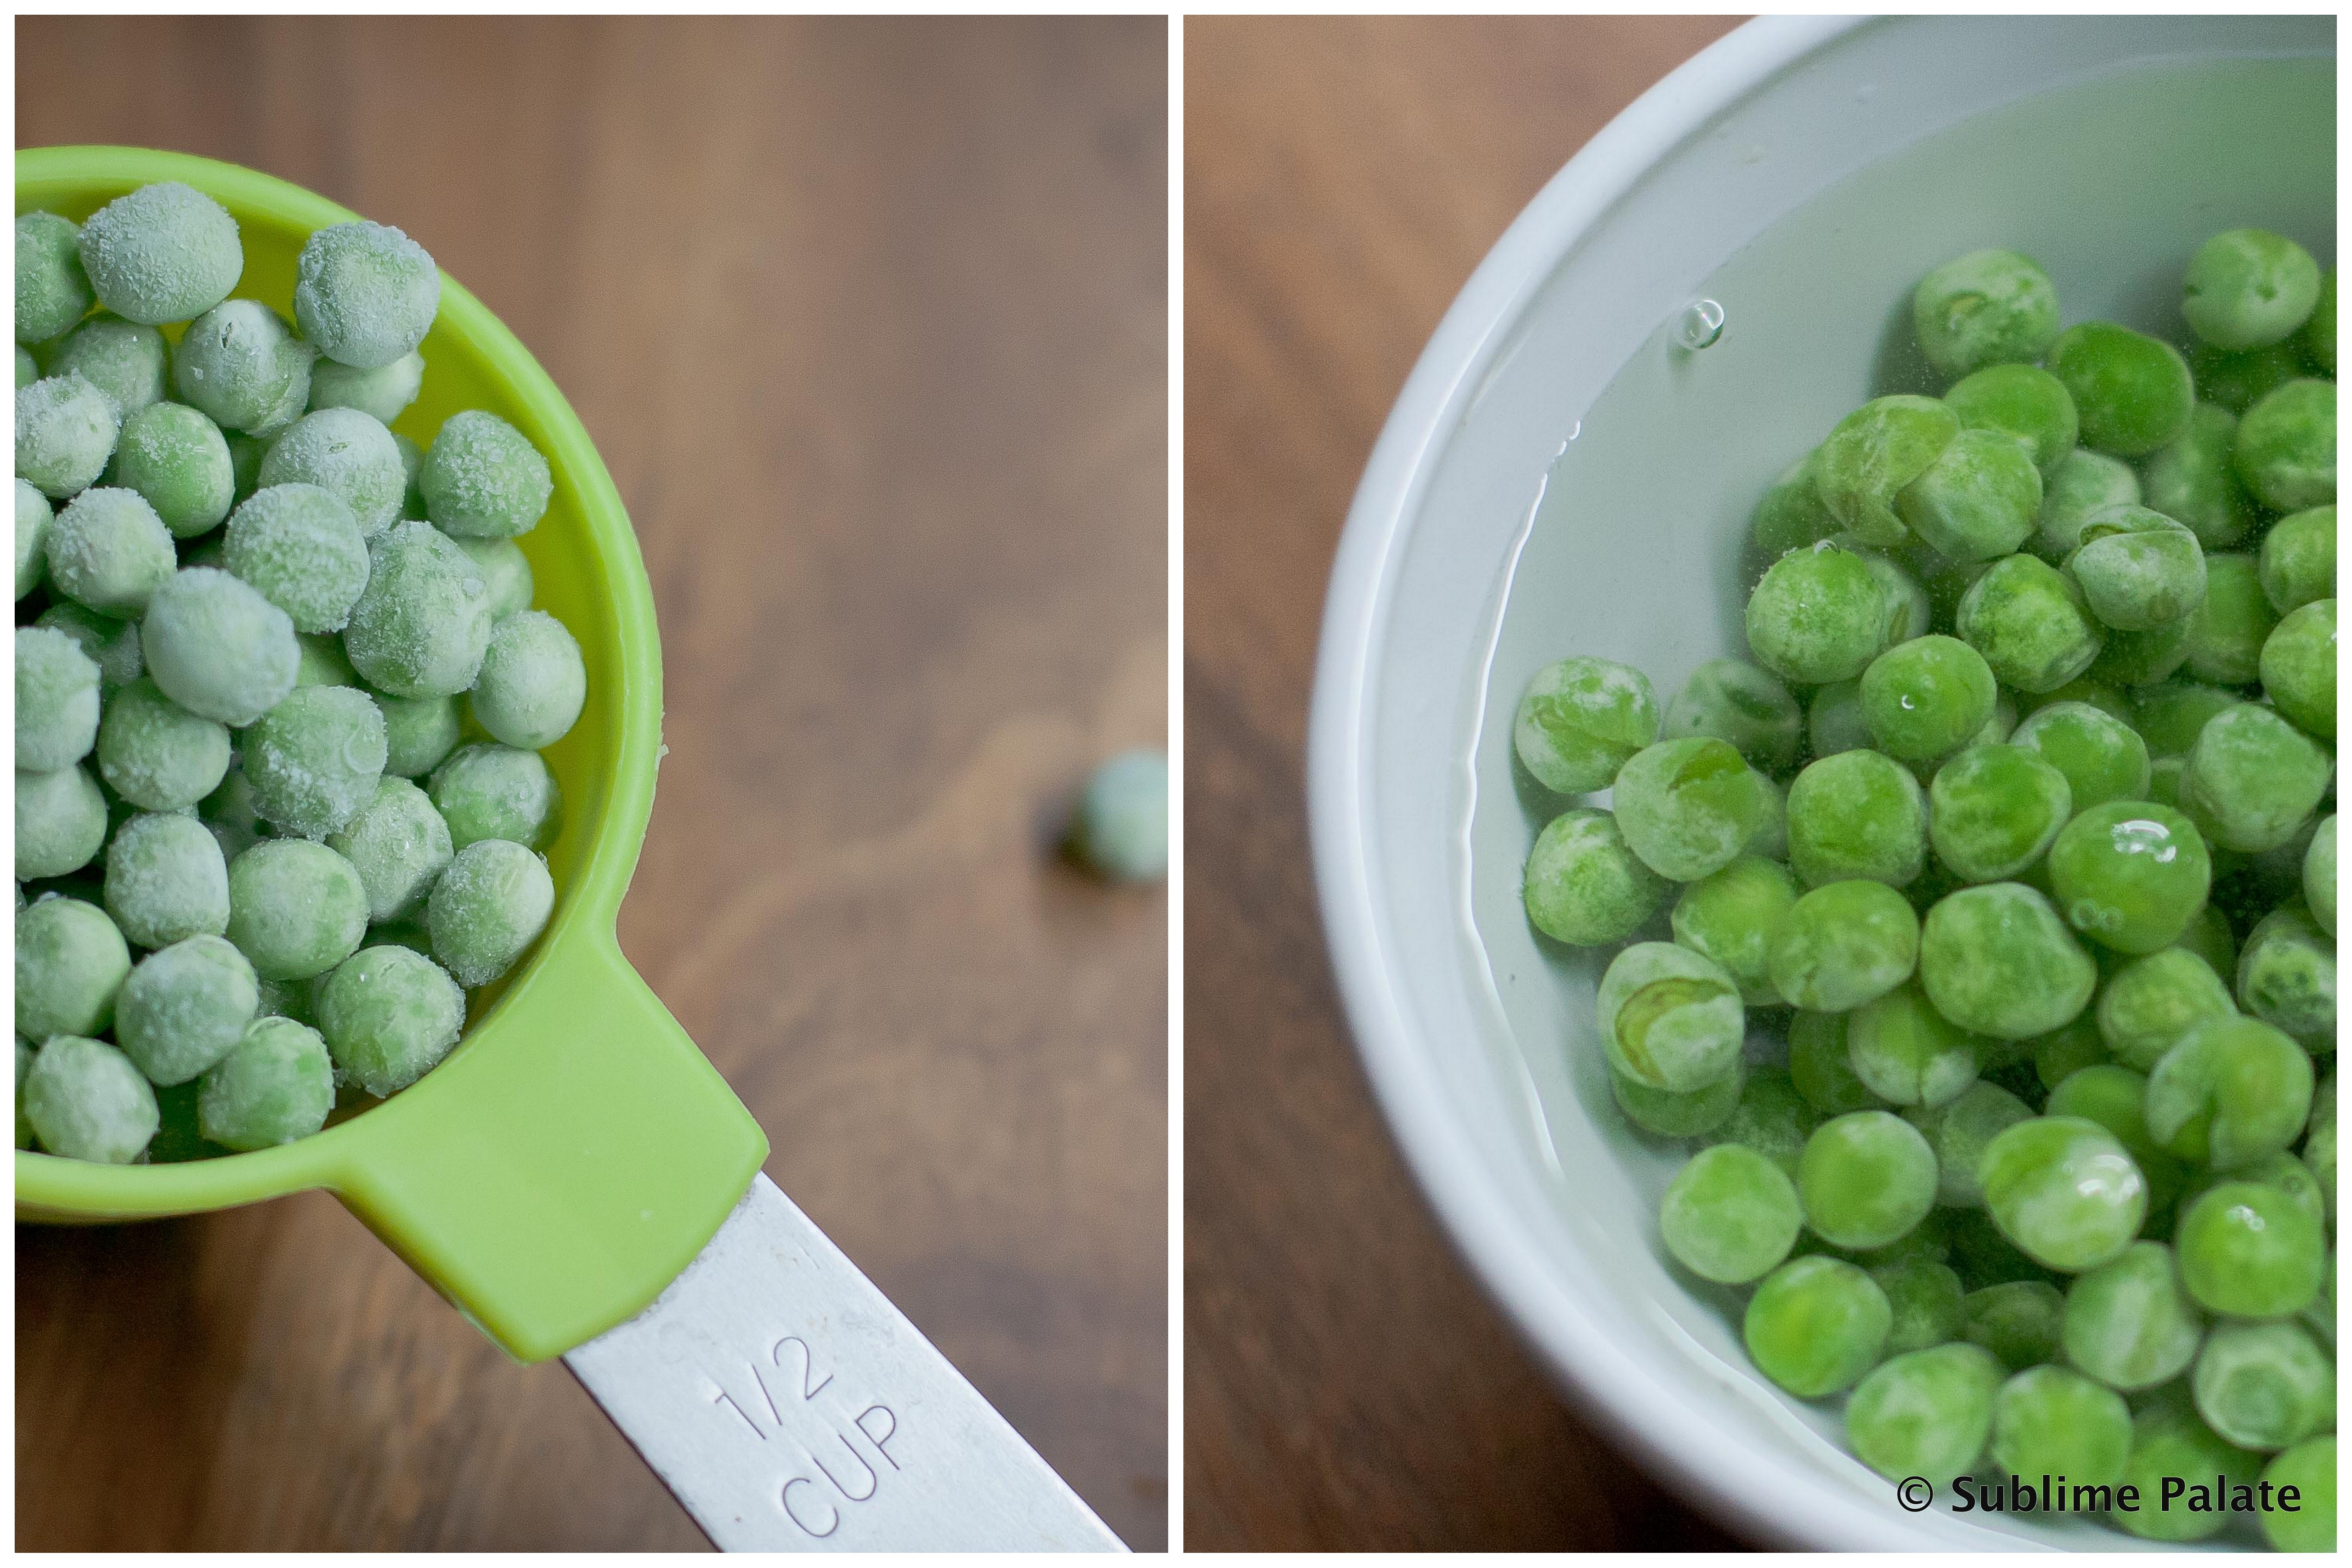
Frozen peas: 2 cups
Regular vegetable oil: 2 tsp
Cumin seeds: ½ tsp
Grated ginger: 1 tsp
Asafetida powder (hing): approx. 1/8 tsp
Roasted cumin powder: ½ tsp
Garam Masala: ½ tsp
Aamchoor (Dry Mango) powder: ½ tsp
Salt to taste

Boil the peas in just enough water to wet the peas with a pinch of salt until they are soft. (About 5 mins).

Using a food processor, make a coarse paste of the peas.

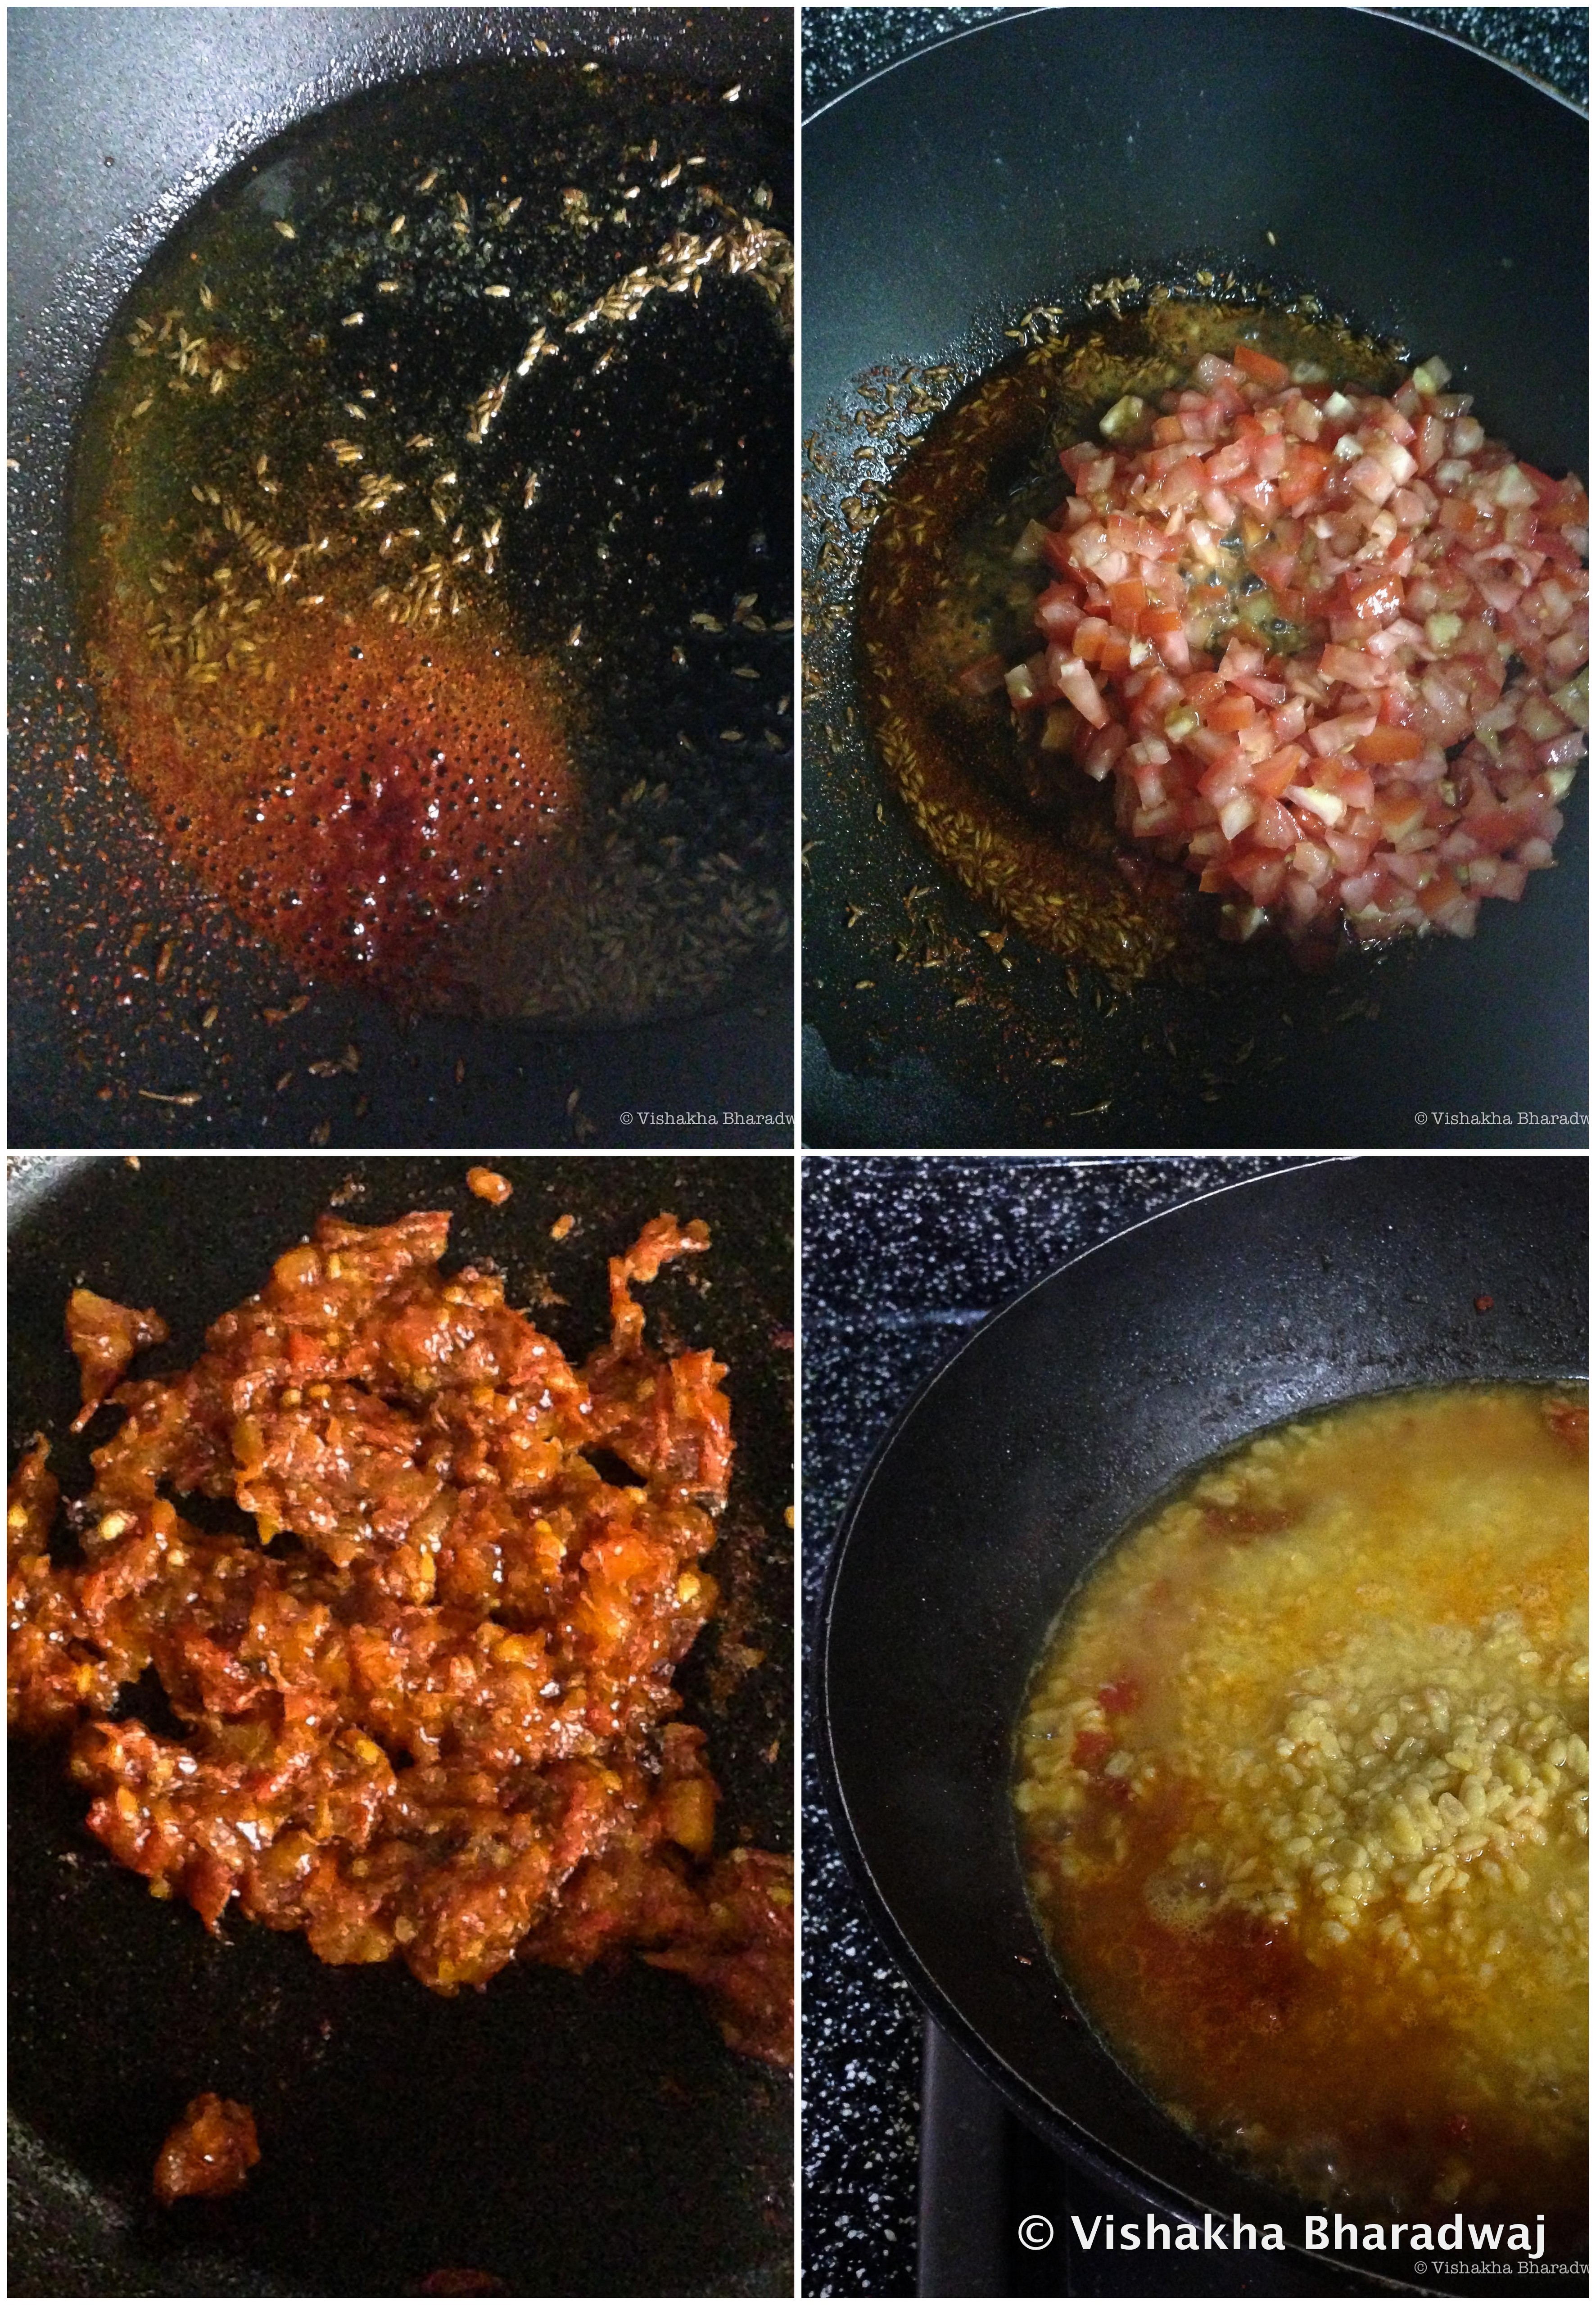
Heat 2 tsp of oil in a small kadhai / wok / skillet. Add cumin seeds, reduce heat and let it change colour without burning or turning black. Add grated ginger. You have to be careful to not let the cumin seeds burn otherwise it can add a bitter taste. Reduce heat or remove the pan from heat if needed. Add the asafetida and stir for a couple of seconds. Add the coarse peas paste, chilli powder and salt to taste.

Increase heat to medium, and continue to stir in order to reduce the moisture content of this mixture. When the mixture is almost dry (about 5 mins), add the roasted cumin powder, garam masala powder and aamchoor powder. Taste and adjust the taste to your liking. Continue frying for another 2 minutes and remove from heat.
Spread mixture on a plate to allow it to cool completely. This step is important to help you roll the pooris and make sure the filling doesn’t come out when rolling.

2013-08-22

Assembling it all together:

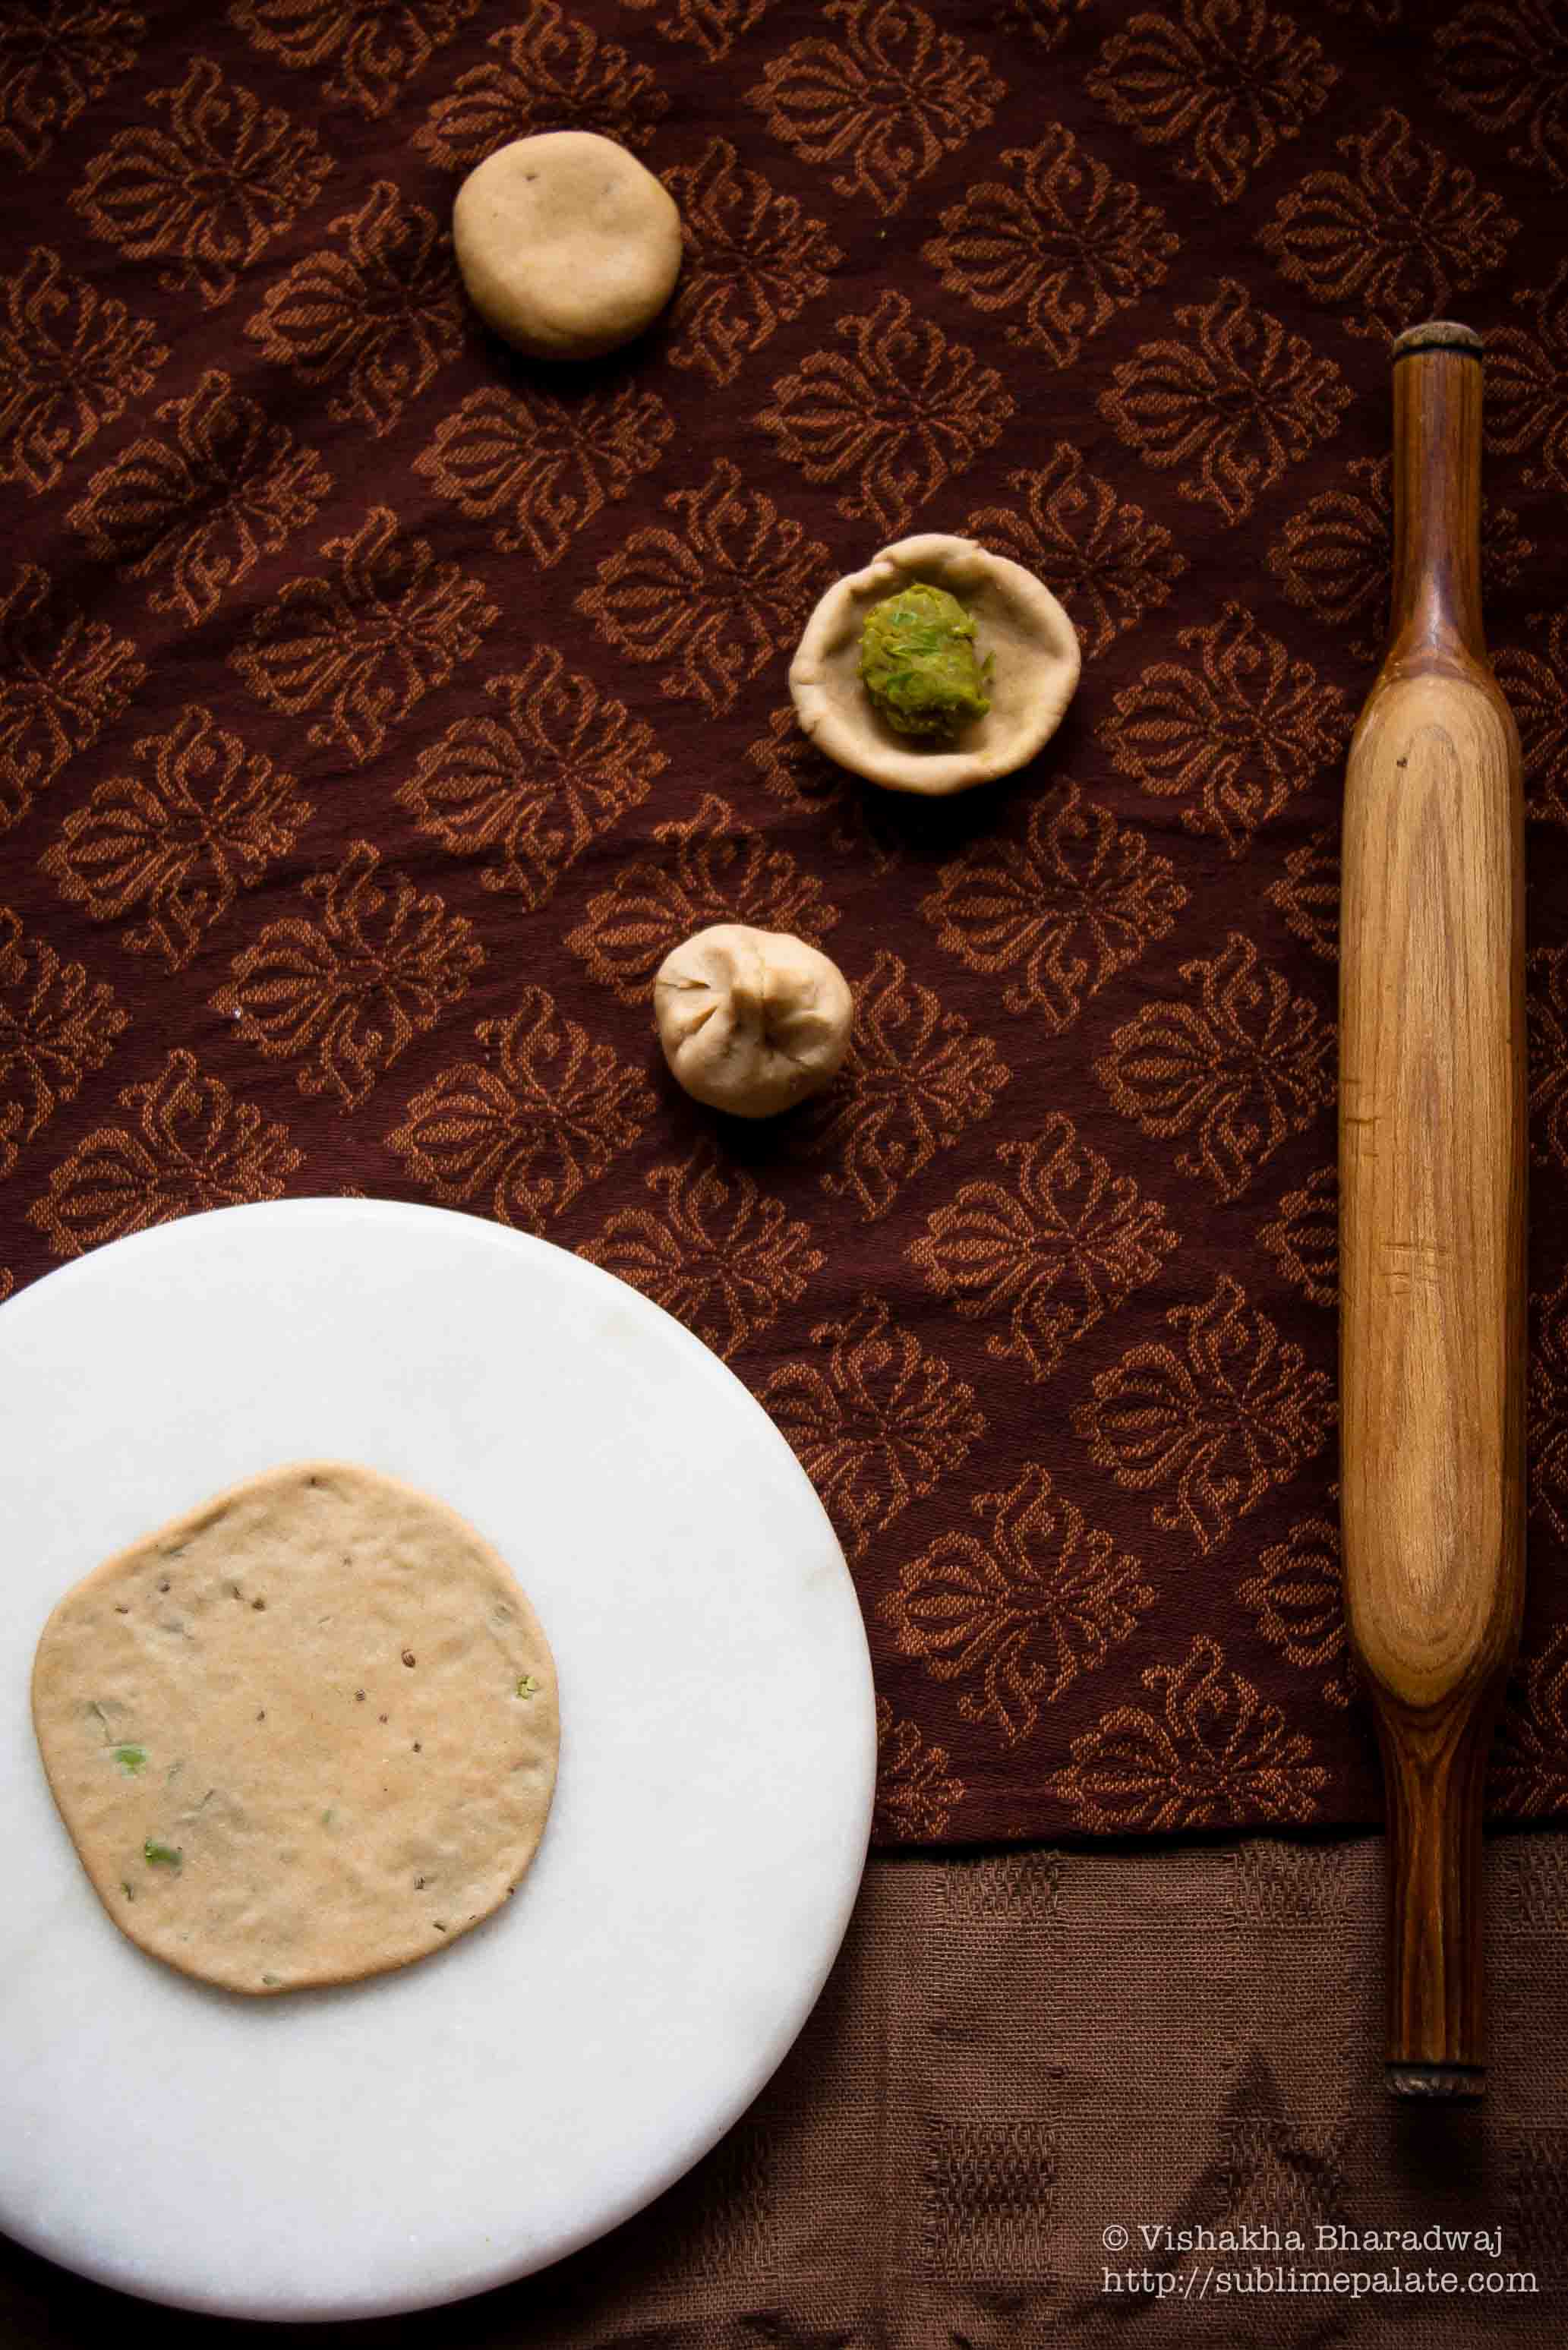
Now divide the dough into about equal size pieces. You should be able to make around 18 – 20 pcs. These are rolled thicker than the usual pooris so each portion must be a little bigger than your usual Poori dough. To give you an idea, each pc weighed in between 20-25 gms.

Make a smooth ball with each pc of dough. Using your fingers and in a sort of pinching motion, press from the centre turning it around, creating a well to stuff the filling. Make sure you don’t spread it too thin as this needs to be rolled flat and the stuffing should not come out.

Stuff around 1 tbsp of the prepared filling as shown in the picture. Seal it well. Take out a tbsp of the oil in a small bowl. Put a few drops of oil on the surface of the rolling surface (Chakla) to ensure it doesn’t stick when rolling. We do not use flour to roll these as dry flour will burn very quickly [A tip I learned from my Mother-in-law].

Roll these into small but thick pooris about 10-12 cm in diameter, taking care not to let the filling come out. If the filling comes out, these will not fluff up as we want it to. This takes a little practice so don’t be disappointed if you miss a few. Keep trying:)

Test the oil by adding a tiny pinch of dough, it should sizzle immediately and float up in the oil. Remove the test piece or you’ll have a burnt piece of dough floating about.

Gently slide down the rolled koraishootir kochuri in to hot oil to deep fry them. With the back of the spatula, gently press these kochuris to help them fluff up. Once fluffed up, immediately turn them over so that both sides get cooked. Fry one piece at a time. You could roll a few and keep on standby while the oil is heating, but make sure you do not stack them. Instead, spread them on a plate separate from one another.

Keep adjusting the heat. If the oil becomes too hot, there are 2 things you can do:
– reduce the heat or remove from heat to gradually cool down the oil to bring to desired temperature.
– Add more oil. This will help to reduce the temperature of the oil.

2013-08-221


Advertisement

Spicy Sweet-Potato bites!


IMG_7746

One of my earliest memories of sweet potatoes (Shakarkand, Mishti Aaloo or Aluaa) is from my occasional winter visits to my grandmother’s home in Bihar. Sweet potatoes were found in abundance in the winter months. Bonfires made with wood were common in almost every corner / street. Given the lack of heating equipments then, these bonfires were the perfect social setting for some tea, conversations and food along with the much needed warmth for those extremely chilly winter evenings.

2013-08-141

IMG_7750

Sweet potatoes are common food at these casual, unpretentious gatherings. Someone will usually carve out some of the burning amber coloured wood and cover the sweet potatoes in them to let it slow roast. This can take up to an hour to cook. When cooked, the skin becomes very crisp. It is then peeled and dunked in milk with or without sugar and is absolutely delightful for sweet potato lovers. At other times, sweet potatoes are also cooked in the wood fired mud ovens (choolha) that is common in rural India. The other simpler way to cook them is by boiling them in water, peeling them and then seasoning it with some salt and Teesi as part of a regular meal.

If you haven’t grown up with this, you might find the idea strange. R, who spent a number of years in Delhi, finds his peace in roasting and spicing up these tuberous roots. It makes me realize how important it is to try different kinds of food in the early years of life. The food that we eat, especially as children creates memories, forms and shapes how we remember and associate life events and people as we grow up.

I must admit though that I never had a strong liking for sweet potatoes (primarily because of its sweetness) until I became a mother. I strongly believe children should be exposed to different kinds of food from an early age. It helps them to have an open mind about food as they grow up. In practice, I take it as an opportunity to nurture my own creativity in the kitchen and make some interesting meals for the family.

These bite sized cutlets make for a great appetiser to kick start any evening.

IMG_7742

For this recipe, I boiled the sweet potatoes until cooked yet firm. I wanted to create a flavour combination that would tone down the sweetness of the sweet potatoes while incorporating savoury, tangy and heat in the right intensity. The first time I created these was when I was trying to make something new for little V’s snack box. I also wanted to make something that was bite size, just the right size so that he can use his fingers without making it too messy.

To print this recipe, click here.

Yield: About 40 mini / bite size sweet potato cutlets

Ingredients:

Sweet Potatoes: around 500 gms
Onion: 1 cup, finely chopped
Teesi: 3 Tbsp (See recipe of Teesi here)
Lime juice: 2 Tbsp (start with 1.5 tbsp and adjust to suit your taste)
Coarse Rice powder: 3 Tbsp (you can replace this with fine semolina instead)
Finely chopped coriander leaves: ½ cup
Finely grated ginger: 1 ½ Tbsp
Roasted cumin powder: 1 ½ Tbsp
Chilli powder: 1 tsp
Black pepper powder: 1tsp
Finely chopped green chillies: 4-5 (I used Thai green chillies)
Rock salt: ¼ tsp
Salt: to taste
Ghee to pan fry the mini cutlets (replace with your regular cooking oil if you prefer): You will need to spread a tsp (or less) of ghee in the skillet. As you cook the mini cutlets, you can use an oil brush or the back of a spoon to touch the surface of the cutlets with ghee/oil. When pan frying the next batch, use a little less ghee, just enough to have some oil lining the skillet.

How I did it:

  1. Wash sweet potatoes thoroughly. Slice each sweet potato (skin on) into 2 or 3 big chunks. I used a pressure cooker to boil until steam forms (one whistle). Remove from heat and let it cool down until all the steam is released.
  2. Meanwhile, prepare the other ingredients.
  3. Shock the boiled sweet potatoes in ice cold water. Peel the skin. Grate these into a large enough bowl.
  4. Add all the remaining ingredients listed above.
  5. Using your fingers, mix all the ingredients together making sure the spices (masalas) are uniformly mixed. It doesn’t matter if the sweet potato loses the grated texture. Sweet potatoes have been cooked but are still firm and will retain their texture when we shape them into mini-cutlets. The important thing is to mix this well to ensure every cutlet has the flavours uniformly spread across. Taste and adjust the salt, spice and tangy taste according to your liking. The best way to do this is to pan fry one mini-cutlet first and taste it. I believe the taste alters with the cooking process therefore this step is highly recommended.
  6. Shape the mixture into bite size cutlets – about an inch to 1.5 inches in diameter.
  7. In a skillet, heat about a tsp of ghee (Just enough ghee to wet the skillet) Place the mini-cutlets in the skillet, and cook on low heat until crispy on the outside. As I do not use much ghee in the skillet initially, I like to brush the cutlets with a little ghee on the outside during the cooking process. This helps to give a nice golden color.
  8. Serve with coriander chutney or a coriander-mint chutney (click here for recipe) or chilli sauce.

IMG_7748

Notes:

  • The green chillies are an absolute must in this, if serving for adults. Adjust to your tolerance. I skipped it when I made it for V.
  • I added Teesi which made it healthier obviously. If you do not want to make Teesi, you can replace it with a tsp of roasted coriander powder and 1/8 tsp of chilli powder instead. The flavour will be different but good, nevertheless.
  • I used Vietnamese sweet potatoes to make this, as it is readily available here. The Vietnamese sweet potatoes have less moisture than many other varieties. I found it easy to shape and pan fry.

2013-08-14

Cooking in the backyard: Thai style Tuna Fried Rice

IMG_7698

Thailand, a country full of little family-owned café’s. These little café’s are usually set in a comforting, home-style environment. Here you’ll experience what I call ‘cooking in the backyard’. It is also how a lot of traditional homes are designed with a wet kitchen in the backyard. You’ll often see the young school going teenager lending a helping hand to his or her parents. During rush hour, the kids even help with the cooking. It’s inspiring to see these young chefs cook with such exuberating confidence.

IMG_7718

I stand there watching, as the man on my side of the counter passes a white slip over to the Cook. The Cook, a lady probably in her late 40s, has a very pleasant disposition. She smiles at me as she gently heats up the wok while taking a quick glance at the white slip of paper. She’s probably done it a thousand times over and over again. She looks like she could do this with her eyes closed.

As the wok heats up, she takes some garlic and chillies and gently pounds them using a mortar and pestle. The mortar and pestle is always by her side. She is extremely organised with each ingredient placed less than an arms distance away, just where it should be. She always has a big icebox next to her where all the chilled meat is kept. She opens it just a bit, takes out the required portion of the meat and closes it again until the next order comes in.

IMG_7703

An artist in her own right, she knows how to play with her tools – the mortar and pestle, the wok, the ladle and the fire. She uses the fish sauce, sugar, soya sauce, pepper and other herbs and spices to tell her story. She fires up the wok, turning and tossing the ingredients, adding them one after the other, all in good time, adjusting the heat as she deems appropriate. Within minutes, she creates food that is a treat to all your senses. A modest melamine plate in basic white, with or without patterns is placed right next to her. She plates her food and places a few slices of cucumber and a slice of lime, all in such an artistic manner.

IMG_7706

As the plate makes its journey from the wok to my table, my eyes see the color coordination including the Thai green chillies and the freshness of the lime. As it is placed in front of me, I get the smoky aroma that creates a suspense that I want to unfold, almost immediately. As I take the first bite, I know it has touched all my senses and a memory has just been formed.

 As the lady moves on to the next white slip where the orders are scribbled, a quick rinse and a scrub is all it takes to have her Wok ready to create the same brilliance all over again for the next waiting customer.

IMG_7701

Here is my version of a Thai style Tuna Fried Rice, a dish I had for many lunches during the years that I lived in Thailand.

For the printed recipe, click here.

Serves: 3

Ingredients:

Pre-cooked and cooled Thai Rice (preferably cooked the night before): 2 ½ cups
Red Onion: 1 Cup finely chopped
Thai Green chillies: 4-5, chopped fine (This makes it very spicy, adjust to your own tolerance)
Garlic, lightly pounded: 3 cloves
Olive Oil: 1 tbsp
Canned Tuna flakes in EVOO (use any other similar variety): 150 gms, oil drained.
Spring onions (Scallions), finely chopped (green parts): ¼ cup
Fish sauce: 1 Tbsp
Dark soya sauce: 1 tsp
Worcestershire sauce: 2 tsp
Black Pepper powder (coarsely powdered): ¼ tsp (or adjust to taste)
Salt: a pinch

IMG_7711

How I did it:

  1. The rice needs to be precooked and cold. This is important to ensure the grains of rice are separate and not lumpy when making the fried rice. When cooking the rice for fried rice, put a little less water than you would do normally.
  2. Heat a wok. When the wok is hot, add oil to it.
  3. Add the lightly pounded garlic. Reduce the fire and let the garlic cook for a few seconds without getting burnt. Add the chopped onions and green chillies. Let it soften while stirring continuously. Onions will change colour to a beautiful pink. Approx 3 mins on low heat.
  4. When the onions turn pink, add the cold and precooked rice and a tiny pinch of salt and increase the heat to high. Using the back of a ladle/spatula, push the rice towards the centre of the wok, removing any lumps while mixing it with the onions.
  5. Now add the tuna followed by all the sauces and the black pepper powder. Bring it together on high heat.
  6. Add the chopped spring onions. Give it one last good stir and serve it immediately with some sliced cucumbers and wedges of lime.

Collages30

Notes:

–        Fish sauce is quite salty. I would suggest that you add half the quantity of fish sauce first and adjust the taste as per your liking.
–        In my opinion, a fried rice cannot have the same texture and taste if it’s cooked with freshly cooked or hot rice. Therefore, try to cook the rice at least a few hours in advance.
–        If you don’t have spring onions, replace it with some finely chopped fresh coriander leaves or cilantro. That little bit of green is essential to provide a little freshness to this simple fried rice.
–        I had to cook for my 4 year old son, so I added the green chillies right in the end. If not, I would have added them together with the onions, or lightly pound them together with the garlic in the very beginning. Go ahead and do whatever suits your situation. If you are making this for kids, omit the green chillies.

The simple things in life: Mung Dal [no onion-no garlic]


IMG_7686


When life begins to feel complicated, I take a moment to reflect on the meaning of happiness and what it is for me. Is it really a bigger house, more money, an expensive bag or things like that? Yes, I would be lying if I said these things didn’t make me feel good at all. It does, but for that moment and may be a few days more. The only problem is if I continue to seek happiness in such things, my definition of happiness will keep getting complex.. and there’s really no end to it. There is always a want for more… and more. Nothing wrong with it but I find it important to take a moment, think back and put things in perspective.

It’s always the simple things in life that gives me true happiness. I am sure it’s the same for you too. In my quest for happiness, I listed a few things (not in any particular order) that make me truly happy:
A hug from my 4 year old child
Being a Mom
A good cup of ginger tea (chai) early in the morning
An unknown, probably insignificant, little flower my child picked up from the roadside. Just for me.
A conversation with my closest friends
A breath of fresh air
Soaking the sun rays
Companionship
Recalling childhood memories
A simple home made meal: Dal-Chawal

IMG_7696

Dal-Chawal or Lentils-Rice. A combination which is a staple in India. It may be in different variations depending on which part of India or which home it has been cooked, but essentially it is lentils or Dal and Rice.

Every time I travel, I immerse myself in the food and culture of that place. It’s an unspoken rule that we never order Indian food when traveling [outside of India]. However, when I come back home, the first meal cooked, without fail, is a very simple Dal-Chawal.

I wouldn’t even want to call this a recipe considering this is such a staple in Indian households. I still choose to write the method down as every home has their unique way of cooking lentils. Dal is cooked in a lot of Indian homes, almost every day. And that is also the reason, why one gets bored of eating it ever so often. In order to bring variety to Dal, I like to rotate the kind of lentils I cook. My pantry is stocked with some 7 different types of lentils/beans. I don’t cook Dal all 7 days a week but it definitely finds it’s way to our dining table at least 3 to 4 times a week in various forms.

IMG_7680

This preparation is quite simple – No onions, No garlic. A simple Dal flavoured with cumin seeds, asafetida and tomatoes. The cumin seeds, asafetida and tomato are the main players in this act. Asafetida gives it a pungent taste and tomatoes add a mild sour flavour to the Dal. It’s a little tough to tell which one is more dominating – the asafetida or the tomatoes, but together, they rule the otherwise modest Mung beans.

IMG_7685

The process of making this Dal is two fold. Part one involves roasting the Mung beans and then softening the beans while infusing it with some fresh ginger. Part two is the tadka or tempering that will add the flavours to the Mung. The tempering is done in ghee or clarified butter with cumin seeds, asafetida, finely chopped (or grated) tomatoes and some Kashmiri chilli powder for a mild spicy touch.

IMG_5770

I am also sending this recipe to Aparna of My Diverse Kitchen for the 61st edition of MLLA. My Legume Love Affair (MLLA) was started by Susan of the Well-Seasoned Cook and is now being carried forward by Lisa of Lisa’s Kitchen.

Mung Dal with Asafetida and Tomatoes (no onion-no garlic)
Serves: 3-4
Time: 30 mins

Ingredients:
Yellow Mung beans / dal / lentils: ¾ cup
Asafetida (hing): ½ tsp
Cumin seeds: 1 tsp
Tomatoes: 2 medium sized (about 1 + ¼ cup of finely chopped)
Kashmiri Chilli powder: ½ tsp
Ginger (grated): 1 tsp
Turmeric: 1/8 tsp or roughly a big pinch
Salt: to taste
Water: 2 cups
Ghee: 1 tbsp

IMG_7679

Method:

  1. Dry roast the Mung beans. I do this in a pressure cooker to avoid getting too many utensils dirty. Keep stirring the beans constantly to ensure they are evenly roasted. I did this on medium heat for about 5-6 mins. When roasted, take it off the heat. Rinse with water 2-3 times.
  2. In a pressure cooker, add the rinsed Mung beans, 2 cups of water, a pinch of turmeric, ginger and salt. Cook the beans until soft while still retaining their texture. If you are using a pressure cooker, let the steam build up on high flame. Then lower the flame and let it cook for another 5 minutes until done.
  3. While the Mung beans are getting cooked, heat ghee in a pan. Add cumin seeds. When they are done, add the asafetida and chilli powder. Let it cook for a few seconds. Then add the chopped tomatoes and a pinch of salt. With the heat on high, cook the tomatoes constantly stirring it to ensure they are not burnt and until the raw smell no longer exists.
  4. When the tomatoes are cooked, reduce the flame. Add the Mung beans. Add water to a consistency you want and adjust the salt as per your taste. If you want to add chillies, add 2-3 slit chillies (a combination of green and red adds a nice colour.. You can add just green too and skip the drama). Let it come to a boil on high heat and then simmer for 3 minutes.
  5. Garnish with coriander leaves and serve hot with rice and any vegetables of your choice.

2013-07-30

Roasted Chicken with Rosemary

‘I don’t know what to cook tonight’ – a dilemma many of us face on a day-to-day basis. Every time, ok almost every time, you think of making dinner, you probably end up saying that to yourself. I do! A close friend has just initiated a group on Facebook by precisely that name – ‘I don’t know what to cook tonight’. She is a great cook herself and there are already some interesting recipes being shared there. Do hop on over there and join us:)

The first post in that group also happens to be a Rosemary Chicken. To see her recipe, check out the group. I promised to share to share my version as well, so here we go.

One warm, humid night in October last year, I made this absolutely juicy and flavourful chicken dish for the nth time. I took photos of the process, almost making the recipe dummy-proof. In case you are thinking how brilliant my memory is, just hold on to that thought. The reality is – it isn’t! The place where I live, is warm and humid practically most of the year 😉

Roasted Chicken with rosemary

So let’s rewind back to October 2012, I took out my [then brand new and now almost hammered phone], and clicked pictures of the making of this dish. Honestly, there are times when I really couldn’t be bothered with how the photograph turns out. And there are these other times, where I can go to any extent to get the photograph I want.

This Chicken is great for a weeknight meal, though you’ll need to do the marination before hand. 2 hours would be great but 1 hour will give you good results too. There’s no long list of spices for the marination. And other than the rosemary and the chicken, it’s ingredients which you’d most likely have in your pantry. The marination is an important step to give this dish that depth of flavour. The process of searing and then roasting at the right temperature is important to make the chicken juicy and packed with flavour.

For the printed recipe, click here.

Here’s how I did it :

Serves: 2-3
Marination time: 1-2 hours
Cooking time: 5 minutes for Searing + 20 minutes for roasting

Ingredients:

Chicken thigh (Boneless) : 230 gm each x 2 pcs (approx)
Dried rosemary herbs : 1 tbsp
Fresh rosemary stalk (optional) : You can skip this if you don’t have. I just added it while roasting because I had them this time : 2
Minced garlic : 1 tbsp
Olive oil : 1/2 tbsp to marinate + 1/2 tbsp for searing the marinated chicken.
Lime juice : 1 tsp
Coarsely ground black pepper powder : 1/4 tsp
Salt : to taste

Method:

1. Using a knife, make slits on the Chicken pieces. Marinate the Chicken for 1-2 hours with the above ingredients reserving 1/2 tbsp of oil for searing the Chicken. Make sure you rub the ingredients into the slits of the Chicken so that the flavours can go deep into the meat.

2. Preheat oven to 180 deg C.

3. In a skillet, heat 1/2 tbsp of olive oil. When the oil is hot and on high heat, sear the marinated chicken pieces on both sides for about 1-2 mins on each side. The idea is to give a golden brown colour to the chicken without completely cooking it.

4. Line a baking tray w aluminium foil. Place the seared chicken pieces on the aluminium foil and set it to roast for 20 minutes.

5. Remove from oven. Let it rest for 5 minutes before serving. We usually have this with some stir fried vegetables and a pasta or a pasta with vegetables in it.

Note: I have made this with Chicken breast meat as well and it tastes just as good. If using Chicken breast, roast for 15 minutes only or it will become very dry.

Step by Step

photo_

Crispy Salmon with Garlic Coriander sauce

Crispy Salmon with Garlic Coriander Sauce

There are 2 kinds of people in this world: Those that love Salmon. And those that don’t. That’s probably true of most things, but I couldn’t come up with a better opening line. So, there you go!

I happen to be the former and so is little V. I hereby declare my eternal love for Salmon. R, on the other hand, doesn’t quite get what the fuss is all about! But we [V and I] find a way to work around it. We just make him eat it. 😉 And he does.

We especially love the crisp skin of the Salmon. The skin absorbs a bit more salt than the rest of the fish and that makes it even more desirable. When there’s Salmon on the dinner table, all else doesn’t quite matter, does it? 🙂

I have made this countless number of times for V and it’s quick and easy to make. If you are a Salmon lover like me, I won’t need to sell the recipe to you because you will probably love it anyway 🙂

In it’s simplest form, all you need is some crushed garlic, salt, pepper and olive oil marinade with the salmon. Pan fry (with minimal oil) and you are done. In this version, I added a slight variant – fresh coriander leaves or cilantro. If you have a particular dislike for coriander, feel free to omit the coriander leaves.

We usually have this Crispy Salmon for dinner on a weeknight when I don’t want to spend too much time cooking. This goes well with a simple vegetable pasta or just plain rice and stir fried vegetables.

To print the recipe, click here.

Crispy Salmon with garlic coriander sauce

Serves: 2
Total time taken: Under 30 minutes
Preparation time: 20 minutes
Cooking time: 7-8 minutes

Ingredients:
Salmon fillet with skin on (about 250 gms)
Garlic cloves: 1-2 (adjust to taste)
Fresh coriander leaves – a bunch. Discard the roots.
Black pepper powder: a tiny pinch
Juice of ¼ of a lemon
Zest of ½ a lemon
Olive oil: 1 tbsp
Sea salt: to taste

How I did it:

1. Squeeze the lemon juice and zest on the salmon fillet. Sprinkle sea salt to taste. Put a little less than required as we will also season the sauce.

2. Prepare a quick blend of the garlic, coriander leaves including stalk but not the roots, a tsp of olive oil and sea salt.

Preparing the garlic-coriander sauce.

3. Rub the prepared coriander, garlic sauce (the marinade) on the salmon. Sprinkle a dash of black pepper powder. Let the Salmon marinate for about 15 minutes.

Rub the Marinade on the salmon.

4. Heat a pan. Add the remaining olive oil (2 tsp). Make sure the the oil is hot before placing the salmon fillet in it. This step is important to prevent the fish from breaking and disintegrating.

5. Place the salmon fillet, skin down first. Reduce flame to lowest. Cover and let it cook for 5 minutes.

Heat a pan. Add olive oil and place the marinated Salmon, skin down. Cover & let it cook for 5 minutes.

6. After 5 minutes, turn the salmon for another minute. Do not cook on this side for long as the salmon will start to overcook.

Turn the Salmon over and cook for another minute.

7. Serve w lemon wedges.

Crispy Salmon with Garlic Coriander Sauce

Chilled Cucumber, Mint and Yogurt drink

It was a hot afternoon. We just got home from a long, unwanted walk in the heat. Exhausted. Dehydrated. I was definitely not in the mood for any complicated, time consuming cooking. Yes, there are many such days. I made a Vegetable Pulao. I needed to make something that would go with it.

=

On my mind was something cool, refreshing and lightly spiced up. My usual go-to would have been a Raita. For those who are not familiar with Indian food, Raita is a yogurt based side dish usually mixed with cucumbers, tomatoes, onions or any other vegetable individually or in various combinations. They are spiced up with something as basic as salt, black salt, roasted cumin powder and chilli powder.

I started out to make a Raita. But, it was one of those days where my heart guides and my hands listen.

I peeled the cucumbers. Removed the seeds. I started chopping them but I knew I was looking for something else. Not Raita again!

I looked up the fridge for some inspiration. I gazed at the vegetables almost endlessly. I often do that when I need to make something I haven’t had before. And there it was. The magic of mint was about to happen. Soon, I had a bunch of fresh mint leaves plucked, stalks removed, washed and ready to be used.

I wanted to add some spices. But I couldn’t add chillies yet or little V couldn’t have it. So, it had to be something else. It had to be Garlic. I LOVE Garlic.

There it was, a beautiful, refreshing drink with yogurt, cucumber, mint and a touch of garlic. Refreshing. Chilled. Perfect to beat the heat.

IMG_1190

Click here for the printed recipe.

This is how I did it:

Peel cucumber. Remove seeds from the core. Roughly chop it.

2013-06-14

Pluck leaves of mint. Smash a clove of garlic. Use up to ½ the clove or adjust as per your taste. Remember, a touch of raw garlic goes a long way.

In a blender, add the cucumber, mint, garlic, 3-4 cubes of ice cubes and a spoon full of yogurt. Blend until smooth.

2013-06-141
Now take this blended mix in a bowl. Add the remaining yogurt, roasted cumin powder, black salt and a bit of regular salt to taste. Using a whisk until you get a smooth mixture.
Taste and add milk (up to half a cup).

2013-06-142
Give it a good whisk again and chill for half an hour or more before serving.
Garnish with a pinch of cumin powder and a couple of mint leaves.

IMG_1195

Cranberry, Cauliflower and Peas Pulao

IMG_1164

Hello everyone,

Yes, it has been an awfully long time since I have been away. Thank you to those who have missed me, checked on me and encouraged me to come back. It means a lot and thank you for being there! I have missed sharing my thoughts and recipes on this platform.

I am looking forward to sharing some of the food that I have been eating and cooking. Let’s start with rice dish – a staple in my house.

Did I ever mention my dislike for raisins? I am not, I mean, really NOT fond of raisins. No, not even a bit. On the other hand, little V, who, by the way, is not that little any more, can survive on raisins alone. That is, if he had his way 🙂 He can have as many raisins as he can get his hands on.

I was cooking a quick + less effort lunch for us one week day when I thought of adding raisins in the pulao (pilaf) to please him. But to my surprise, he suggested dried cranberries instead. I immediately jumped with joy and happily took his suggestion. His love for cranberries comes a close second to raisins. So, there you go! We had a win-win situation.

When my rice was soaking and I had some time to think, I just happened to glance on the bottles of sunflower and pumpkin seeds which were kept on the kitchen counter and I normally add to oats for breakfast. I thought – why not?! So there we go, at the end of it, we had a beautiful and crunchy twist to the usual Pulao. I roasted them in a little bit of ghee together with half of the dried cranberries and added them as a garnish. It gave the Pulao a whole new dimension!

IMG_1155

For a printable recipe, click here. 

Serves: 2
Cooking time: 15 minutes + 5 minutes resting time
Preparation time: 30 minutes

Ingredients:

Rice: ½ cup
Dried bay leaves: 1-2
Cloves: 4
Cumin seeds: ¼ tsp
Whole black pepper: 8 nos.
Star anise: 1
Cauliflower: 8-10 medium and evenly sized florets
Peas: ½ cup frozen or fresh (I used frozen)
Cranberries: 15 pcs approx. (adjust to your liking)
Sunflower seeds & Pumpkin seeds: In equal amounts ¼ cup in all
Cashew nuts: about 6 pcs, roughly broken in twoCinnamon stick: 1 thin stick
Ghee: ½ tsp for the rice and another ½ tsp for frying the garnish
Salt to taste
Boiling water: 1and ¼ cups

Method :

Rinse the rice with water at least twice. Soak the rice for 15 mins. At the end of 15 mins, set it aside to drain for 10 mins using a strainer. Put about 2-3 cups of water to boil which we will need later.

Final CPWhile my rice was soaking, I soaked 1/2 a cup of frozen peas in water for at least 10 mins.

Final CP1-002

Now that the peas were taken care of, I quickly went on to cut / break cauliflower into about 8-10 pcs of of medium sized florets. I also roughly chopped the cashew nuts in halves. When these were done, I put my garam masalas aside to make sure I had everything ready when the pot went on!

Final CP3

I heated half a tsp of ghee in a pot in which I was going to make the pulao. I added the cumin seeds and all the whole garam masalas.

At this point, I lowered the heat to make sure they don’t burn. When the garam masalas start to emit a nice aroma and before they burn, I added the cashew nuts and half of the cranberries. Make sure you stir it continuously and keep the heat to low. It’s really easy to burn them at this stage. When they get a nice color (1-2 mins on low heat), it’s time to add in the vegetables.

Collages22

Add the peas and the cauliflower florets with the heat on medium. Fry for another minute. Next, add the rice and mix it without breaking it to make sure the rice is coated with every bit of ghee there is in the pot.

Final CP6

Now carefully add 1 and ¼ cup of the boiling water and salt. Gently mix and taste for salt. A pulao is never too salty, so go easy on the amount of salt you add. Quickly lower the heat to the lowest mark, cover with a tight lid to not allow any or minimum steam to escape during this process. Set your timer for 11 minutes.

Final CP7

Meanwhile, heat a little ghee in a small frying pan. Have your sunflower seeds + pumpkin seeds + remaining dried cranberries ready by your side.

Final CP4

As soon as the ghee melts, add these beauties and fry them on low heat until the seeds get a nice warm golden color. The cranberries just swell up a little and they look absolutely gorgeous.

Final CP8

At the end of 11 minutes, turn off the heat from the pot of Pulao. Now, I know if you are like me, you’ll just want to open the lid to see what happened in there, but hold back for just  5 mins more.

Open the lid when it’s rested. Your Pulao is waiting to be garnished and served.

Garnish with the cranberry, pumpkin and sunflower seeds we fried earlier and serve immediately. This can be eaten as part of an elaborate meal with a spicy curry. It’s really that simple and you can include it very easily to make any regular weekday meal a little more exciting. Have it with some achaar (pickle) and yogurt / raita.

IMG_1160

IMG_1161

Notes:
– Add the cashew nuts as a garnish and fry it together with the cranberries and seeds instead of adding it in the beginning. That helps to add more crunch.
– Now if you are like little V, you could have this entire dish with raisins in place of cranberries.
– In it’s simplest form, you can make the cauliflower and peas pulao without any cashewnuts, cranberries, sunflower seeds or pumpkin seeds. Follow the same instructions but skip these ingredients.

Beet root, potatoes and peas tikki / cutlets

It has been many months since my last post. A friend rightly pointed out that it’s that perfectionist attitude in me which is causing this inertia – I want the food to be perfect and the photographs to be styled and taken well (to the best of my ability!) However, to get all these things together, requires a lot of time and patience. With an extremely active 3 year old in the house, time is one luxury I don’t have.

As a result, I have been cooking and experimenting at home but unfortunately, I haven’t been able to post anything for the past few months. I feel a little selfish at this point so I definitely owe you all an apology. Many of you have been supportive over these past few months of silence – either by checking on me or by just by being connected through images that I have been posting on my facebook page (http://facebook.com/sublimepalate). A big thank you for that and sorry for being MIA.

So, I have decided to give that perfectionist in me a sorta break..  And post recipes and stories .. even though sometimes the pictures may not be perfect.. the recipes may…  – NO,  be rest assured – there will be no compromise on that front!:-) These photos are taken from my phone, so please excuse me if they aren’t nice enough.

So, starting off again, here’s a recipe of a healthy snack, I read on one of my favorite blogs, sinfully spicy.  This is a great snack for kids and adults alike! I took a portion of the tikki mix to make 3 tikkis for V. To the remaining portion, I added finely chopped green chillies.It is inspired by Tanvi’s beetroot tikkis. Ever since I saw that, I just had to make it! So for Tanvi’s recipe, check : http://sinfullyspicy.com/2012/06/27/beetroot-tikki/

Thank you Tanvi for this amazing snack! 🙂

Here’s how I made it:

MAKES 8 tikkis / cutlet:

You’ll need:

Beetroot: 1 medium sized
Potato: 1 small sized
Peas: 1 cup. Boil if using fresh. I used frozen peas and microwaved with a tiny pinch of salt for 2-3 mins to soften it so that it’s easy to mash.
Onion: 1 small size (or roughly 1/2 a cup of finely chopped onion)
Ginger: 1 small pc (adjust to your taste)
Garlic: 1-2 cloves
Green chillies – 2-3
Black pepper powder – 1 tsp (preferably coarsely powdered)
Bread crumbs – 4 heaped tbsp. (If you don’t have bread crumbs, use a slice of bread. Gently soften it by sprinkling a little water and mashing it separately first and then adding it to the mix).
Semolina (Suji) – 3 tbsp or more for coating the tikkis.
Oil – 1-2 tbsp.

Preparation:

  1. Boil the potato so that they are cooked but firm. A little undercooked is fine but mushy potatoes may not bind the mix that well.
  2. Finely chop onions, ginger, garlic and the green chillies.
  3. Finely grate beetroots. Squeeze out the juice by hand. Drink the juice (It was yum .. I strained it and had it without adding anything. But I think a squeeze of lime should go very well). Anyhow, coming back to the grated beetroots, keep it in aside and move on.
  4. Peel and finely grate the boiled potato. If you are brave, try grating it while it is hot! Just kidding – DON’T ! I almost burnt my palm. The inside of the potato retains a lot of heat so it’s advisable to take a little break and grate them when they have cooled off.
  5. Mash the softened peas.
  6. Start working on the next step (mixing) only before you need to make the tikkis. The salt releases a lot more moisture and makes it difficult to bind.
  7. In a mixing bowl, add the grated potatoes, beets, mashed peas, onions, ginger, garlic, bread crumbs, black pepper powder, chaat masala & finally the salt. Gently combine this mix without mixing it too much! The more you mix, the more moisture gets released and your tikkis won’t hold together.
  8. Make small cutlets / tikkis with this mix (oval or round shape can work). With this quantity, I ended up with 8 tikkis.
  9. In a flat plate, keep the semolina. Very gently press the tikki on the semolina mix to coat the tikki with the semolina.
  10. Heat 1 tbsp of oil in a non-stick pan. I fried about 3 per batch in a small non-stick pan. Add more oil when frying the next batch, if needed. Make sure the oil is hot before you add the tikkis. On low heat, fry the tikkis for a few minutes on each side until crisp on the outside. Be gentle when turning the tikkis. If the heat is low, cook for a little longer to get a crispy outside while making sure the inside is cooked.
  11. I had these with my go-to green chutney!

Hope you enjoy them as much as I did.

Black and White Wednesdays : Week 42


Corn on the cob

Submitting this image to Black and White Wednesdays #42 conceptualized by Susan of The Well-Seasoned Cook and hosted by Roma at Roma’s space.